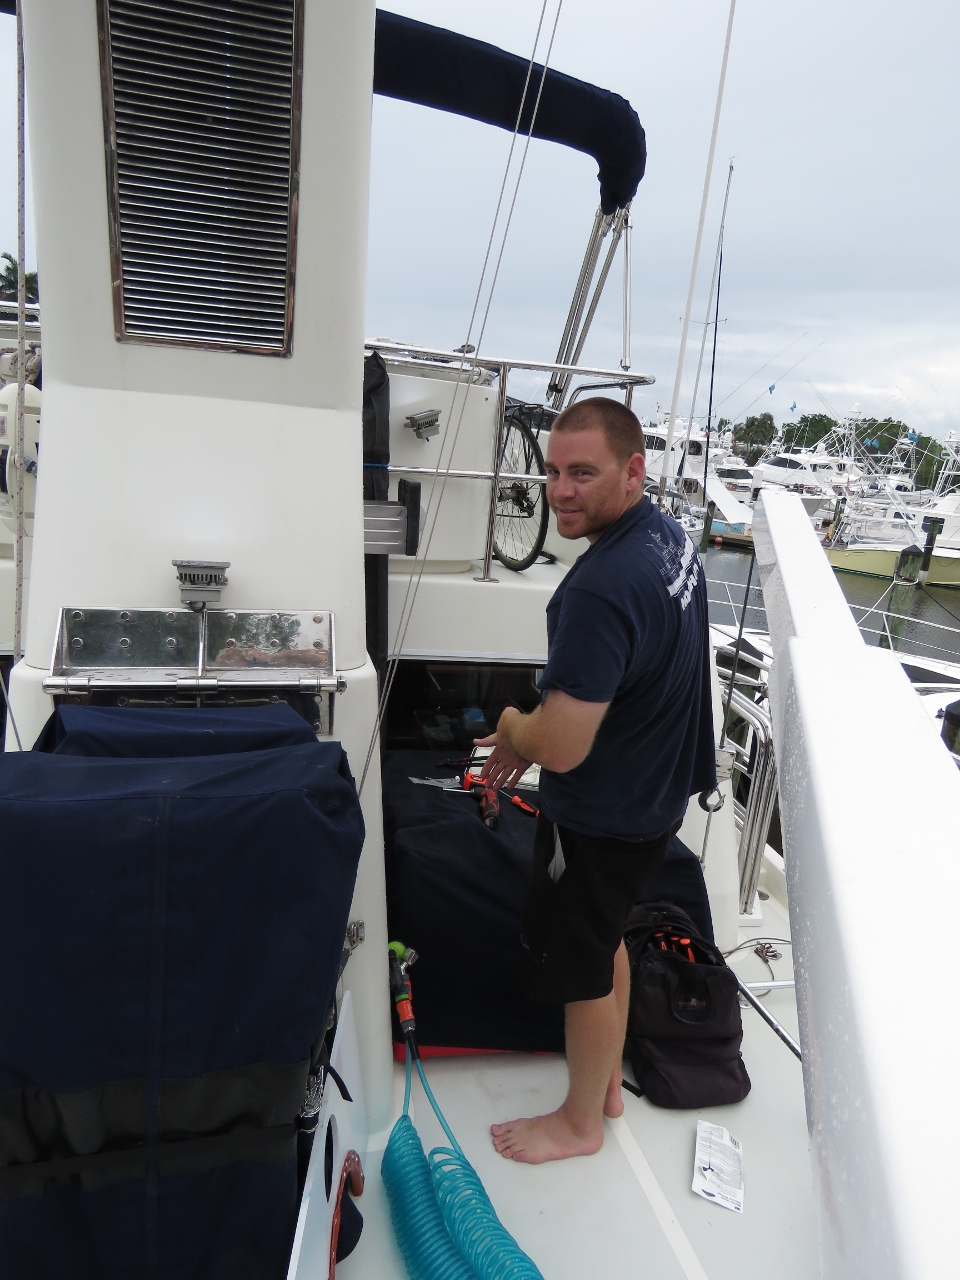
Soverel Harbour Marina has been an excellent stop to replenish our boat spares and supplies, address Jennifer’s shoulder injury, and just relax and enjoy a slower pace. While here, we’ve also completed a ton of boat projects, ranging from battery replacement to canvas work to automation systems.
Below are the majority of the projects we’ve completed between March 17th and May 1st. Click any image for a larger view, or click the position to view the location on a map. And a live map of our current route and most recent log entries always is available at http://mvdirona.com/maps
 |
Batteries
Position: -80 4.27, 26 50.79
The wing/generator start batteries have needed replacement for the last couple of months and they’ve been just limping along. We decided to replace the main start batteries at the same time. Nordhavn Southeast got us an excellent price on four Lifeline GPL-4DL batteries, and delivered and installed them today.
|
 |
Exhaust
Position: -80 4.27, 26 50.79
Nordhavn Southeast also replaced the gasket in either side of the exhaust wrinkle belly.
|
 |
Liferaft
Position: -80 4.27, 26 50.79
We are getting our liferaft maintenance done while in Palm Beach at the same time as tender service is being done and took advantage of the briefly empty slip beside us to crane the raft into the tender.
|
 |
Canals
Position: -80 4.09, 26 51.34
We’d arranged to have A Sailor’s Place pick up our tender and liferaft at the Juno Park launch ramp. We’d arrived a little early so toured a bit through the canals. Boats and docks sure fill every available spot.
|
 |
Juno Park
Position: -80 3.99, 26 51.18
A Sailor’s Place picked up T/T Dirona (Tender To Dirona) at Juno Park for transport to their Stuart shop for tube repair and liferaft maintenance
|
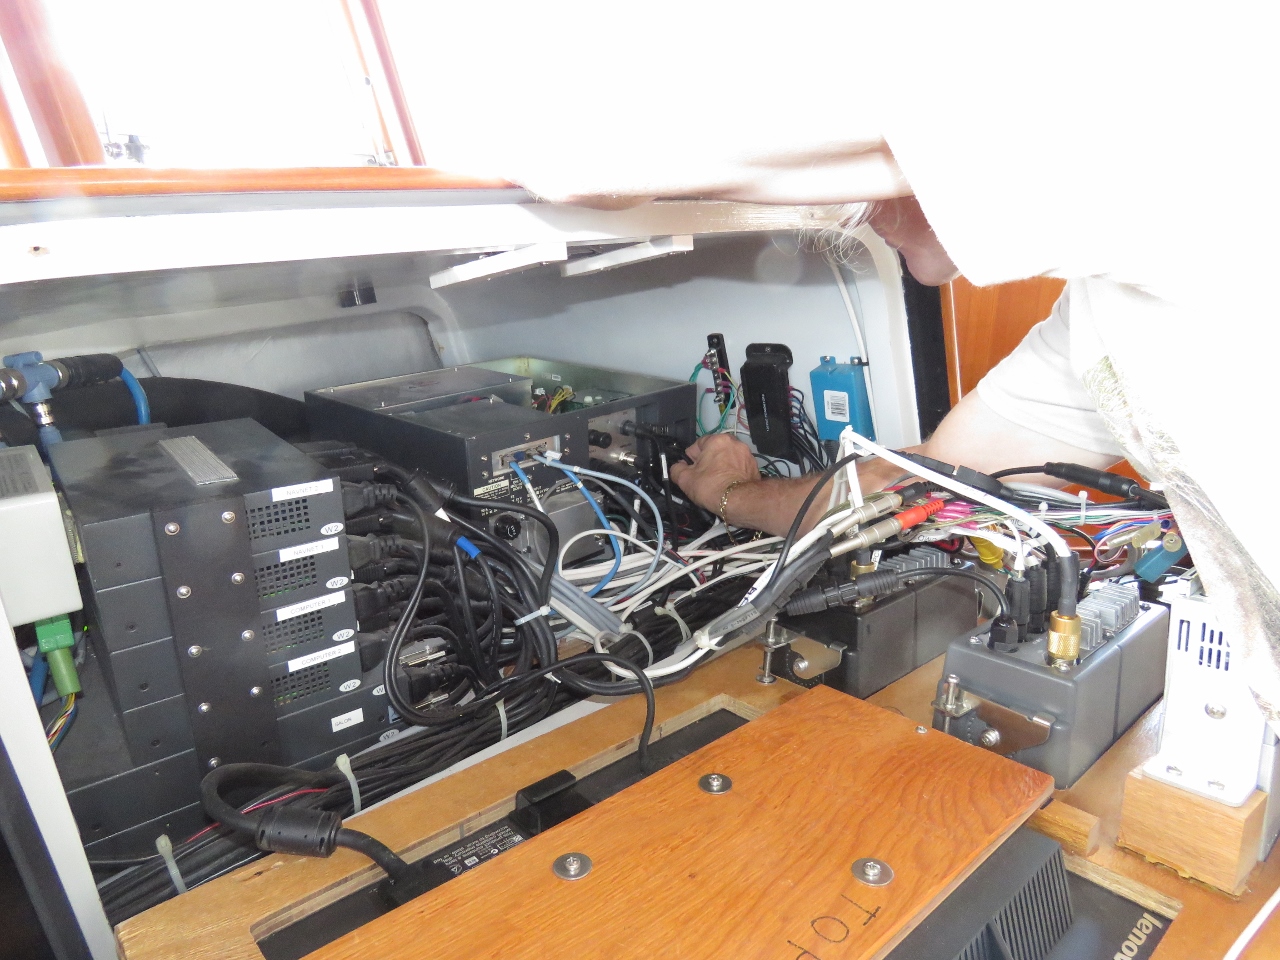 |
Graphics card replacement
Position: -80 4.27, 26 50.79
Now that we have spare parts for our Furuno MFDBB (Multi Function Display Black Box), we can replace the temporary card with one that is exactly the right part. The one that we were using required us to enter setup on each power up, but otherwise worked fine. Getting the card in and out is a real pain the way the black box is mounted, but James has had a fair bit of practice by this time, and is pretty efficient at it. Hopefully he won’t need this skill again for a while.
|
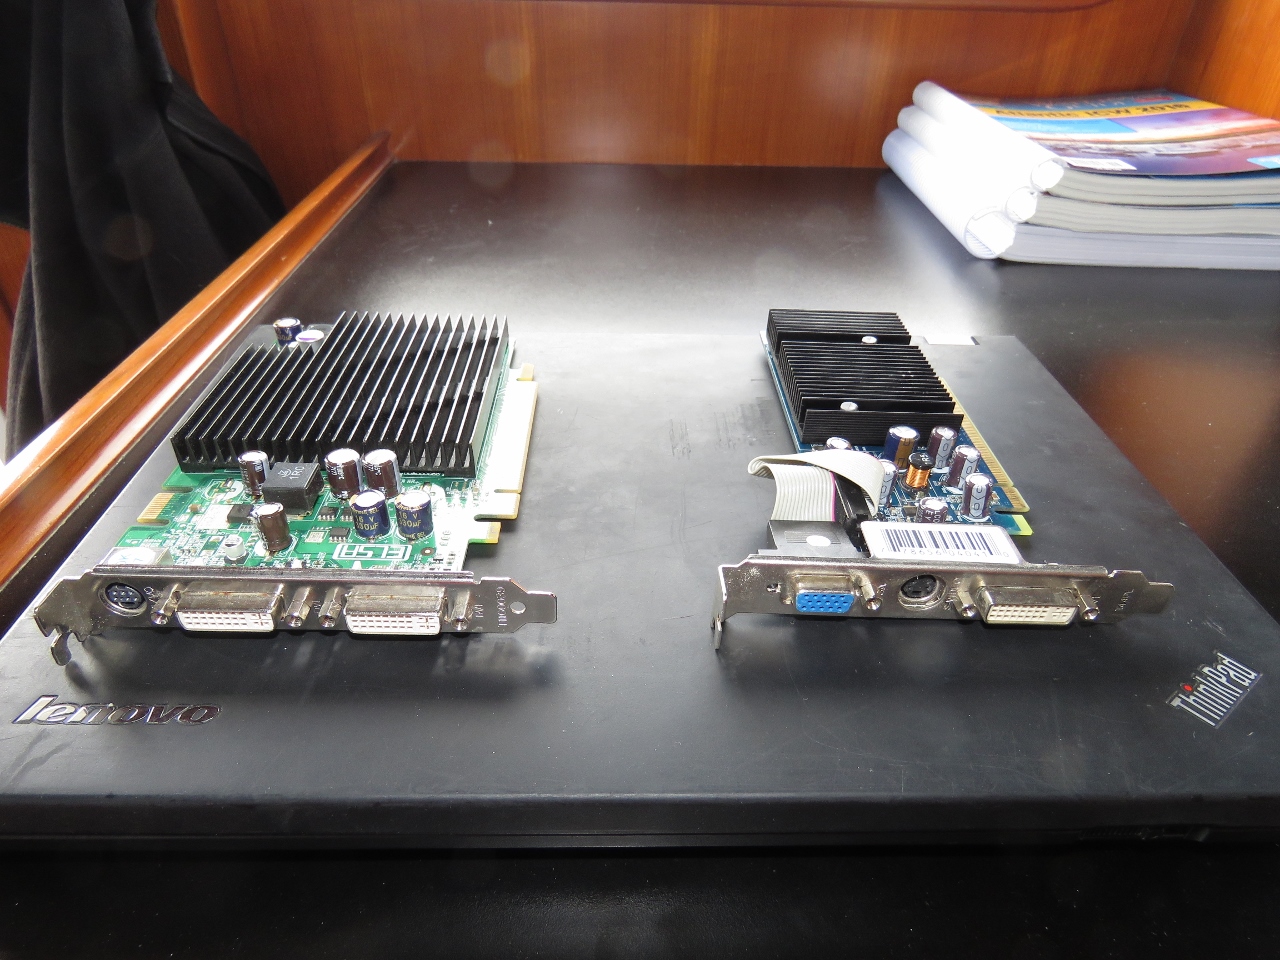 |
Old & new cards
Position: -80 4.27, 26 50.79
On the left is the correct replacement graphics card for our Furuno MFDBB (Multi Function Display Black Box), an Elsa Gladiac 776 GS 256MB (a clone of the Nvidia 7600) that went out of production around 2006. On the right is the Nvidia 6200 graphics that we’ve been running on since Reunion. Given how different the cards look, it’s amazing that the 6200 worked at all. Once again, Thank you Plug n Play!
|
 |
Battery cable
Position: -80 4.26, 26 50.79
James preparing battery cable for crimping. We’re installing a relay at the DC distribution panel. When the wing\generator start bank needs charging and charging is available, we’ll use the relay to parallel that bank into the house bank. Now that we’ve got new start batteries, we want to keep them properly charged and hopefully improve longevity.
|
 |
Crimp
Position: -80 4.26, 26 50.79
Crimping lugs onto the ends of the battery cables. We’ve got a heavy-duty Ancor 702040 Lug Crimper that can handle lugs from 8 to 4/0-Gauge. The tool is massive, weighing nearly 10 pounds, and easily handle any job we’ve needed it for.
|
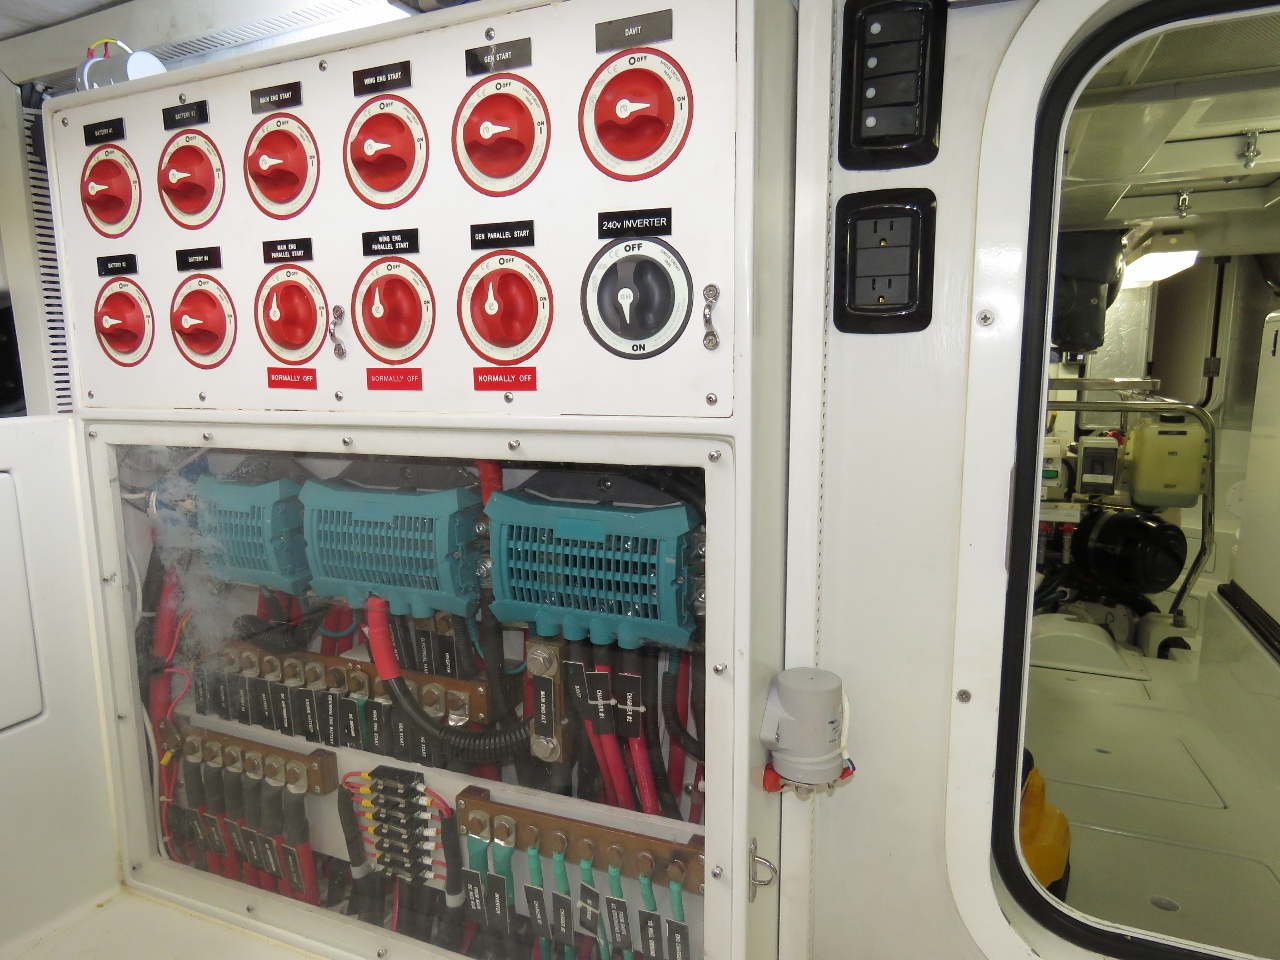 |
Relay
Position: -80 4.27, 26 50.79
The new relay for the wing/gen start bank place at the bottom right of the DC distribution panel. The relay that parallels the main engine start alternator into the charging system is visible at the top left of the DC panel. Both relays are Kilovac LEV200A5NAFs rated at 500 amps. (The circuit never carries more than 200 amps, but the 225-amp rated Trombetta Bear that we’d originally used for the start alternator failed in operation)
|
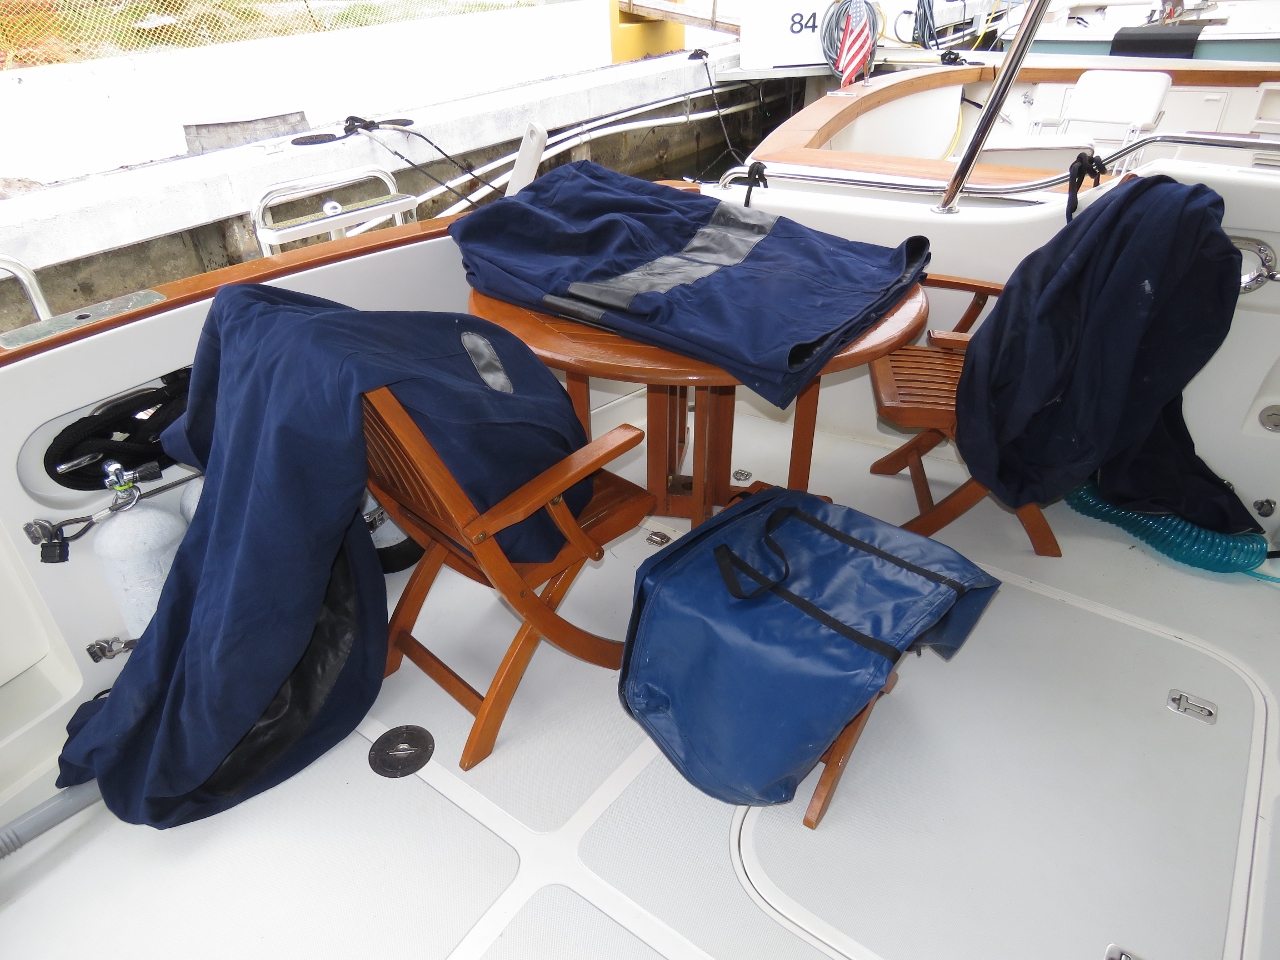 |
Canvas
Position: -80 4.26, 26 50.79
Our canvas, from Canvas Supply Company in Seattle, has held up well over the past five years. But we had a few wear points that needed repair and some zippers where the sliders had rusted up. The workmanship from nearby C 2 Shore Upholstery looks very good and was priced reasonably.
|
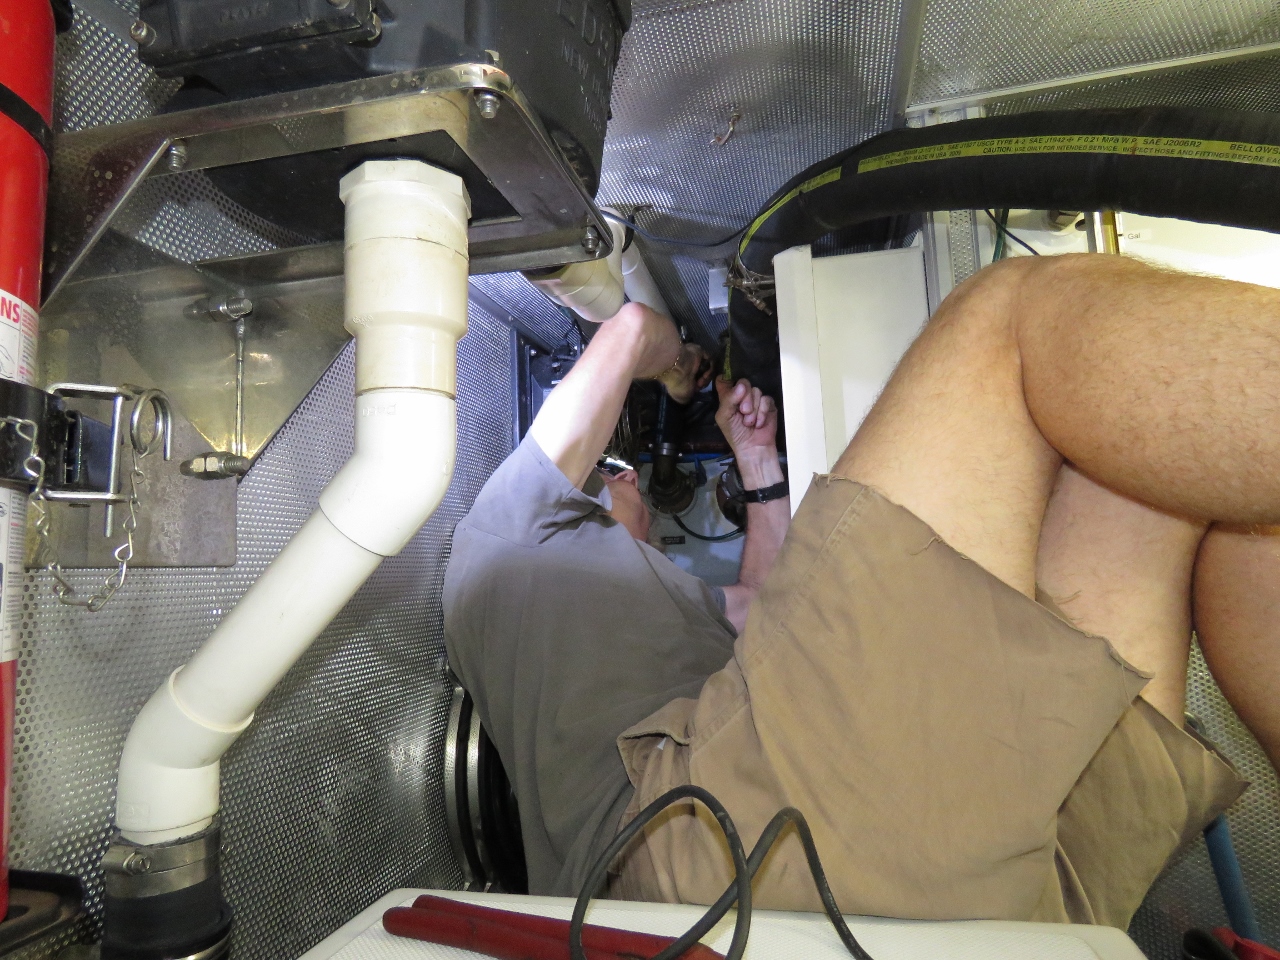 |
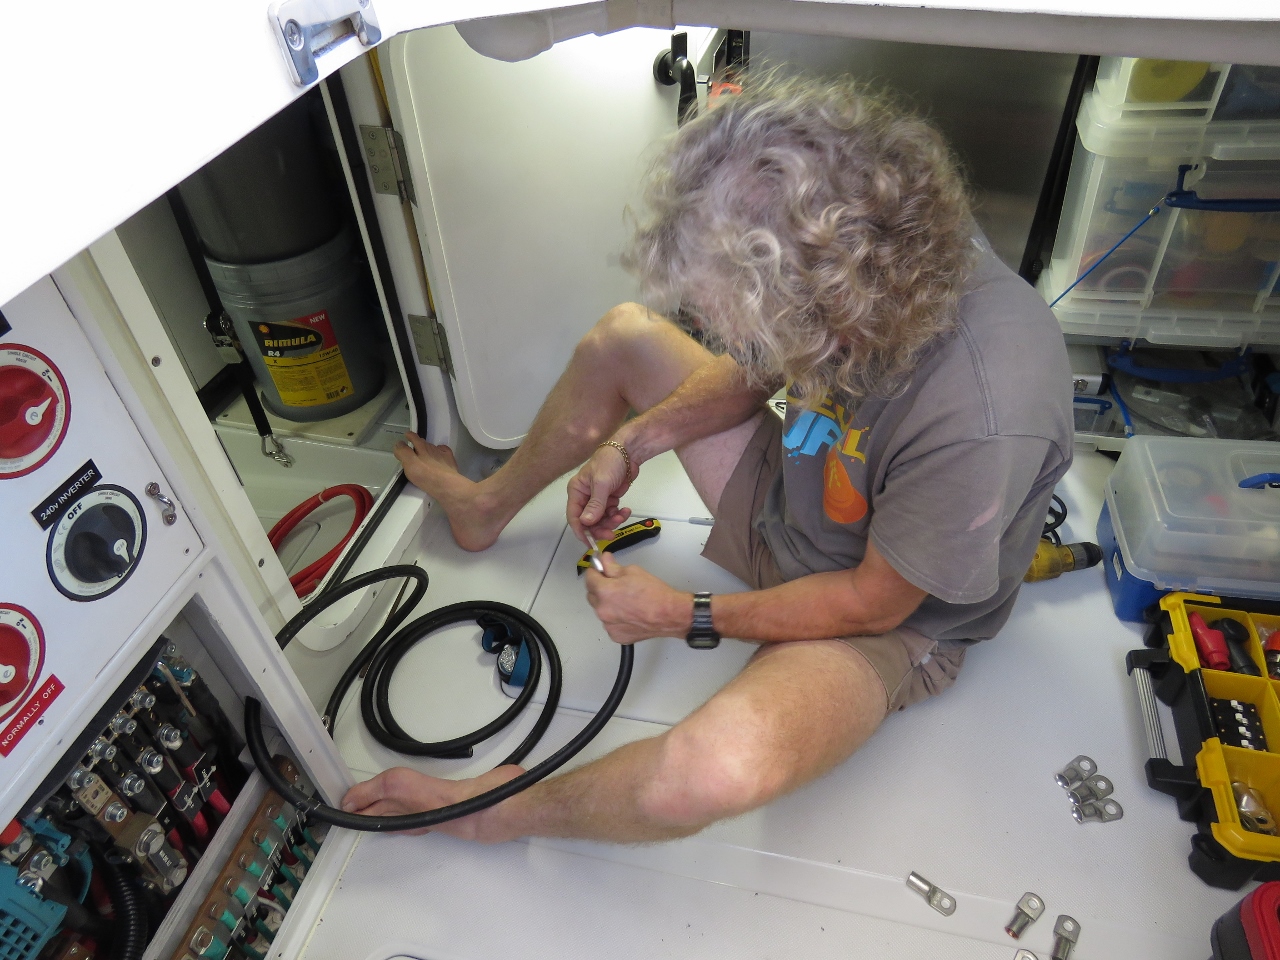
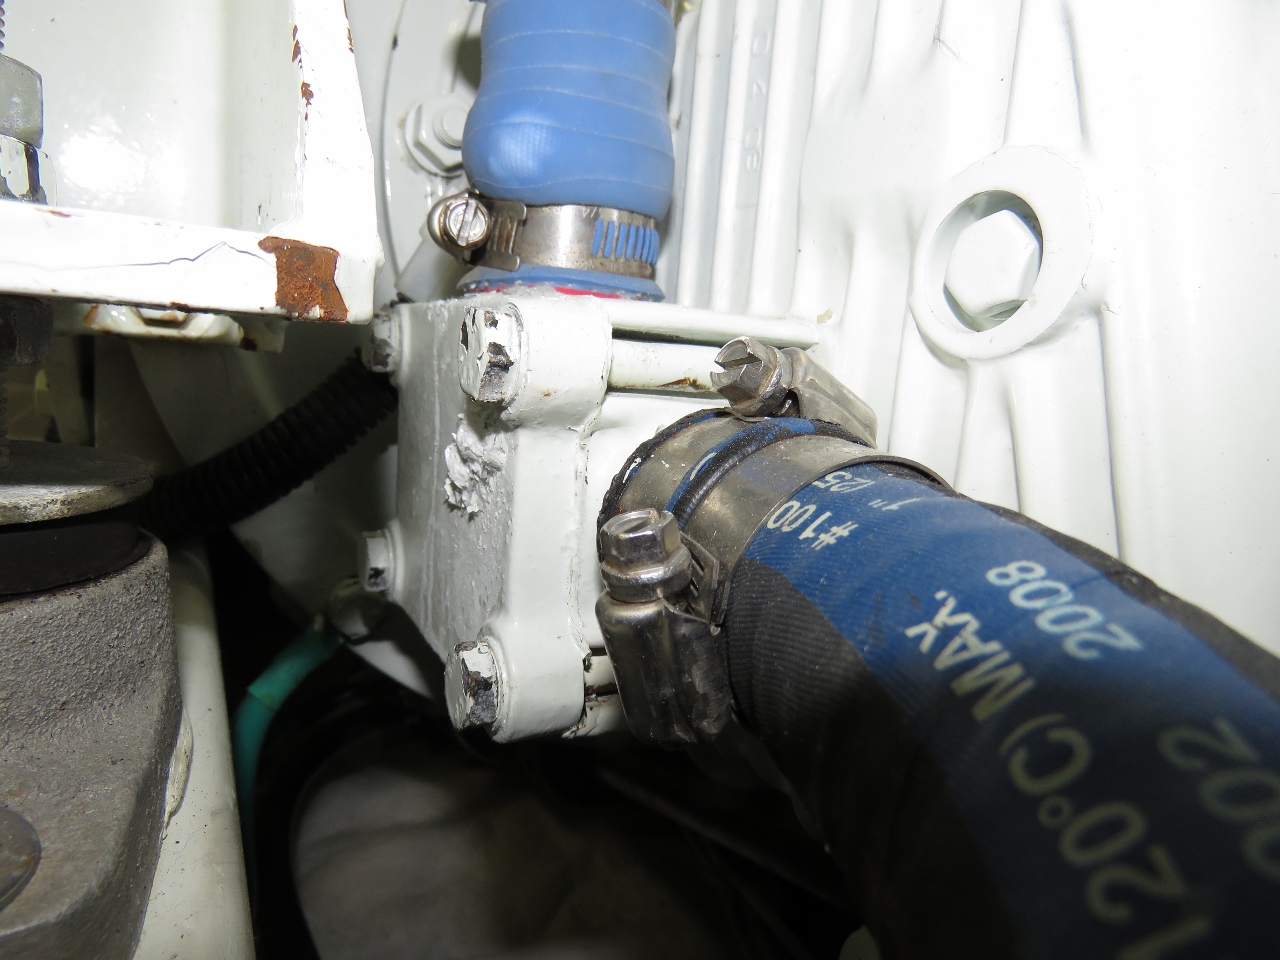
Exhaust hose
Position: -80 4.26, 26 50.79
It’s hard to believe given how heavy the hose is, but the wing engine exhaust hose had developed a pinhole leak between the engine and the check valve. James replaced it with hose purchased at West Marine earlier in the week. The old exhaust hose was extremely difficult to remove from the check valve, partly because it is heavy, wire-reinforced hose but mostly because over time it had effectively welded on. James carefully used a Dremel to cut through the wire without damaging the check valve.
|
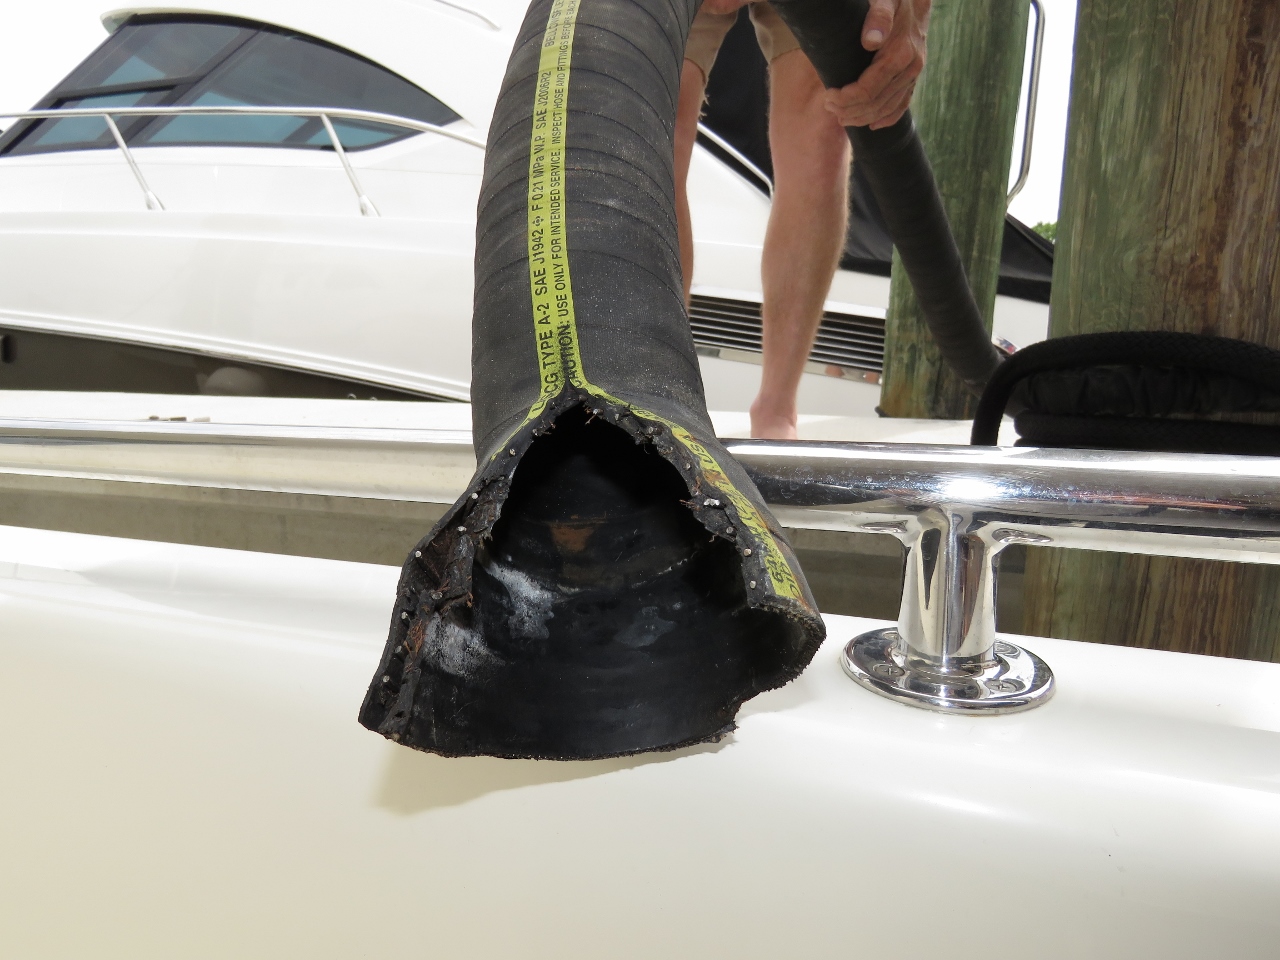 |
Old hose
Position: -80 4.27, 26 50.79
The old exhaust hose. You can see why James had such a hard time removing it.
|
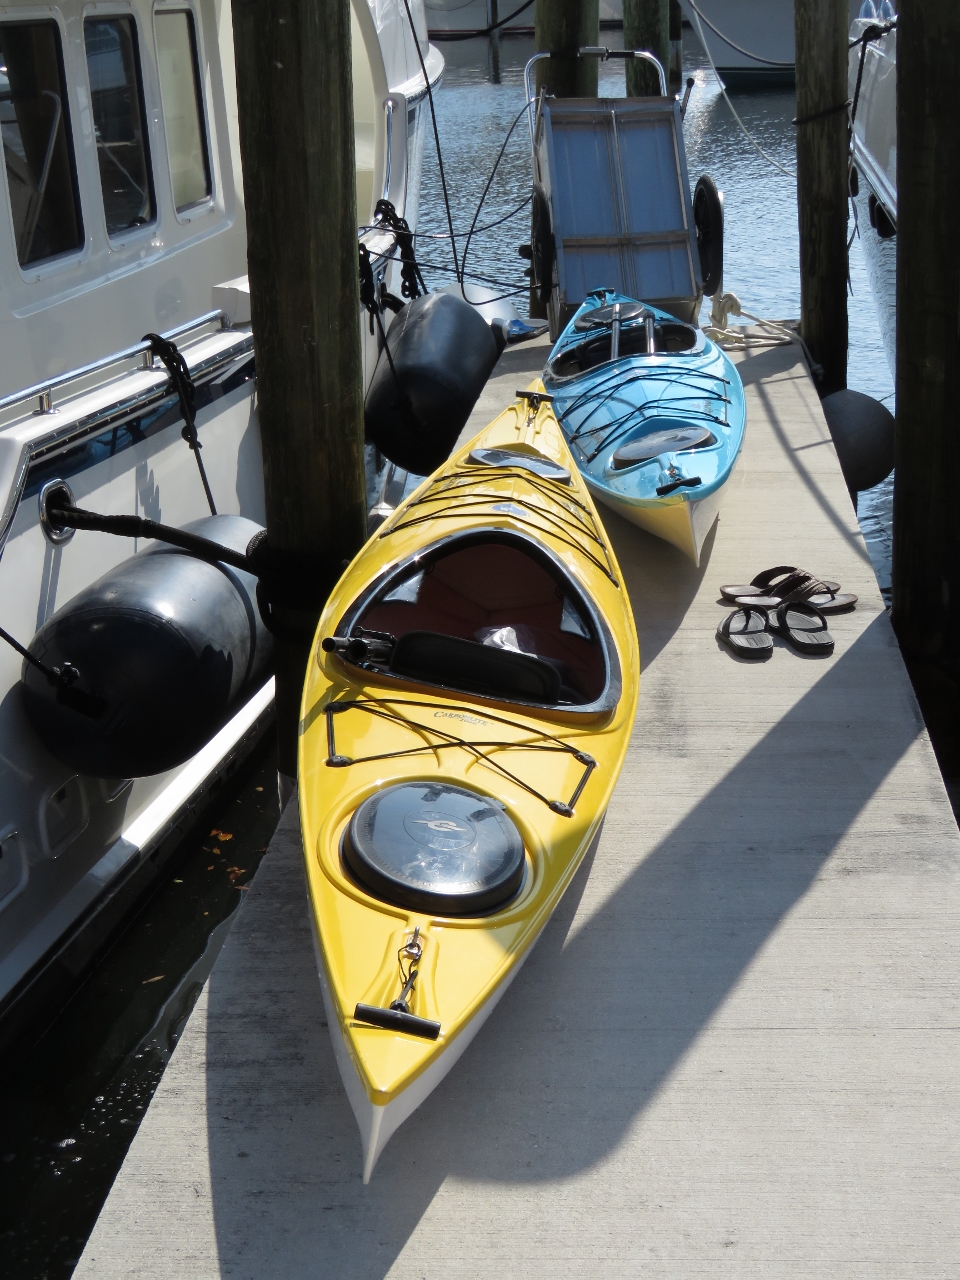 |
Kayaks
Position: -80 4.27, 26 50.79
We’ve only used our kayaks about three times since leaving Seattle. In that same period we’ve moved them off their racks (outside the port boat deck rails) at least a dozen times to wax the boat, pass through locks, or enter narrow slips with high poles as we’re in now. We didn’t anticipate our usage going up, so decided they were more hassle than they were worth and donated them this weekend. Dirona looks much better without them, and the boat deck feels much more open.
|
 |
Oil change
Position: -80 4.26, 26 50.79
It’s hard to believe, but we’re again due for an oil change, our fourth this calendar year. The 208-hour run from St. Lucia to Palm Beach consumed most of the 250-hour change interval.
|
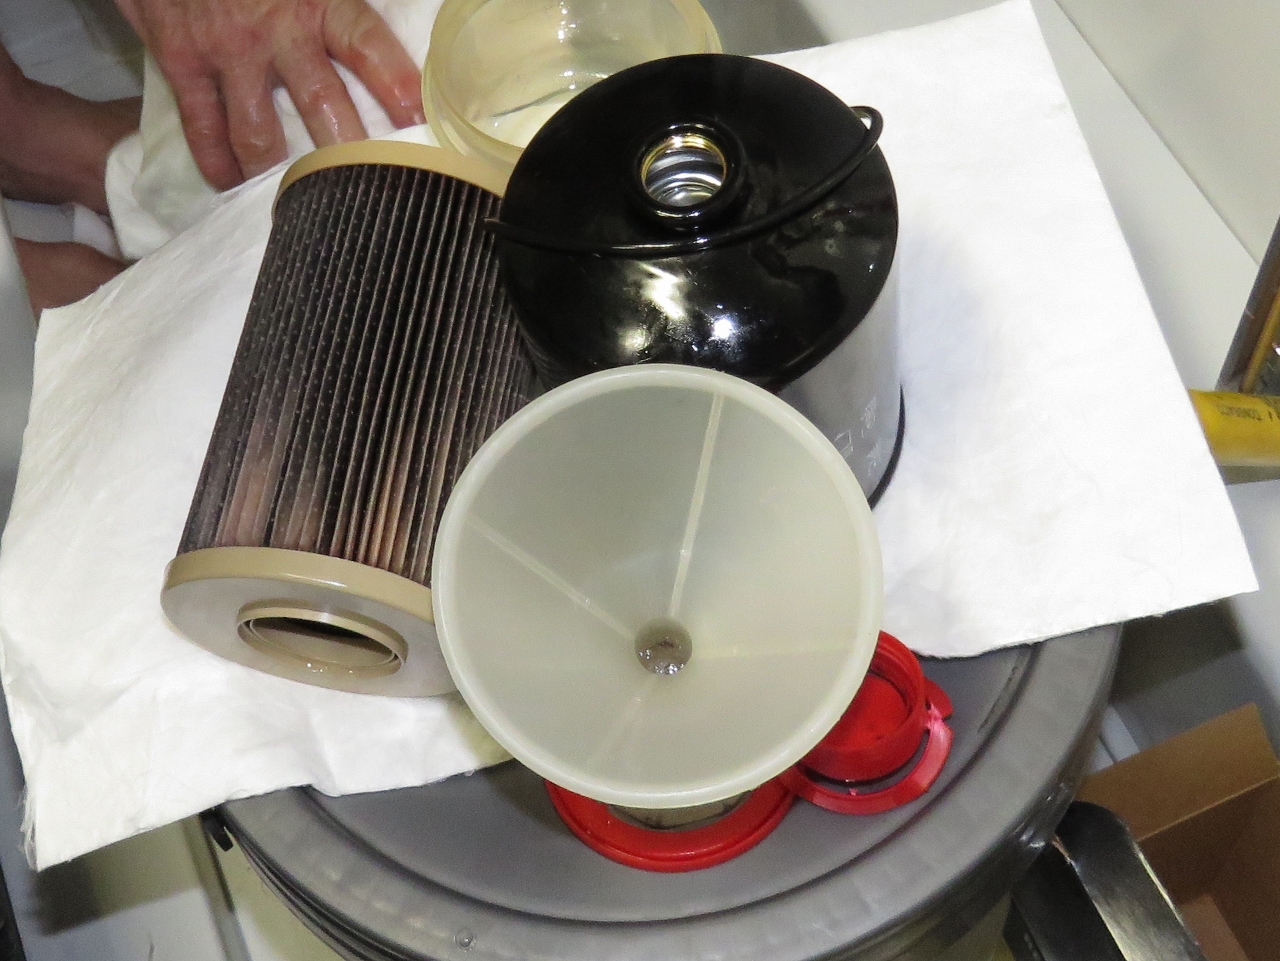 |
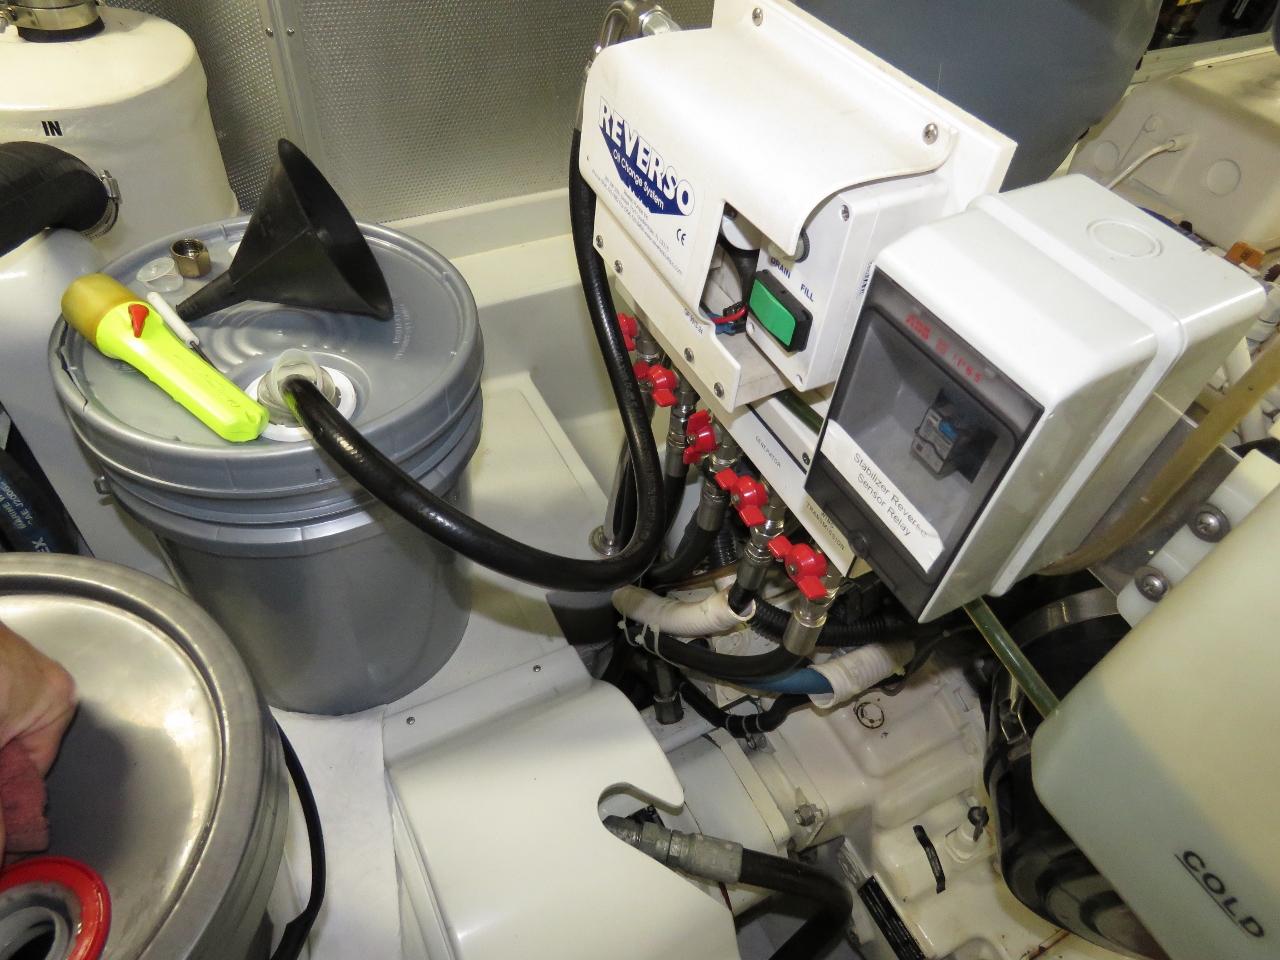
Fuel filter
Position: -80 4.27, 26 50.79
We’d last changed the secondary and tertiary on-engine fuel filters just over a year ago in Tasmania. The 10-micron secondary filter was still in excellent shape, with plenty of surface area left. The 2-micron tertiary filter is harder to see inside the housing, but what we could see looked excellent too. If there was any concern, we’d cut it open.
|
 |
Fuel bugs
Position: -80 4.27, 26 50.79
We had a bit of a surprise waiting for us when we changed the fuel transfer pump filter. Read more …
|
|
|
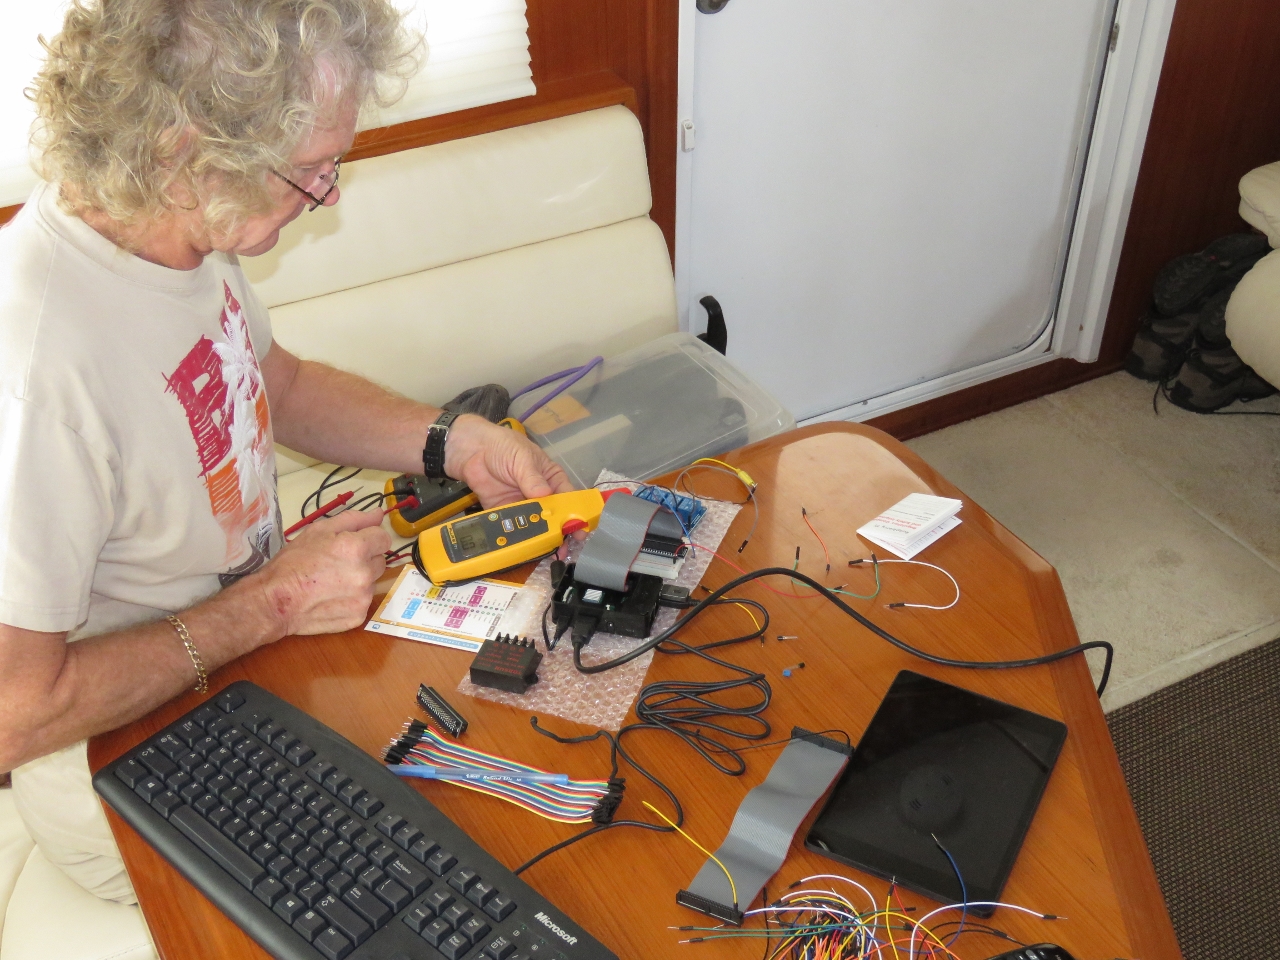
Raspberry Pi
Position: -80 4.27, 26 50.79
While we were in Darwin, James purchased a Raspberry Pi to learn about it as much as anything. On the way to Rodrigues, he found it was incredibly easy to program and we have since configured 8 channels of digital input to monitor and record a variety of non-networked equipment on Dirona. Today he got digital output running and now has 8 channels of digital output available. The first one was immediately put into use to control the wing/gen start battery bank parallel relay. This ensures the wing/gen battery are kept well charged even though long periods of generator/wing inactivity when at dock or underway.
|
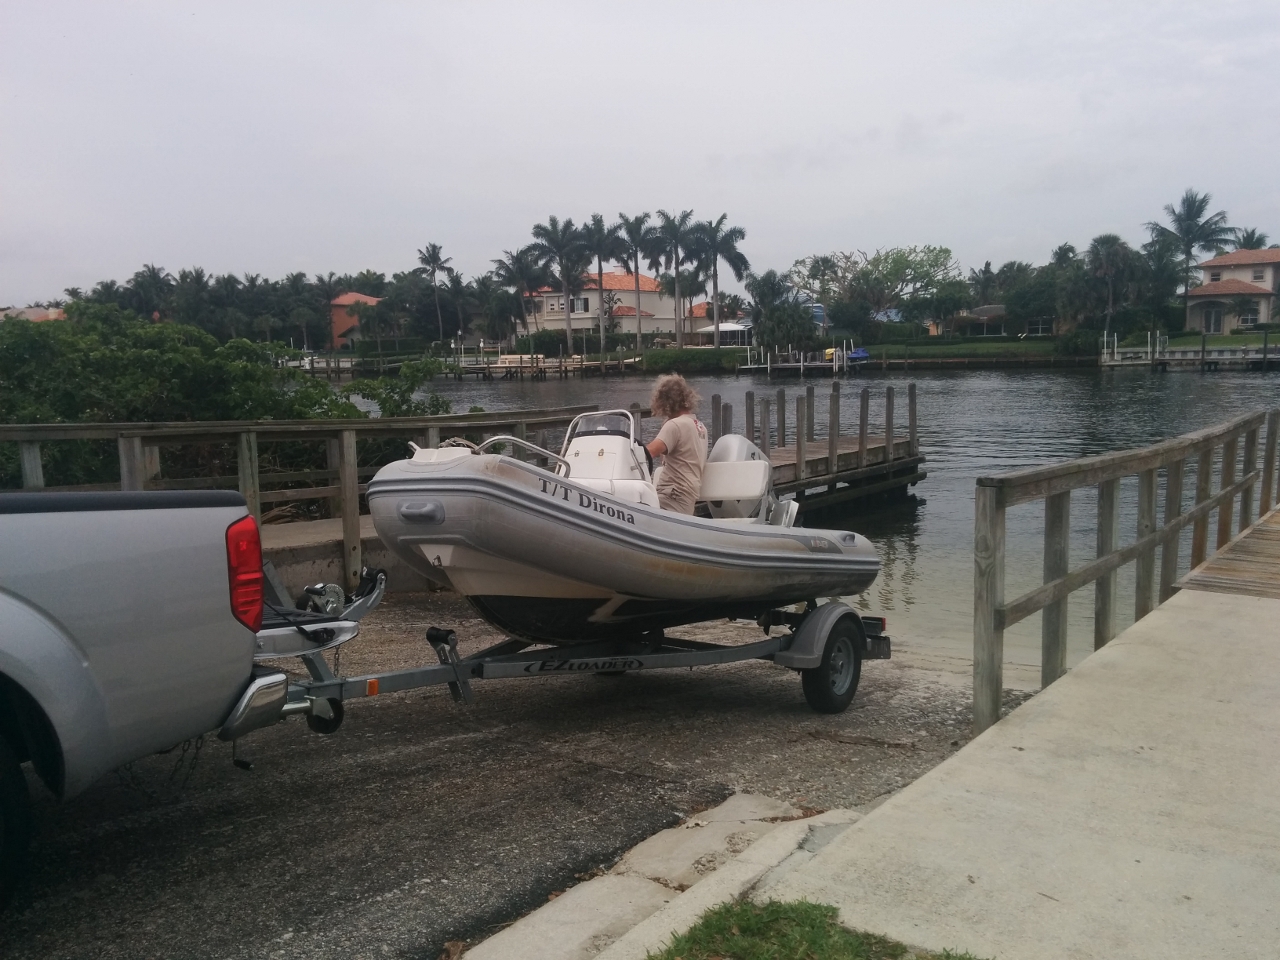 |
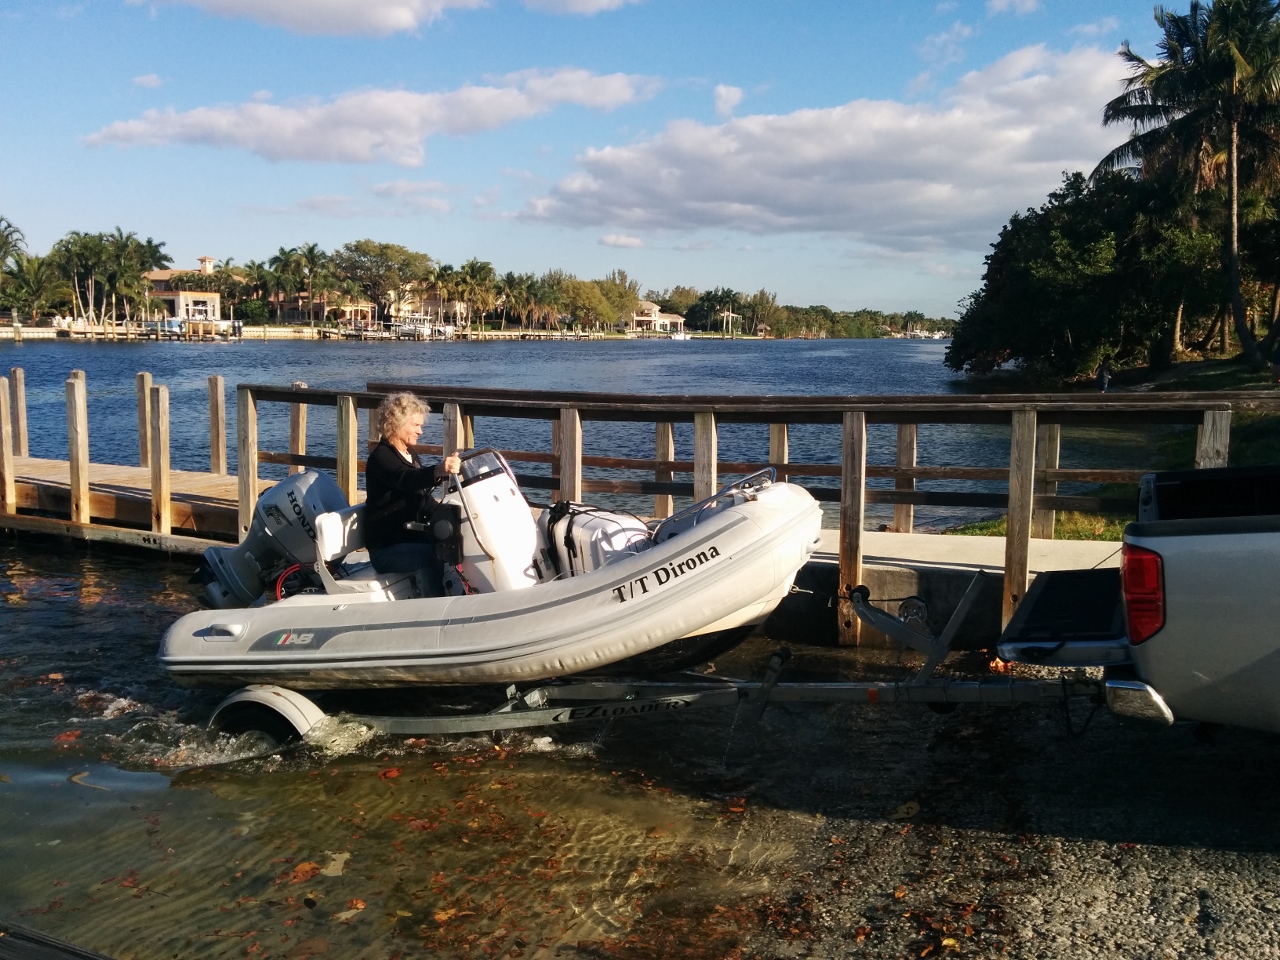
Tender
Position: -80 3.97, 26 51.18
A Sailor’s Place delivered our repaired tender and reinspected liferaft to Juno Park today.
|
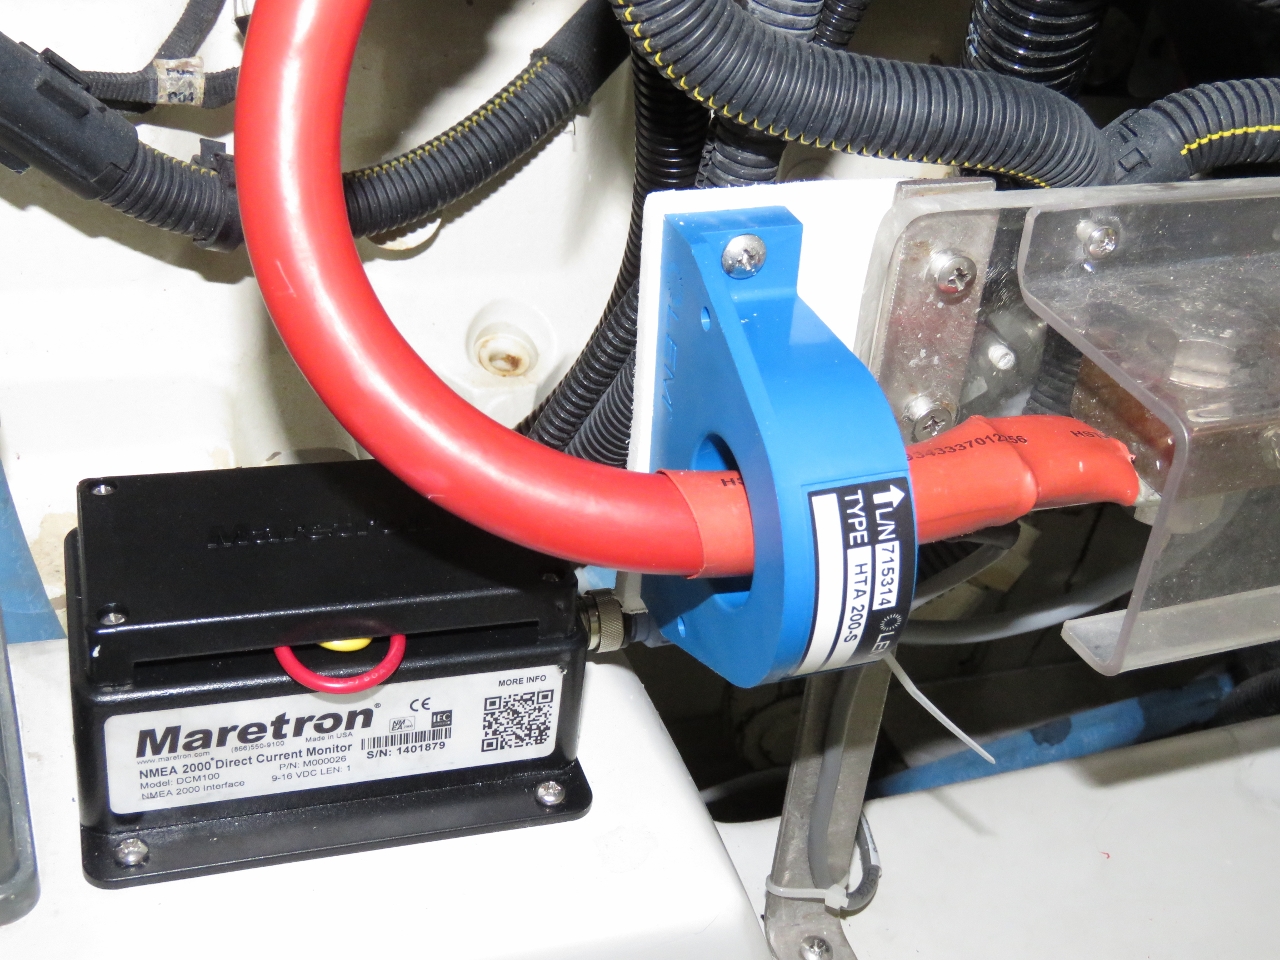 |
DCM 100
Position: -80 4.27, 26 50.79
We installed a new DCM 100 today to monitor the start battery bank voltage and amperage.
|
 |
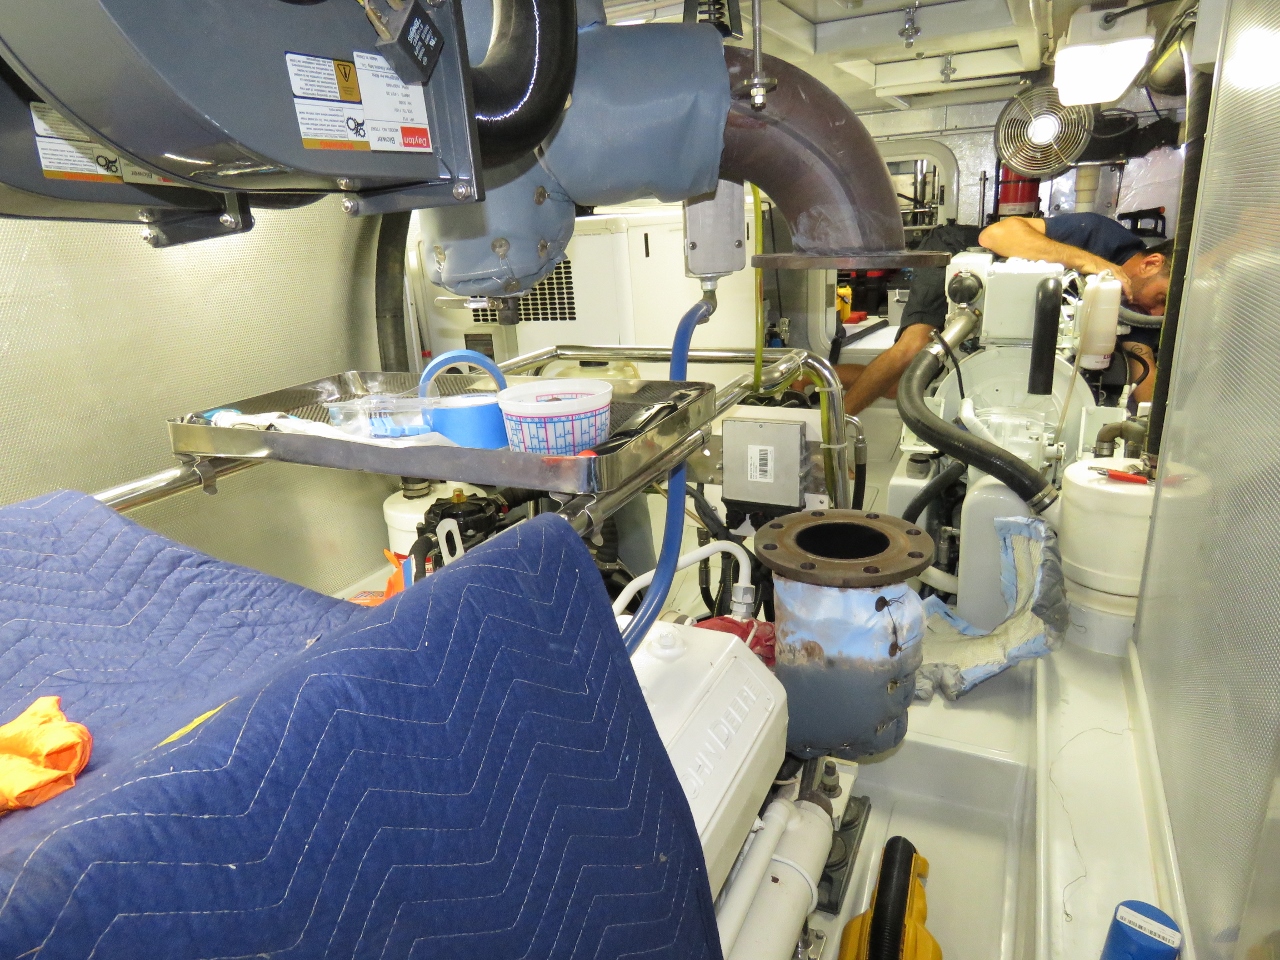
Stack work
Position: -80 4.26, 26 50.79
Chris from Nordhavn Southeast has been on the boat the last couple of days building an enclosure inside the stack to better exhaust engine room heat. We prefer to do all our own work on Dirona, but woodwork and carpentry aren’t James’ strong suit.
|
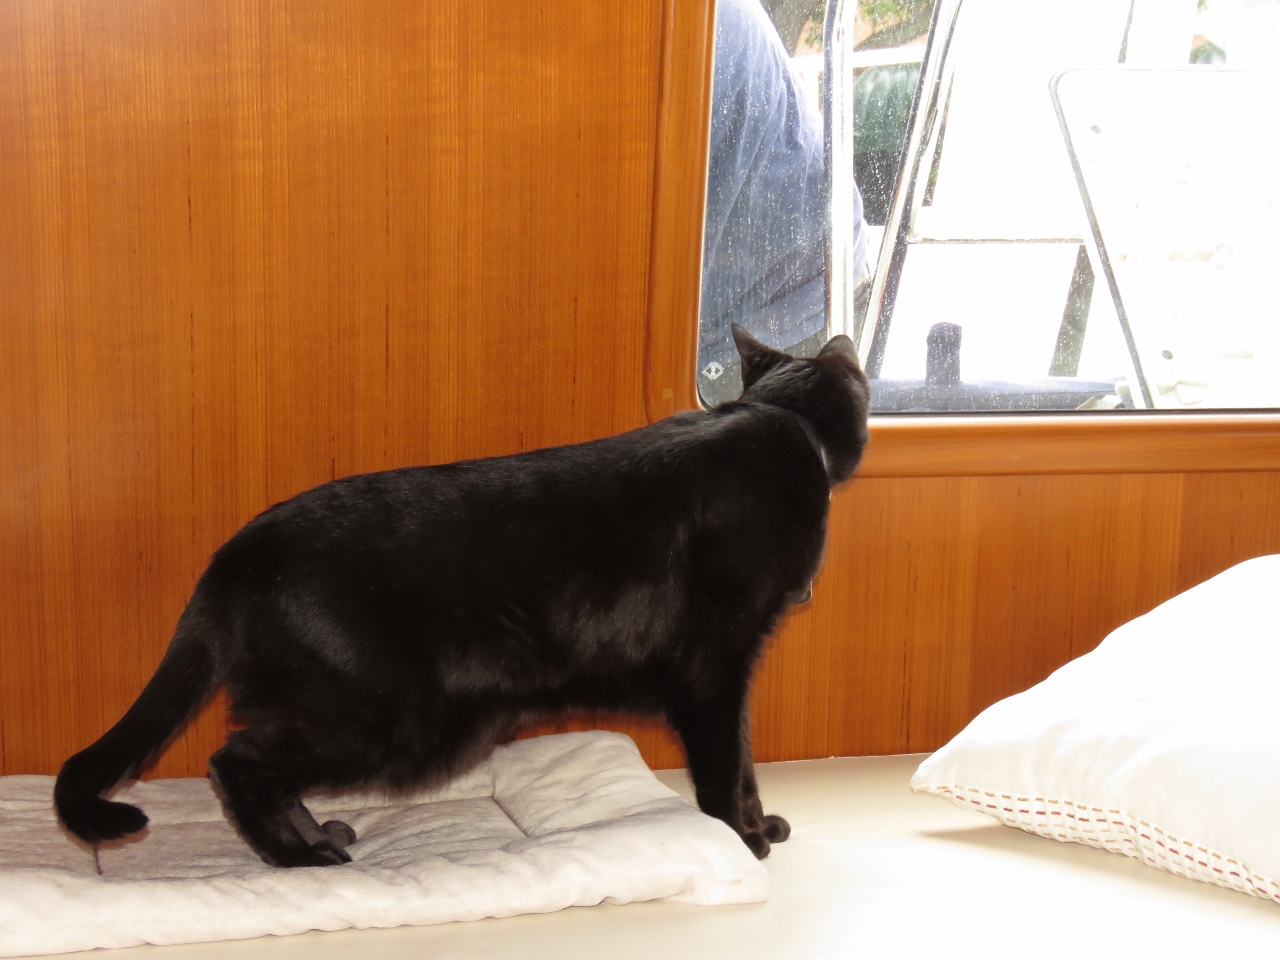 |
Intruder
Position: -80 4.26, 26 50.79
The whole day while Chris was working outside on the boat deck, Spitfire has been sleeping in the pilot house. He suddenly woke up and became quite concerned that we had an intruder.
|
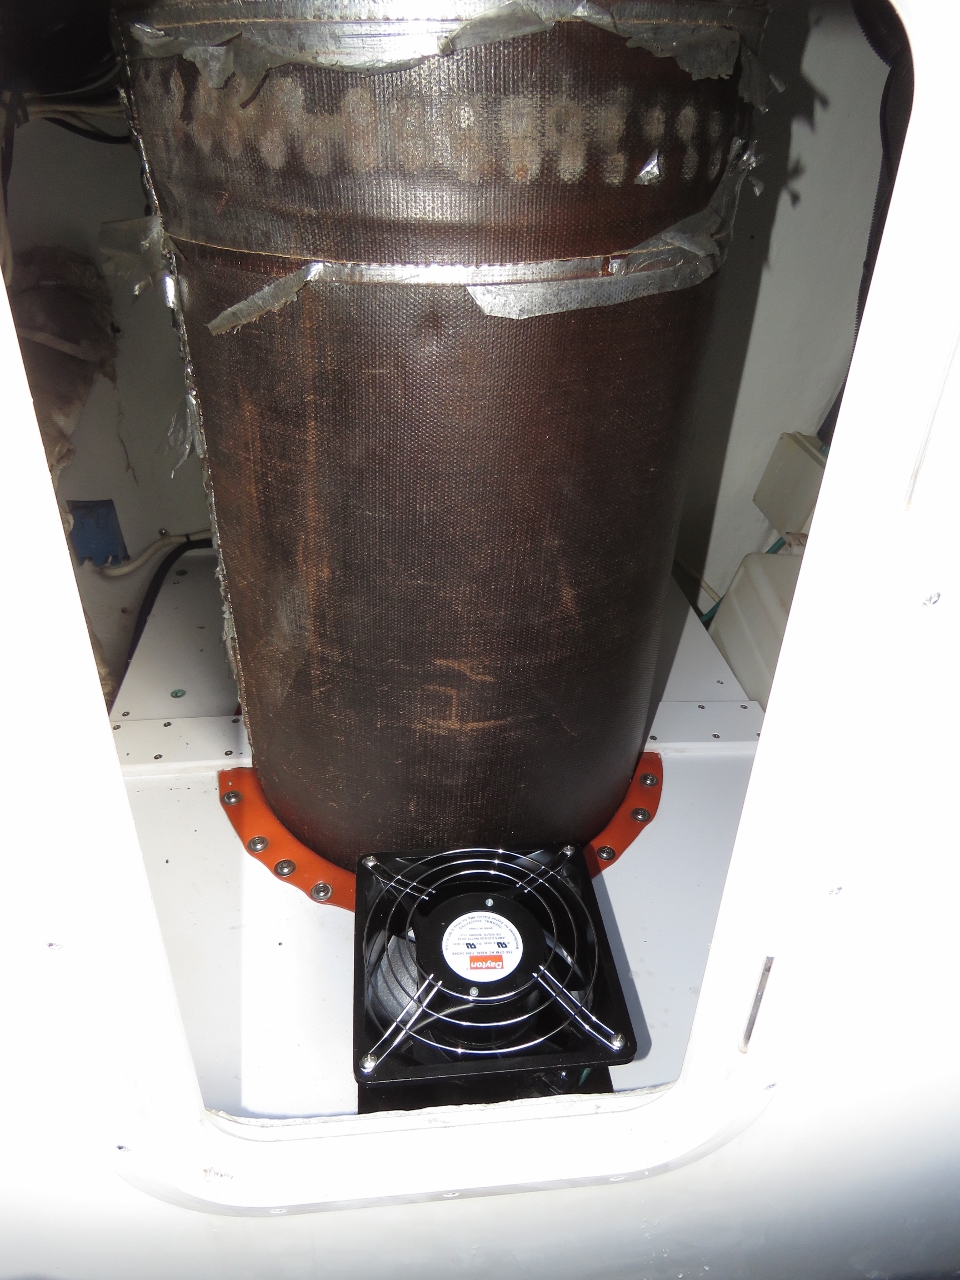 |
Stack enclosure
Position: -80 4.27, 26 50.79
Following a design inspired by Peter Hayden of Nordhavn 60 Tanglewood, Chris from Nordhavn Southeast enclosed the stack base and installed two fans to pull air out of the engine room. We’re fairly happy with the current cooling design on Dirona, but the stack running through the house runs warmer than we like. The primary purpose of this design is to add a little extra margin of safety and redundancy in the stack cooling system, however, it may contribute positively to the engine room cooling system as well.
|
 |
Stack fan
Position: -80 4.27, 26 50.79
Now that we’ve got the fans pulling from above, we can remove the secondary stack fan from the engine room. It looks a lot better without it.
|
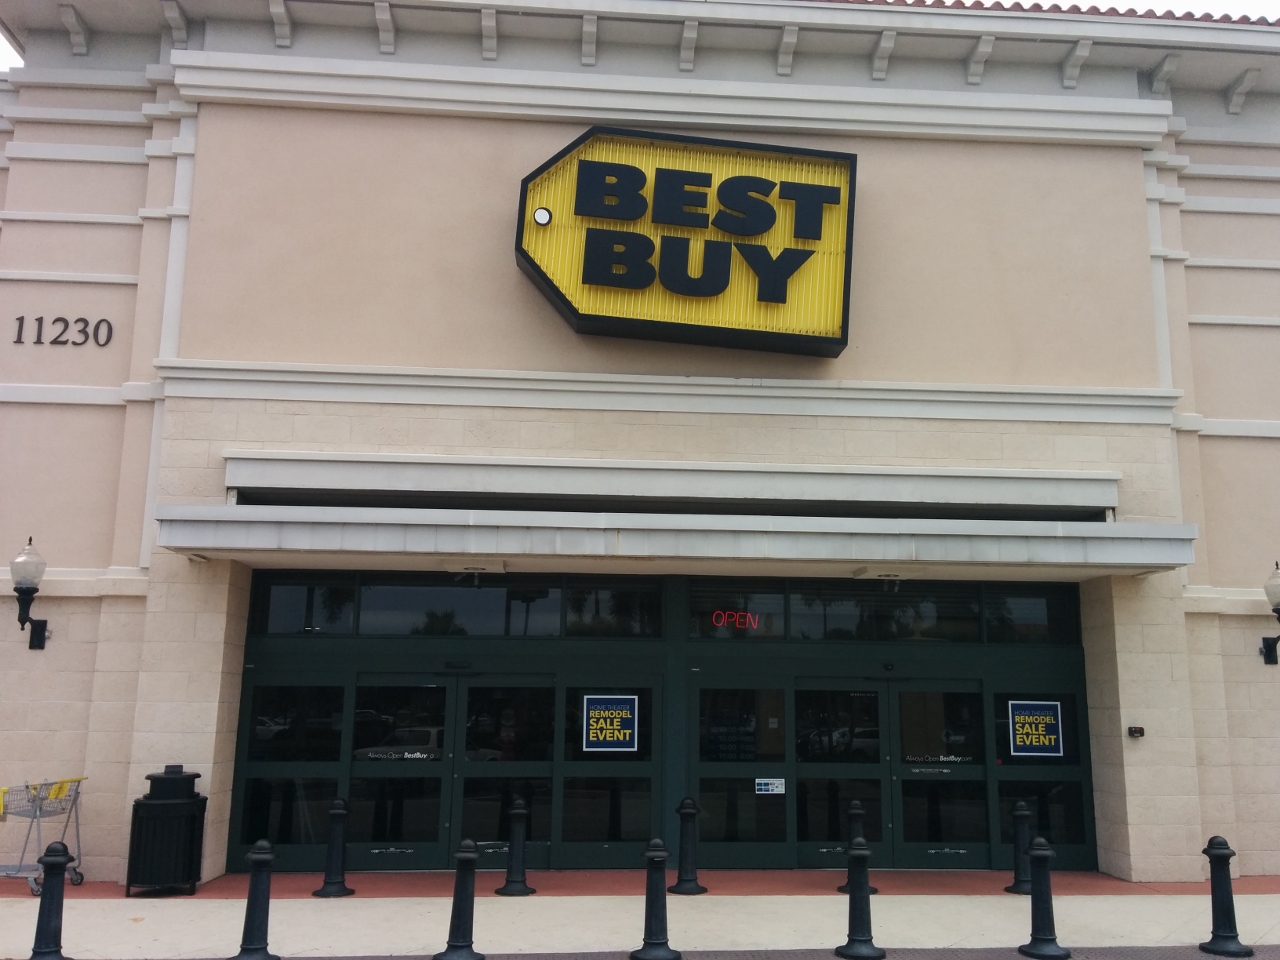 |
Best Buy
Position: -80 5.48, 26 50.45
We walked over to Best Buy to get a USB-to-Serial adapter. We’re upgrading our navigation computer to 64-bit Windows and the system keeps blue-screening with the driver for our existing Keyspan adapter. Keyspan has always been our go-to adapter for USB-to-Serial adapters. They’re more expensive, but were always head-and-shoulder above the rest. They seem to have allowed device driver maintenance to lag though and it’s a disaster in a Windows 7 64-bit system. The USB-to-Serial adapter we bought at Best Buy, based on the Prolific, chipset is working well.
|
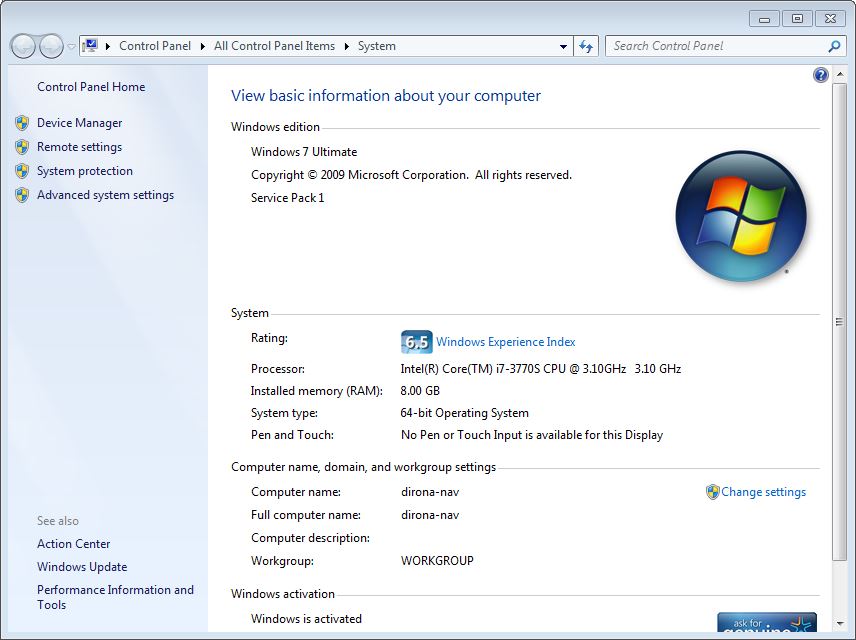 |
64-bit
Position: -80 4.27, 26 50.79
When we first setup our navigation computer in 2010, some applications wouldn’t run on 64-bit Windows, so we have been running 32-bit Windows 7. We’d like to be able to use more than 4gig of memory and most applications should work on 64-bit now, so one of Jennifer’s “jobs for one-armed people” the past few days has been to upgrade the system to 64-bit Windows 7. It took a few days to work through some driver issues and get everything working again, but all our applications now are working well, we now have 8gig of available memory, and the system runs much faster overall.
|
 |
Florida registration
Position: -80 5.01, 26 50.62
Dirona is documented with the US Coast Guard, but we haven’t needed to renew our Washington state registration once the boat was out of the state. Many states allow a federally-documented vessel a 60-90-day grace period in the state without requiring local registration. Florida law apparently supports this as well. But the enforcement arm, the Florida Fish and Wildlife Conservation Commission, apparently requires all vessels operating on Florida waters to be state-registered and will ticket those found non-compliant. We suppose we could contest the Fish and Wildlife interpretation in court, but the sticker looks cheaper and easier. :) Another option would be to renew it in Washington, our official state of residence, but we won’t be in those waters this year and registering there is much more expensive than Florida.
|
 |
Spare windlass
Position: -80 4.26, 26 50.79
One of the deliveries we received this week was a spare windlass that is large and weighs about 85 pounds. This was a difficult purchase decision. There are many ways of working around a failed windlass, and it’s both an expensive and heavy spare. But the more we thought about it, the more the spare felt like good insurance. We have anchored thousands of times, and with the weight of our ground tackle, trying to operate without a windlass would be very difficult. We’ve used up a lot of the obvious locations to stow something this big and heavy, but found a great spot for at the back of the lazarette that amazingly didn’t displace anything else. The windlass doesn’t shift an inch secured with a ratchet strap and boxes that were there can just sit on top.
|
 |
Motor mount 1
Position: -80 4.27, 26 50.79
We keep the motor for the micro-tender mounted on the starboard side of the stack above our gasoline tanks. This is a good place for it and keeps it out of the way when we’re not using it. When the micro-tender is in use, however, it’s a bit of a pain to bring the motor up and down, so we often stow it loose either in the lazarette or the cockpit. Neither is a great solution, so one of the projects on our list has been to install a mount for it in the cockpit. Here James is tapping holes in the fiberglass at the port side of the cockpit to install the mount.
|
 |
Motor mount 2
Position: -80 4.26, 26 50.79
The mount we used on the boat deck extends too far out to use the cockpit, and we couldn’t find anything off-the-shelf that would work. We ended up selecting one designed to be attached horizontally, but it turned out to not fit either so James modified it to be a small, vertical mount. It fits perfectly, takes up hardly any space when not in use, and the motor is out of the way when on the mount. We’ll continue to stow the motor on the boat deck when we’re not using the micro-tender, but now can securely stow the motor in the cockpit and also have a convenient place to work on it for oil changes etc.
|
 |
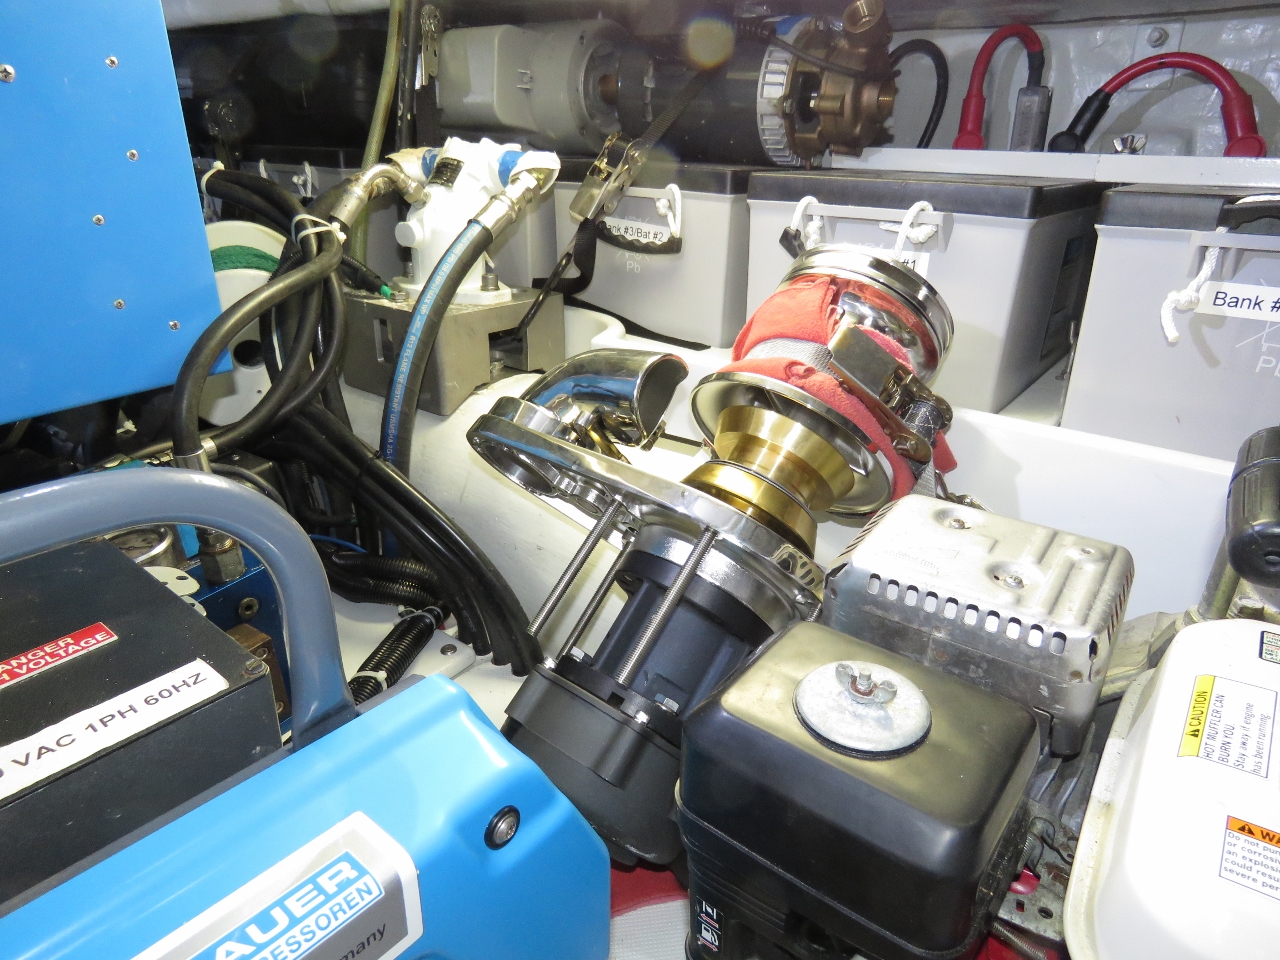
Transmission cooler
Position: -80 4.27, 26 50.79
A slight seepage was visible on the outside of the wing engine transmission cooler case. It’s hard to believe, but a quarter-inch solid aluminum plate has corroded right through the center. Removing the cooler was a bit challenging with so little space to access the bolts.
|
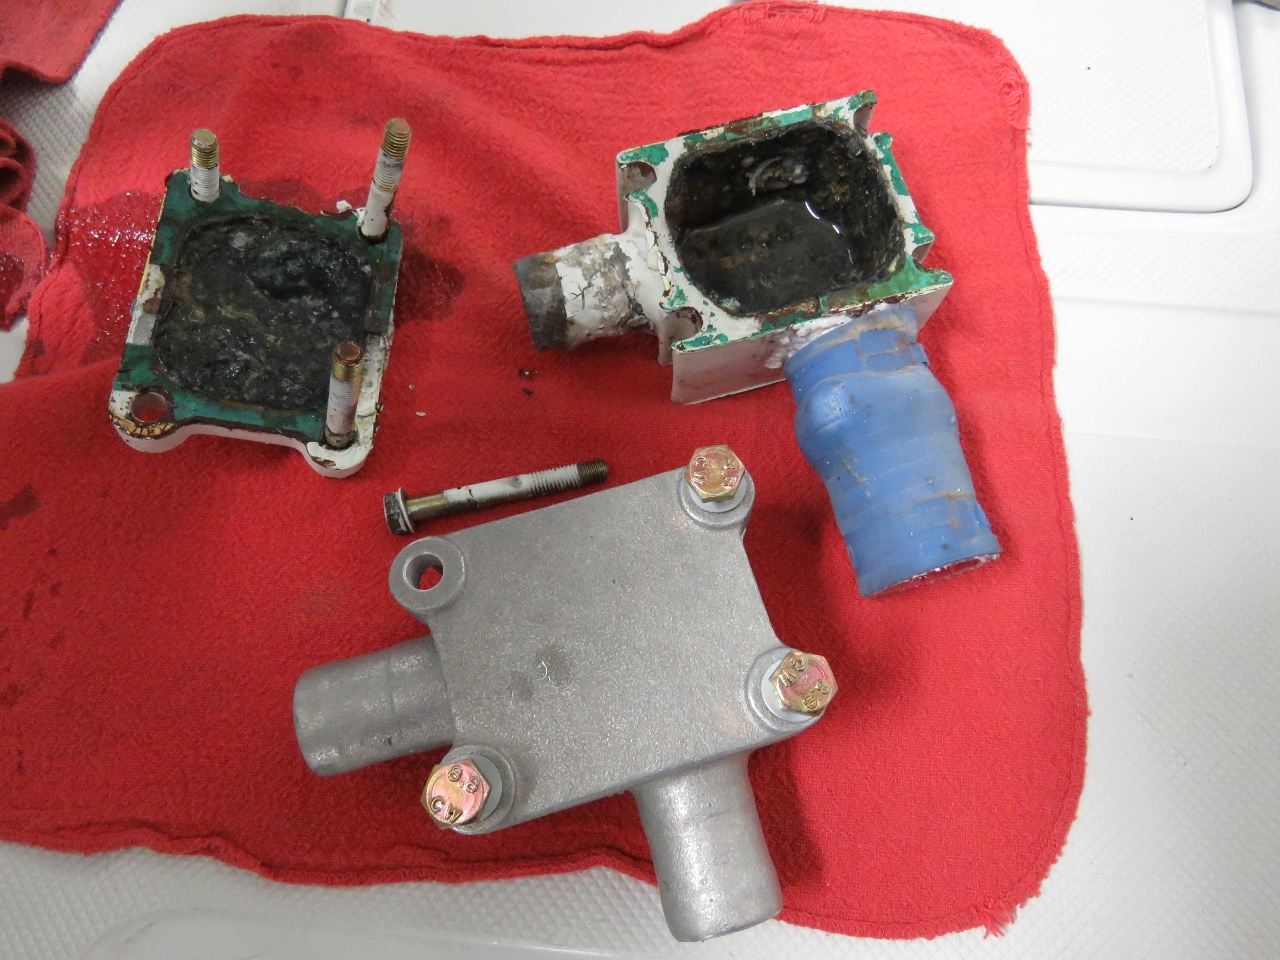 |
Transmission cooler 2
Position: -80 4.27, 26 50.79
The old transmission cooler in two pieces with the new spare. You can see the cover on the left is deeply pitted—the old one definitely was ready for replacement. One of the long bolts that made the cooler difficult to remove is shown as well.
|
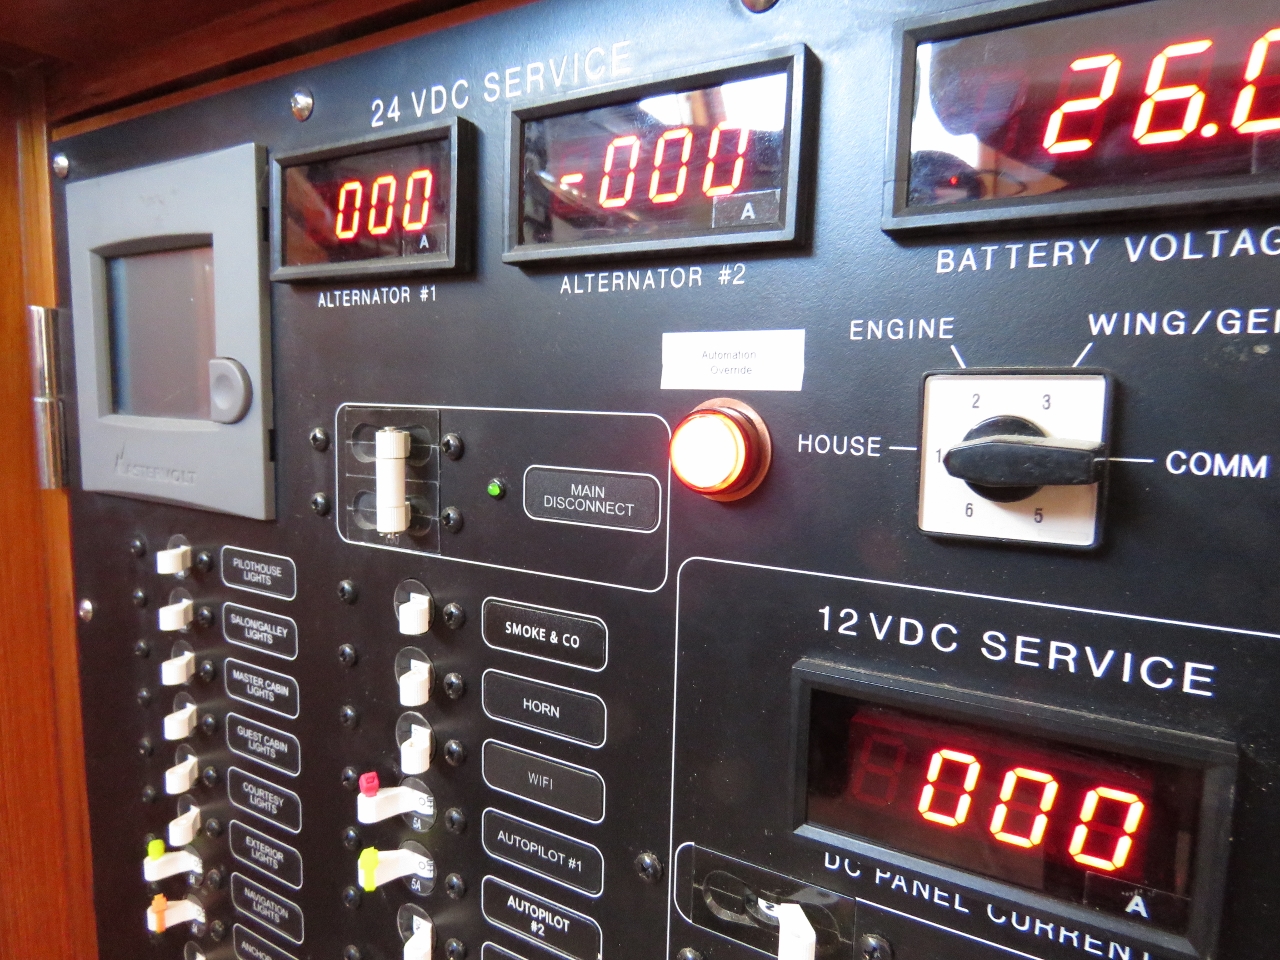 |
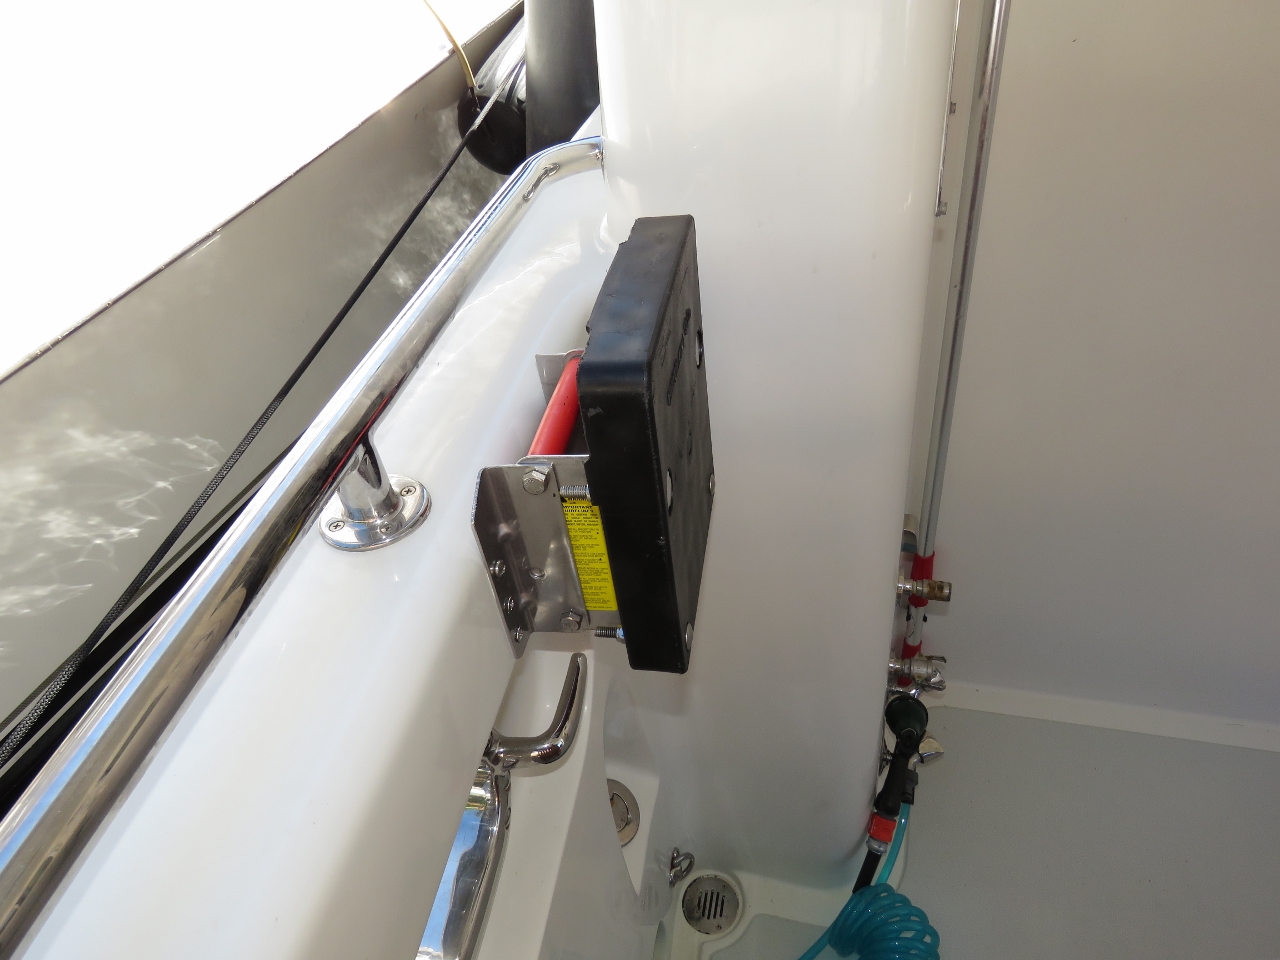
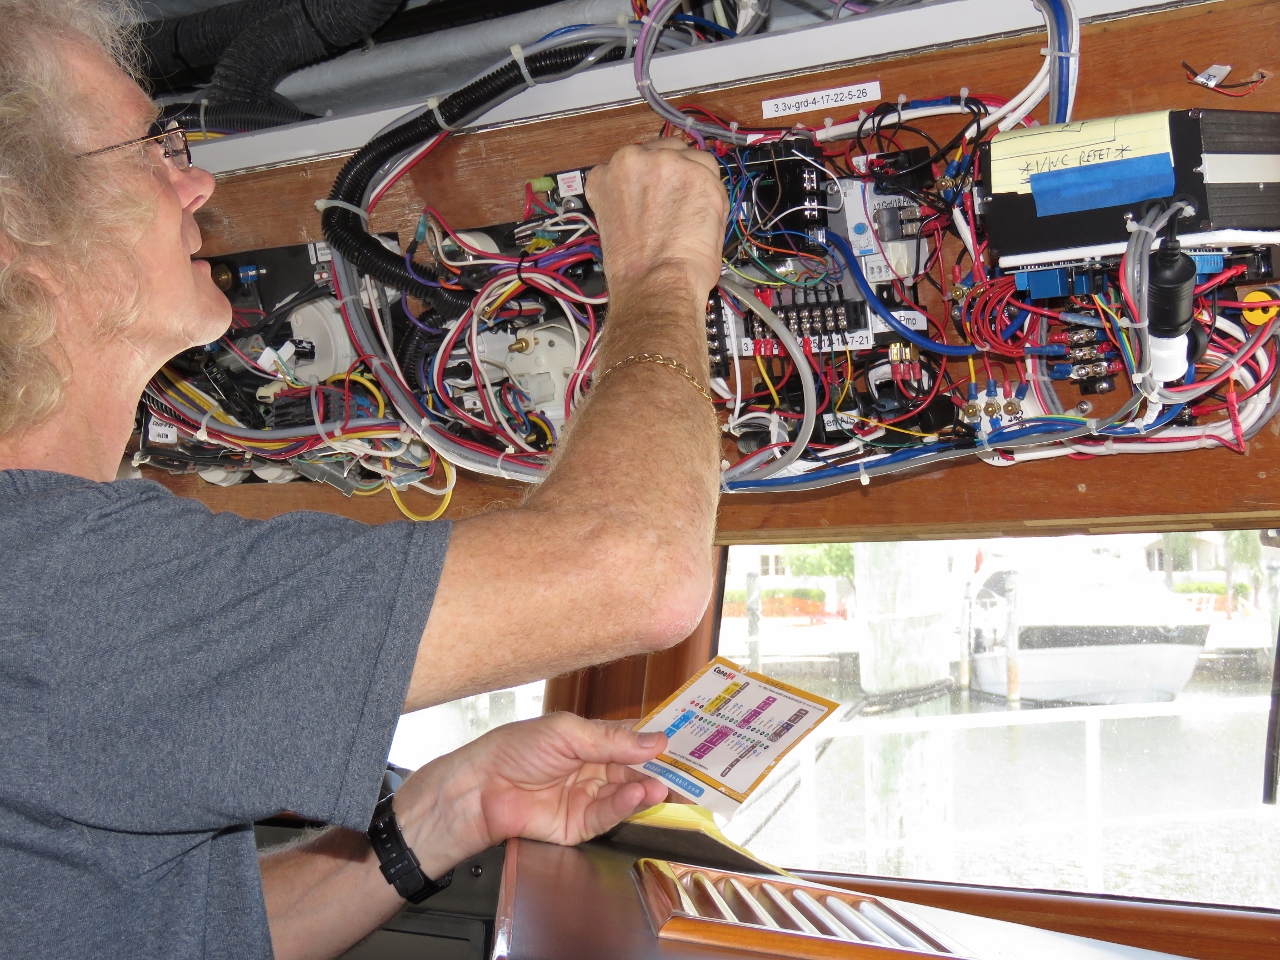
Automation override button
Position: -80 4.26, 26 50.79
We’ve written software to automate load-shedding of the hot water and HVAC systems during regular operation and generator warm-up and cool-down. Today we added a switch to the breaker panel to manually override the automation should a fault occur.
|
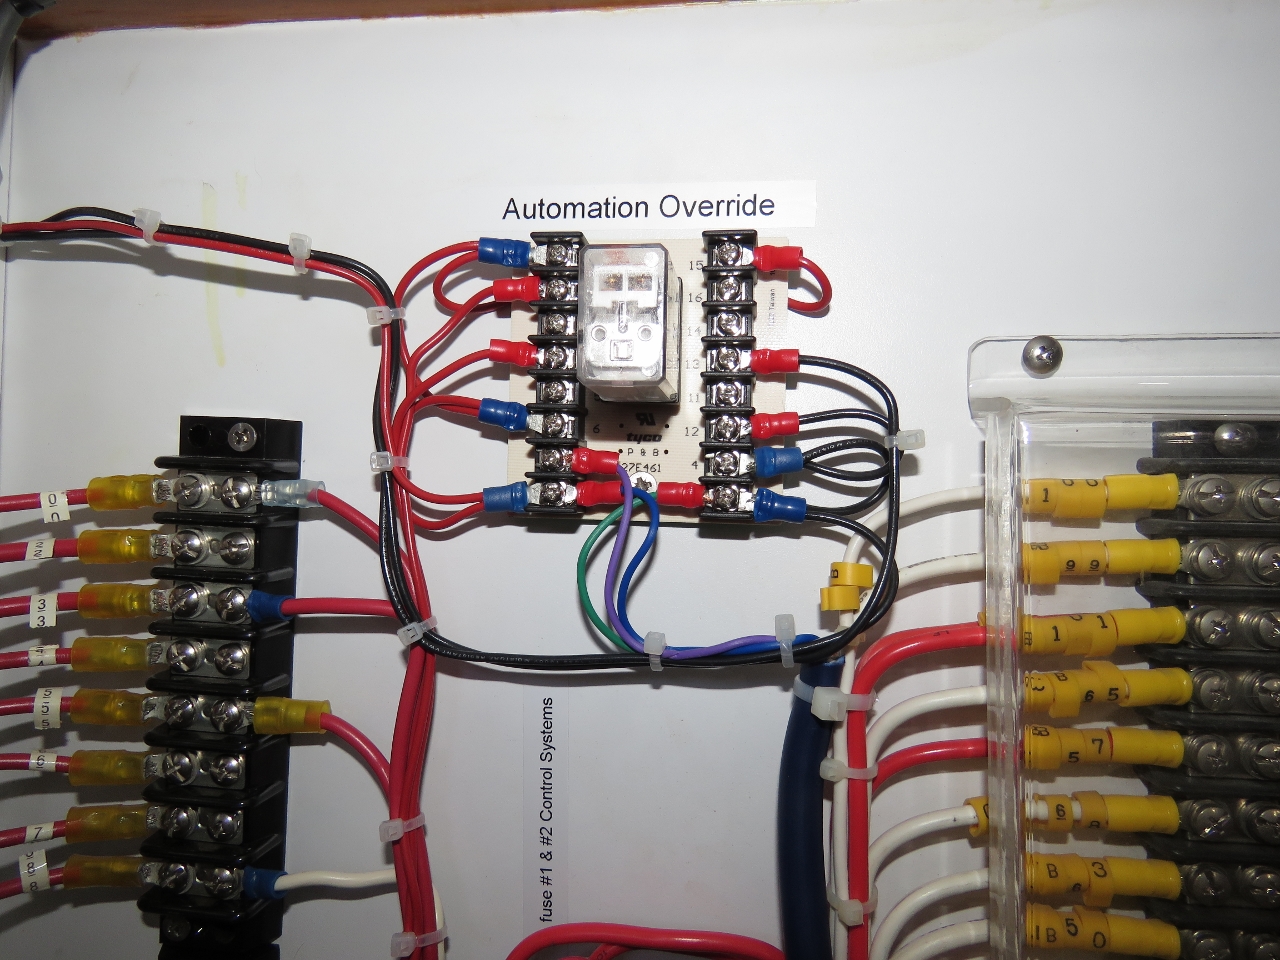 |
Automation override wiring
Position: -80 4.26, 26 50.79
The wiring for the automation override relay.
|
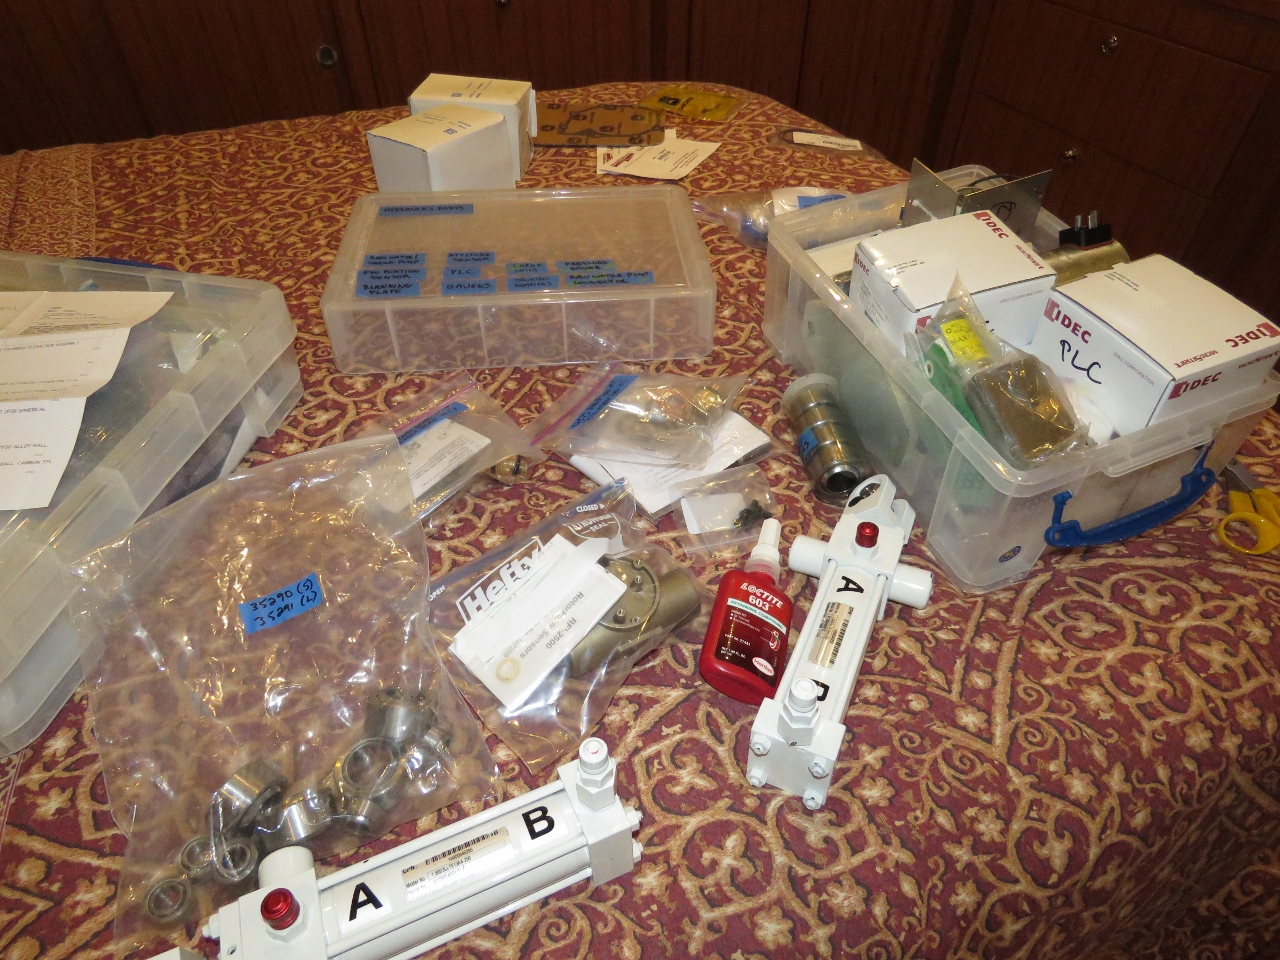 |
Stowing
Position: -80 4.27, 26 50.79
Working on stowing the ABT parts we received. Jennifer is chief stower, so having her shoulder and nerve issues improve is a big help in getting things put away.
|
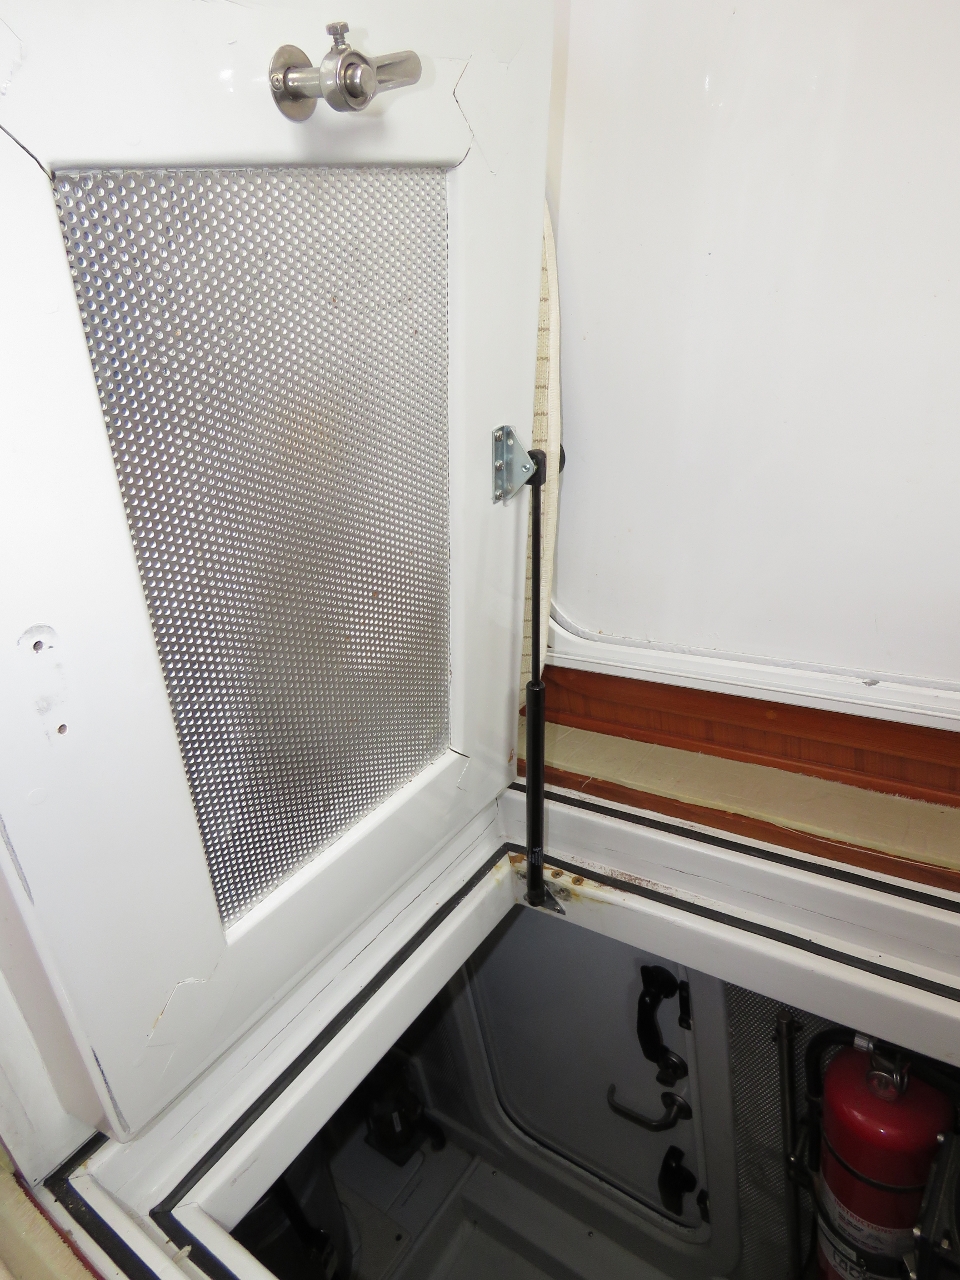 |
Strut
Position: -80 4.27, 26 50.78
The struts supporting the hatch from the salon to the engine room failed again. We use this hatch a lot and if it could do serious damage if it slammed shut on a finger or head. We haven’t been happy with the failure rate on the current struts, and they are difficult to obtain. We tried a Suspa brand that is available through Amazon and also improved the mounting position to avoid overpressurizing the strut. Much better–the hatch practically flies open now with just a single strut.
|
 |
CANBUS
Position: -80 4.27, 26 50.79
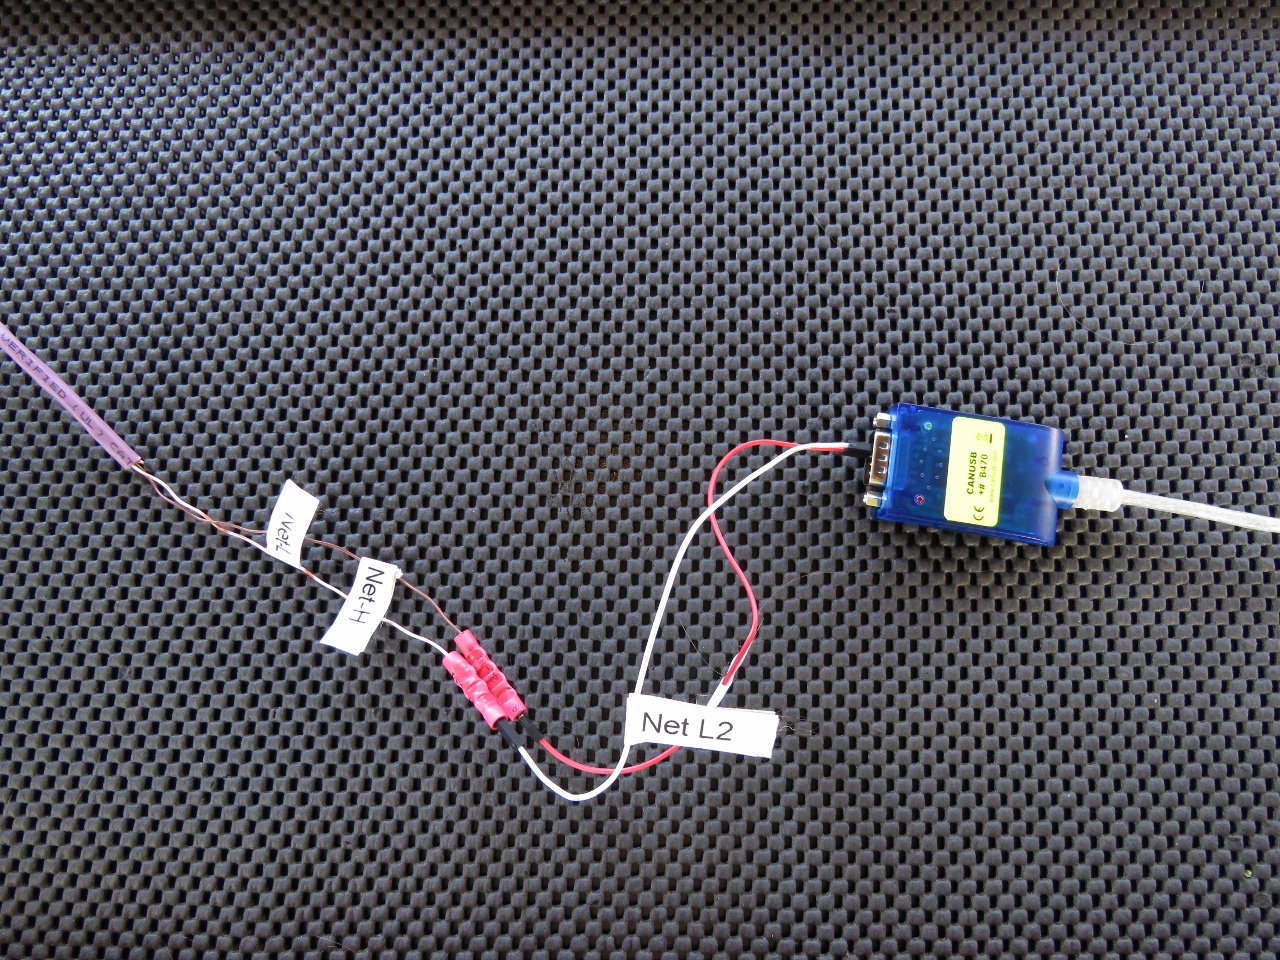
Load shedding allows you to operate on a relatively limited source withouth having to contantly figure out if someone else is running an applicance that will be in conflict with yours. The way load-shedding works is that everyone does what they want and the lower priority loads are shed prior to crossing the source load limit. A year ago we implemented 240-volt automatic load-shedding where first the water heater is shed, and if the load continues to be high, the HVAC will be shutoff just for the duration of the peak. Peaks are always relatively short, so you don’t even notice the HVAC disappearing for tens of seconds and the hot water still is as hot as ever.
Rather than just having the two sources that could possibly be shed, we’d like to be able to shed our 2 100-amp Mastervolt chargers as well. That way we can run them as hard as the power source will allow, but still not have to manage other loads on the boat, since we would be able to shut the chargers down individually as the load got too high. It’s easy to control Mastervolt chargers using their MasterAdjust user interface, but there’s no programmatic way to do it and they won’t release an API to allow programmitic control. We know they use a proprietary protocol implemented on top of CANBUS and recently bought a CANBUS adapter with the goal of being able to turn those chargers on and off at will. Pictured you can see the CANBUS adapter hooked up to an ethernet cable that’s plugged into MasterBus. |
 |
MasterBus Stream
Position: -80 4.27, 26 50.79
Just determining which two of the eight signal wires are signal high and signal low on the proprietary MasterBus took quite a while. Finding that right pair is even harder when, even if you have them right, you won’t get a result if the transmission speed isn’t set correctly. We probably got a bit lucky and found it a bit more quickly than we deserved. So at this point, we’re actually able to see the MasterBus data stream. Now the challenge is figuring out which strings of hexadecimal numbers are most interesting and how to interpret them.
|
 |
MasterBus Programmatic Control
Position: -80 4.27, 26 50.79
After almost two solid days of investigation, we finally were able to understand the MasterBus stream enough to control the chargers. Here is a simple PHP program where parameter “-C1 on” turns charger one on and “-L1 100” sets charger one to produce 100 amps.
|
 |
Backups
Position: -80 4.27, 26 50.79
We share and backup data between our two laptops and the navigation computer regularly using FreeFileSync. We’ve also less regularly been backing up all the navigation computer data to a circulating set of external drives. One of our many Amazon orders to Soverel Harbour was for a Synology DS415+ RAID file server that we’ve installed under the salon settee. Now we can backup our systems nightly to our central file server and stop using these big, clunky drives.
|
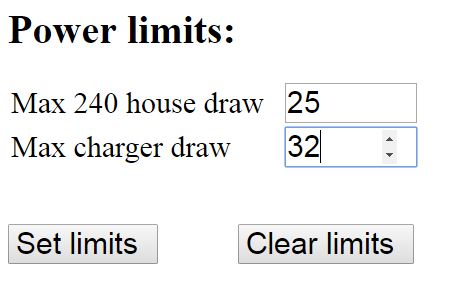 |
Power limits
Position: -80 4.27, 26 50.79
Now that we can programmatically control the chargers, we can further automate operation and automatically set the charger draw limit to completely consume, but not overdraw the source, be it shore, inverter or genertor. For the few cases we can’t automatically determine the source draw limit, we support a manual override through the web page shown. For example, on 50Hz shore power we limit to the common 15 amps, but could override as shown if we had a 32 amps source. (We’d be running the house through the 25-amp inverter in this case, but don’t actually need to override that setting.)
|
 |
Load shedding version 2
Position: -80 4.27, 26 50.79
In addition to programatically controlling the charger draw, we added the two chargers to the load-shedding hierarchy. As the power draw on the boat approaches the shore power or generator limit, we shed first the hot water heater. If the load remains high, we shed next one charger, and if necessary, the second. In the unlikely event that the load still is high, we can finally shed the HVAC for just the peak few seconds. In the screenshot, the three yellow squares at the bottom center indicate that the water heater and both chargers have been shed.
|
 |
S3 Backup
Position: -80 4.27, 26 50.79
With nightly backups to the Synology file server, we are protected against most data loss except complete loss of file server and client devices (most likely from loss of the boat). These failure modes are less likely, but they are possible, and the loss is complete. What’s missing is off-site backup. This is challenging and must be incremental since bandwidth from a boat is usually restricted. Since we have no house or property other than the boat (and since I’m a pretty big believer in cloud computing), we backup everything to Amazon Web Services S3 (Simple Storage System).
While we lived in the US and had unlimited data plans, we used a service to automatically cloud-backup our navigation computer. This also included data from our two laptops that we synchronize to the navigation computer using FreeFileSync. Outside the US, we never saw an unlimited data plan–everything was always usage- or time-limited, and often low-speed or poor quality. So the packaged solution no longer worked. We needed a model where we could backup from Dirona when we could, but also be able to copy data to a disk and transport it with a laptop to somewhere with cost-effective and high-speed connectivity, possibly on a return trip to the US. For the backup to S3 we use S3 sync directly and aim to run incremental backups opportunistically but no less than quarterly. We did investigate a few software packages that synchronize to S3, but they all were tied to backing up from a single computer. So we wrote a small script to backup using S3 sync from either the navigation computer or one of our two laptops, using a combination of data from that computer and either the file server or an external drive. When James went back to Seattle this week, he took with him the full payload on his laptop and an external drive, and copied all 800Gig into S3 using a fast ethernet connection in just over 24 hours (that would have taken many days even with the decent connectivity we have here in Florida). The screenshot shows the amount of data we had stored in S3 over a five-day period. Now we can sync the changes to S3 as often as we choose to. And should be go a while without being able to backup up from Dirona due to connectivity constraints, we can carry a laptop and an external drive to access better connectivity. The good news for us is we are now pretty well protected and, with more than 100,000 pictures and lots of custom software the thought of a loss is not very appealing. |
 |
Struts
Position: -80 4.26, 26 50.79
In addition to changing the struts on the salon-to-engine room hatch, James added two struts to help lift the master stateroom berth. We keep a lot of spares under there and it’s heavy and difficult to lift. Now it goes up almost with one finger. Spitfire of course jumped in immediately upon our lifting the bed and had to be carried out before we could lower it.
|
 |
City Electric
Position: -80 5.54, 26 47.45
At City Electric to pickup the contactors that will be used to implement load-shedding and active cooling on the 120-volt system.
|
 |
Digital Output
Position: -80 4.27, 26 50.79
The Raspberry Pi is capable of delivering only 16 milliamps at 3.3-volts per channel, and no more than 50 milliamps in total. So there really isn’t much power to work with. This group of eight relays will allow the Pi to control eight channels of up to 10 amps at 24 volts.
|
 |
120V Load-shedding
Position: -80 4.27, 26 50.79
Some time back, we modified the 120V inverter with fans to provide active cooling, allowing it to deliver full output for longer at higher temperatures. We’re using the Raspberry Pi to turn the active cooling off and on as needed. The yellow indicator at the bottom center of the screenshot indicates the fans are on. We’ve also implemented simple load-shedding on the 120V circuit. When the capacity of the 120V circuit is exceeded, we’ll shed the most common culprit, the microwave, and turn it back on when the peak has passed. In the screenshot, the indicator below the fan on indicator would display yellow were the microwave shedded.
|
 |
Raspberry Pi
Position: -80 4.27, 26 50.79
Wiring the digital output lines from the Raspberry Pi to the eight relays that control 24-volt circuits.
|

|
Click the travel log icon on the left to see these locations on a map, with the complete log of our cruise.
On the map page, clicking on a camera or text icon will display a picture and/or log entry for that location, and clicking on the smaller icons along the route will display latitude, longitude and other navigation data for that location. And a live map of our current route and most recent log entries always is available at http://mvdirona.com/maps. |
If your comment doesn't show up right away, send us email and we'll dredge it out of the spam filter.
Hi
I have been following your site for many years now, I always enjoy reading the technical aspects of motor yachting.
Regarding the Raspberry Pi, what operating system and which programming language do you use.
With mine I use linux but find command line so last century. Neither have I settled on a language, with all my other ARM processor boards I use C and no operating system.
I hear you on the Linux mostly command line interface feeling primitive but, if you did embedded programming back 20+ years ago, programming a Pi is SSSSSOOOOOOOOO much easier. I run Linux on it and I really like having all the features of a full operating system available. For example, it can access the boats central file server directly so all files are well backed up. Real time kernels have many upsides but they are generally more complex to program.
For programming languages, I use mostly PHP with a bit of C++ for low level or latency senstive features. I find it surprising how little code I needed to implement control of external devices and digital input to get external digital state information available to the rest of the boat management software that runs on a windows server (nav software mostly doesn’t support Linux).