We completed a number of boat projects in Trondheim, including replacing a steering pump and the nav computer. Most were waiting on gear sourced on our return trip to Seattle—we spent much of the ten days after the trip installing and stowing parts.
Below are highlights from July 14th through August 14th in Trondheim, Norway. Click any image for a larger view, or click the position to view the location on a map. And a live map of our current route and most recent log entries always is available at mvdirona.com/maps
 |
Dishwasher
Position: 63°26.00’N, 10°23.29’E
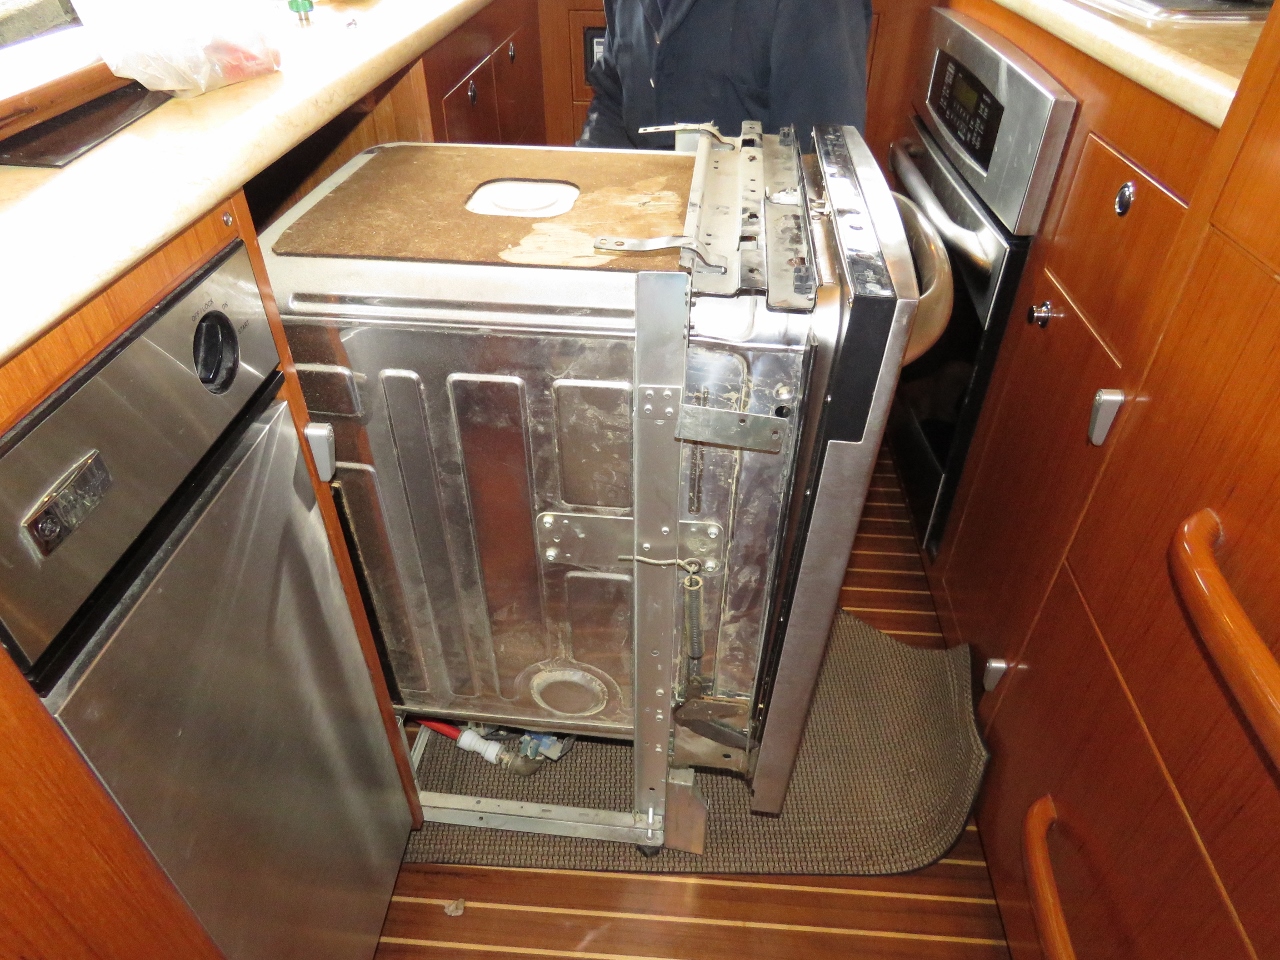
Our dishwasher was leaking again. Initially we thought it might be another gasket issue, but the water was coming out from underneath in the center, so we pulled out it to investigate.
|
 |
Main Conduit
Position: 63°26.00’N, 10°23.29’E
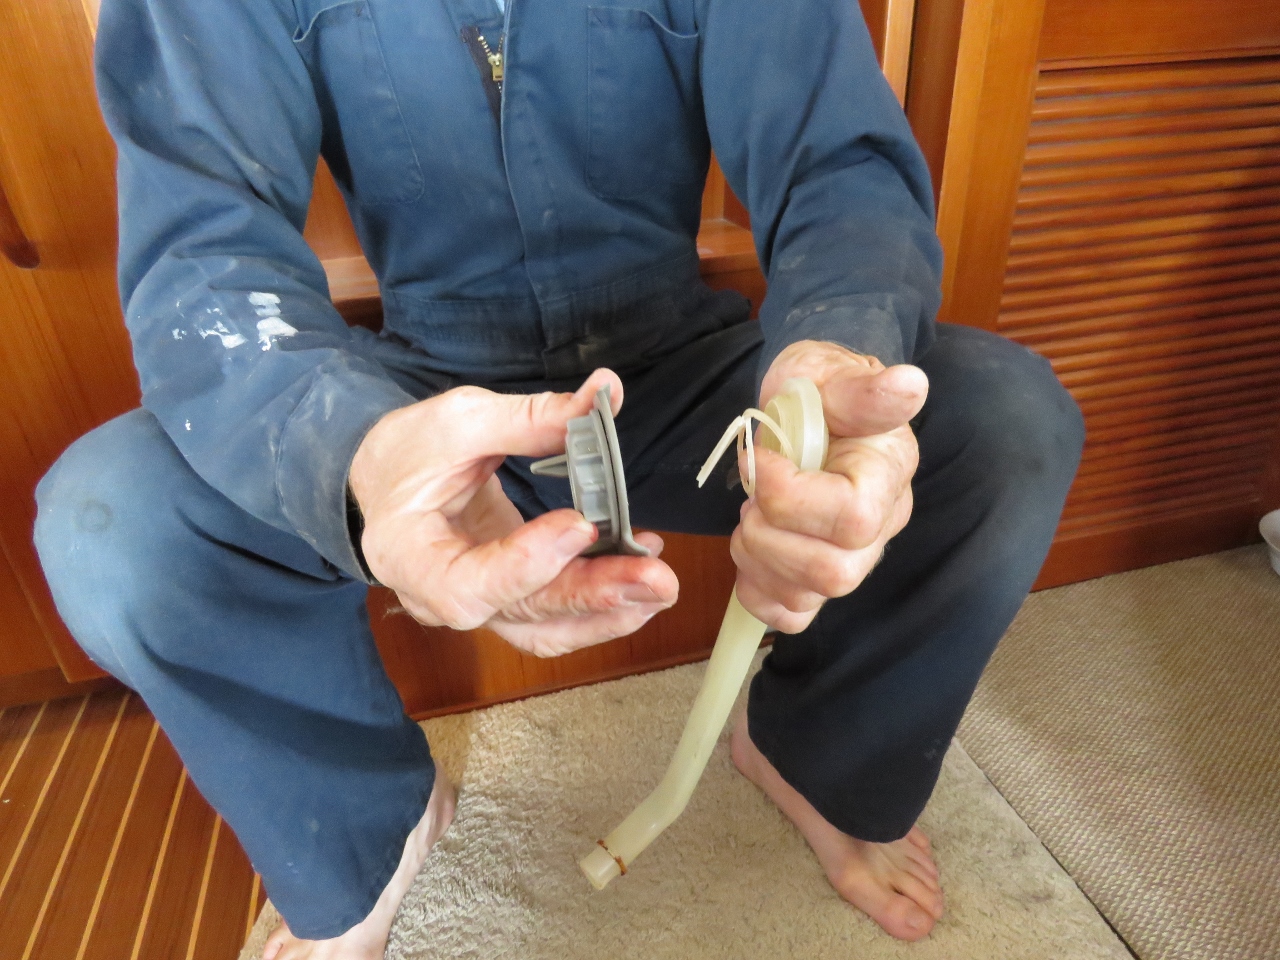
The dishwasher leak was due to the threaded section of the main conduit breaking away. It’s impressive how much water will come out of that small crack. Fortunately we’ll be able to pickup a replacement part when we’re back in Seattle next week, so the timing on this was good.
|
 |
Gas Engines
Position: 63°26.00’N, 10°23.29’E
Regular oil change and maintenance for all our gasoline engines: the crash pump and both dinghy engines, all Hondas.
|
 |
Nav Computer
Position: 63°26.00’N, 10°23.29’E
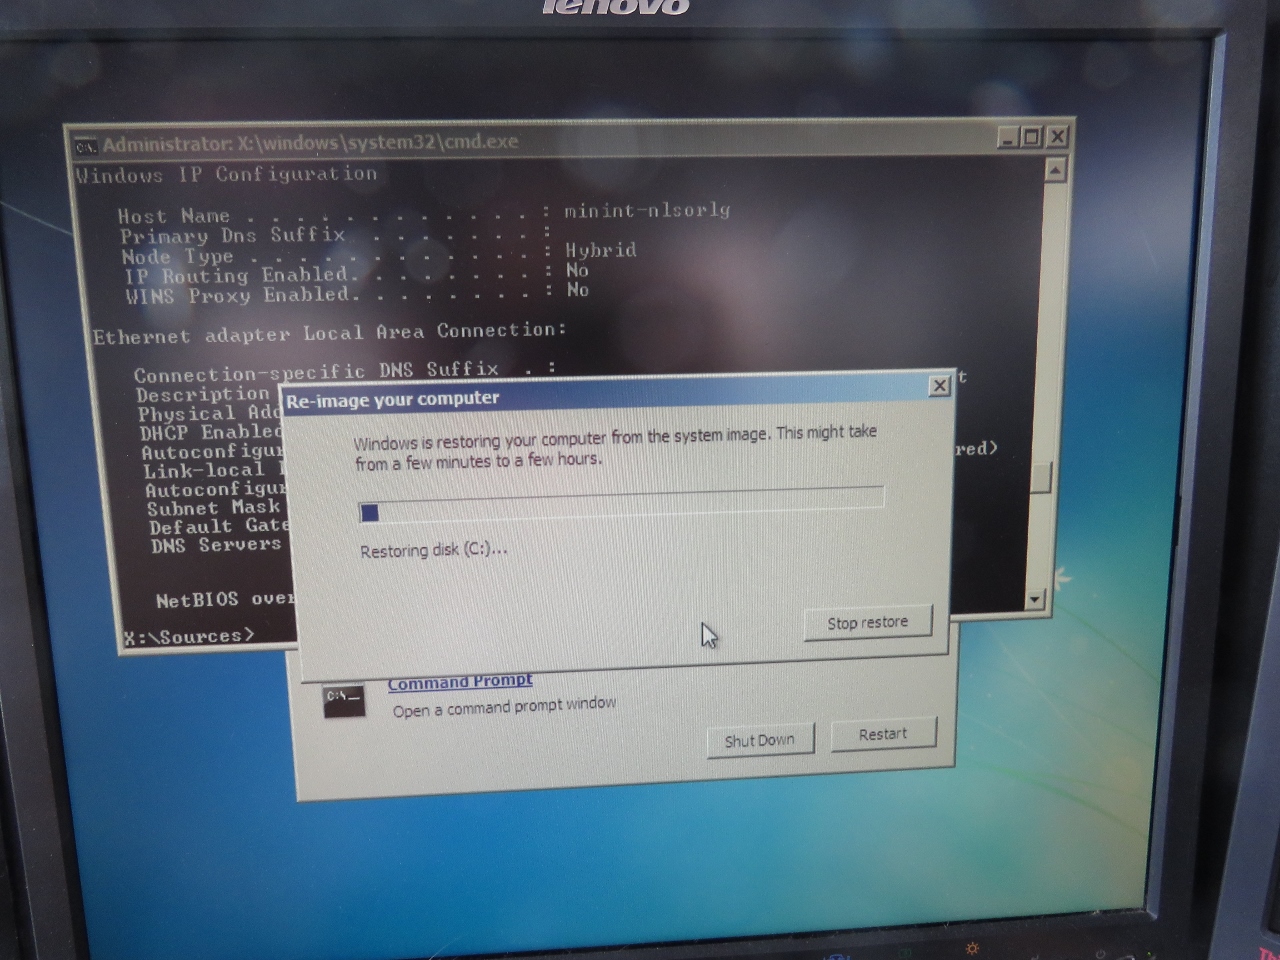
We’ve been having problems with the boot drive in our navigation computer and will bring a new computer back from Seattle. We were hoping the old system would limp along until we returned with the new computer to avoid wasting time with it, but its hard down and we want the control systems operational while we’re gone. So we put in the spare boot drive, restored the most recent Windows Backup image, and got it back operational. Replacing that computer just a little bit later than we should have resulted in a few hours of more-or-less wasted time.
|
 |
Shaft Runout
Position: 63°26.00’N, 10°23.29’E
After we had the propeller shaft replaced in Southhampton due to corrosion, we had a serious vibration once the boat was back in the water. We re-lifted the boat and the shaft was again removed to be reworked. When it was re-installed and Dirona was back in the water, it was better but we still had a vibration problem. We decided to cut our losses since we were already two weeks behind schedule and it was unclear if this job was going to get any better on the third attempt. Instead of again lifting the boat, we proceeded to London to enjoy a two months of city life moored within sight of the Tower Bridge.
The shaft runout is tolerable now and the vibration isn’t severe enough to put boat components at risk, but it is still noticeable. Today James decided to put a dial gauge on the shaft at the transmission and at various places along the shaft. What we found was that the runout at the transmission was only 0.003″ which is acceptable. Further down the shaft, the runout is 0.007″ which is above the ABYC max allowable runout of 0.006″. Because the runout is worse in the center of the shaft, it’s likely the shaft that is not straight. Since there was no noticeable vibration prior to the shaft change, it’s further evidence that shaft runout is the issue. Repairing this will require that the boat be lifted for the third time, the shaft and coupler brought into a competent machine shop, and the shaft will either need to be straightened or replaced. It’s disappointing to be needing to redo this job. |
 |
Unpacking
Position: 63°26.00’N, 10°23.29’E
We just returned from a two-week work trip to Seattle and are unpacking all our loot while Spitfire investigates. Most of the gear will be stowed, but we’ve got several projects built up waiting for parts.
As commonly happens with our luggage, we found TSA inspection notices in the cardboard box and one of the bags. But the contents are always carefully repacked and we’ve never suffered any damage as a result of the inspections. |
 |
Hiking Boots
Position: 63°26.00’N, 10°23.29’E
The Salomon Quest hiking boots we’d bought back in Dunedin, New Zealand four years ago were getting pretty tired when we arrived in Norway, and were completely done in by the time we did our hike to 4770 ft (1454 m) Helgelandsbukken. We’d been trying to buy new ones locally, but couldn’t find any as good as the ones we already had. So we ended up ordering new pairs from Amazon almost identical to what we had before and brought them back with us to Trondheim.
|
 |
ThinkStation Tiny 320
Position: 63°26.00’N, 10°23.29’E
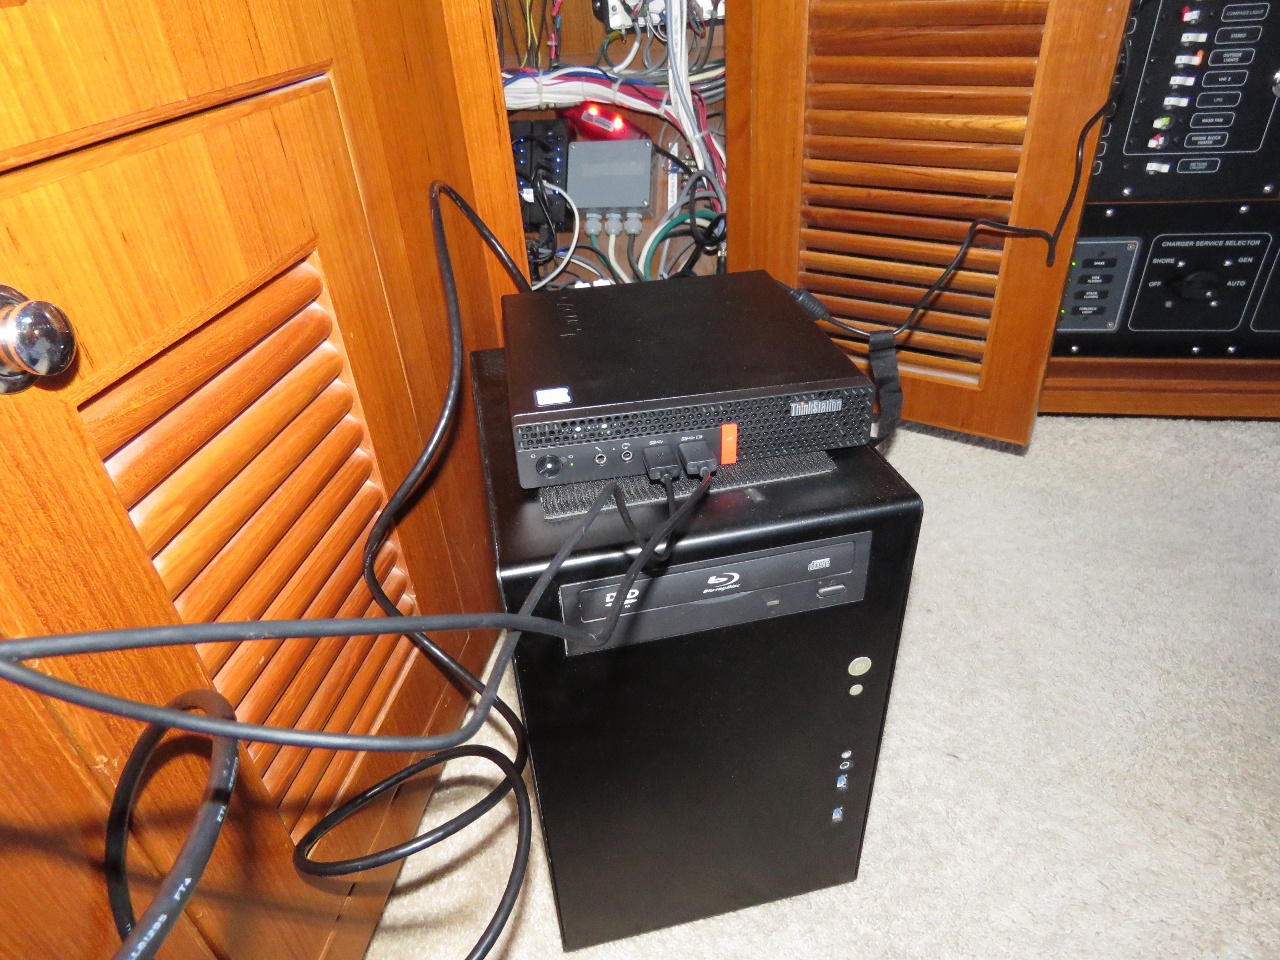
The approach we’d taken with our previous navigation computer was to build it from components and carry a full set of spares, including memory, CPU, network cards, disk drives and two mother boards. Over its six-year life we’ve replaced almost all those parts and the system is so old it’s now getting dangerous to install any hardware-related software system update. We’d already ordered a replacement when the boot drive started failing in Bodo and packed it in completely in Trondheim. It’s been nice to have the spare parts, but chasing those issues has been time-consuming.
With the new navigation computer, we’re going to a different model. We’ve purchased a Lenovo ThinkStation Tiny P320 and a backup. If one fails, we’ll just re-image the spare and continue. The Tiny 320 really is small—that’s the whole computer sitting on top of our old nav computer, which wasn’t all that big either. We’ve got both up and running together while we setup the new system. |
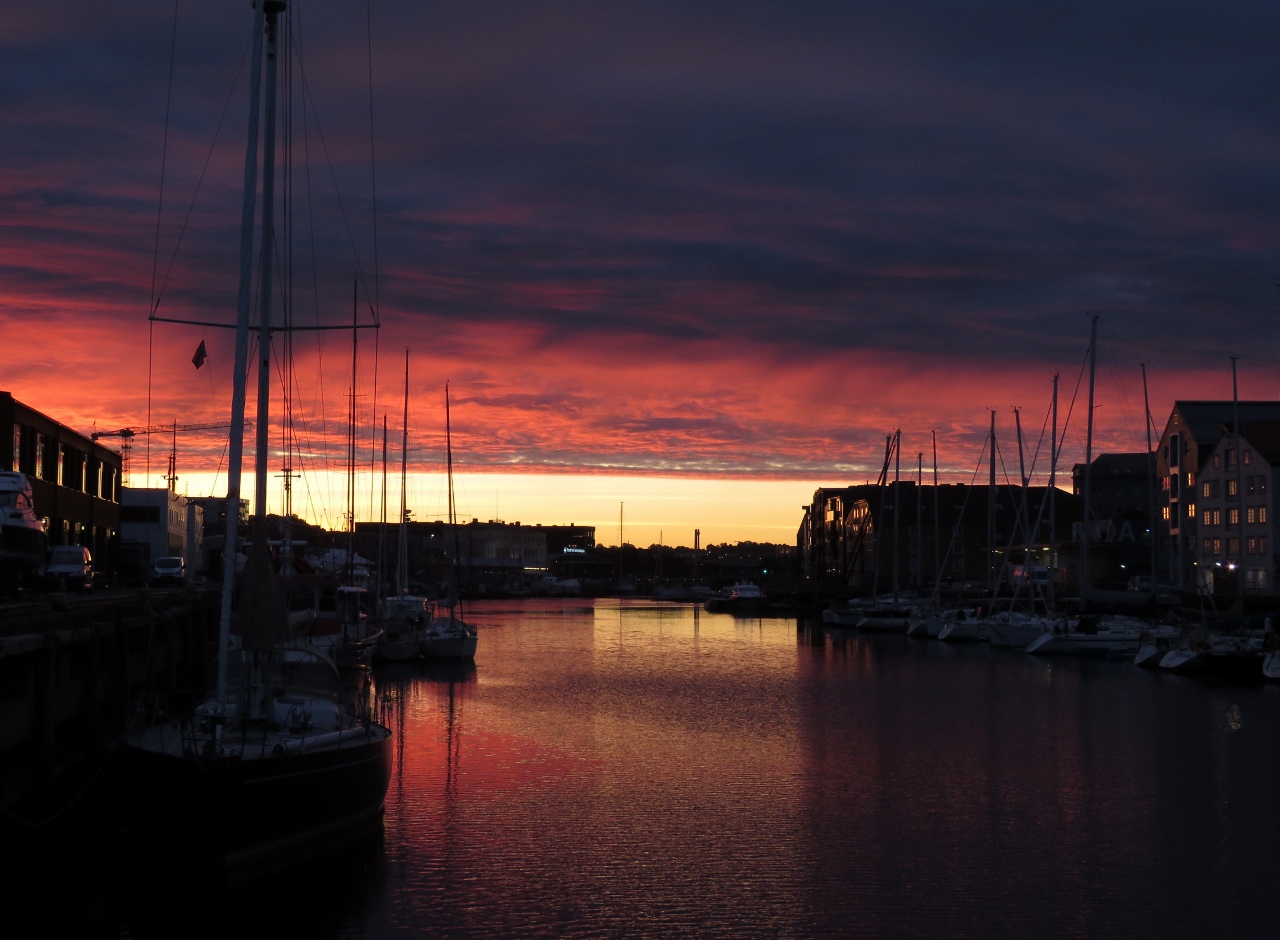 |
Sunrise
Position: 63°26.00’N, 10°23.29’E
With the period of summer, 24×7 sun in Trondheim is past now, we’re starting to see our first sunrises for months. This is the sky behind us just past 4:30am.
|
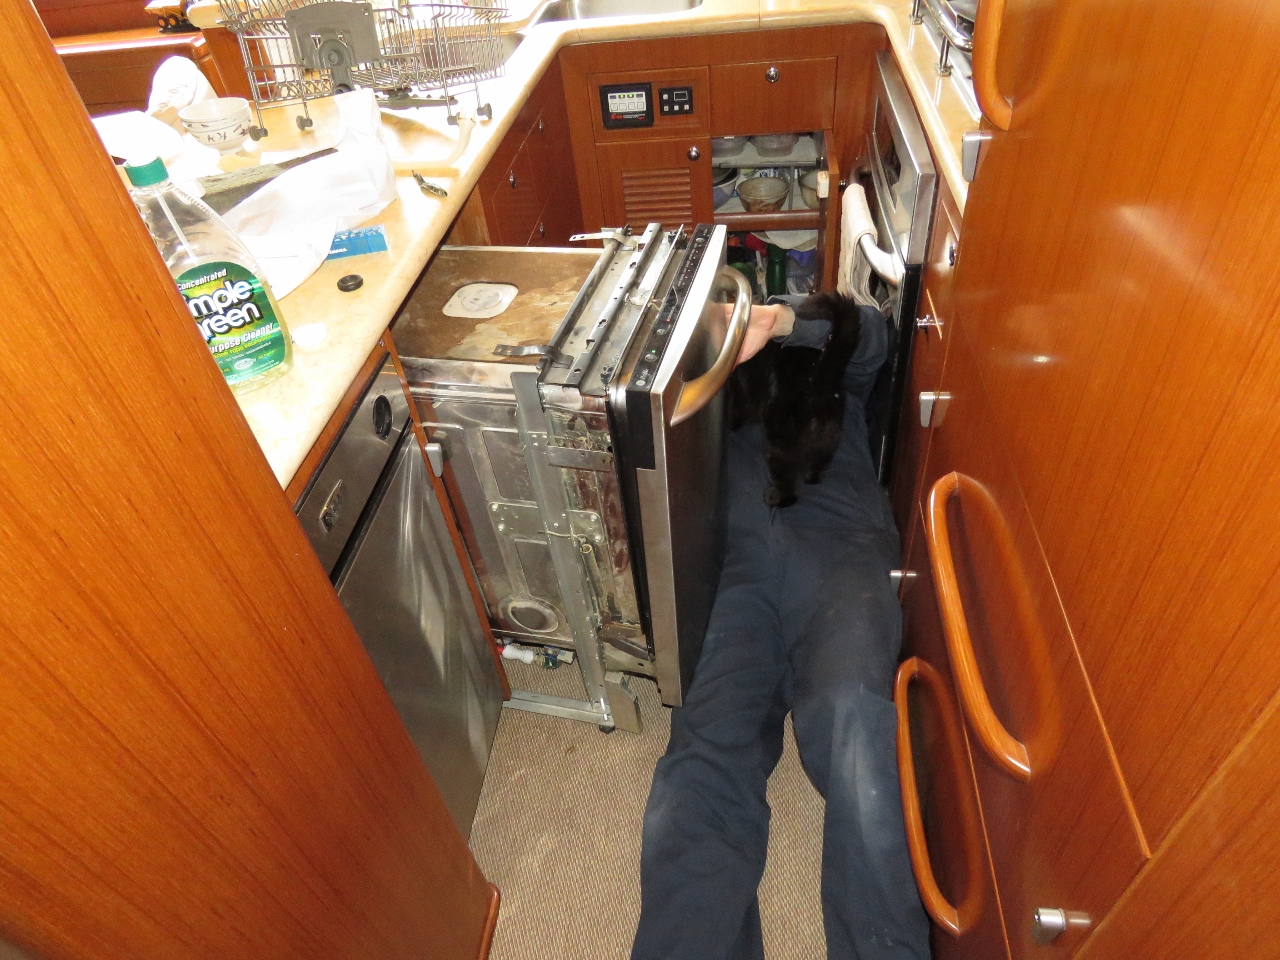 |
Dishwasher
Position: 63°26.00’N, 10°23.29’E
James working on replacing the dishwasher main conduit with a replacement part we brought back from Seattle while Spitfire inspects the work.
|
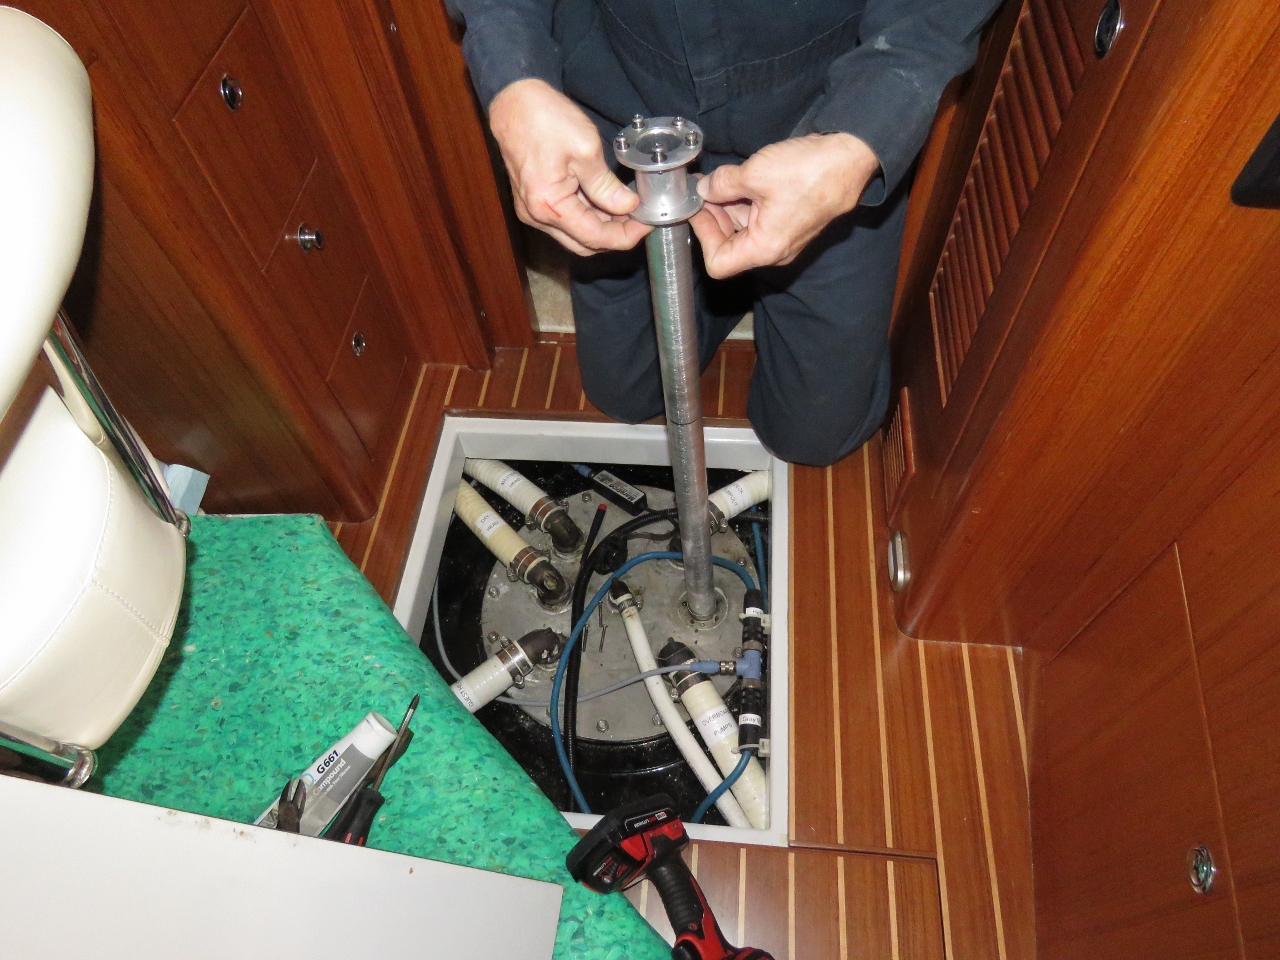 |
Focus Tube
Position: 63°26.00’N, 10°23.29’E
One of the long items that went in the cardboard box we brought back was a Maretron TLM100 focus tube for the black water tank. The focus tube is essentially a tube that extends to near the bottom of the tank with small holes in the bottom to allow fluid to enter and one at the top to allow the fluid level in the tube to equalize with the surrounding tank. This approach prevents toilet paper floating on the top of the effluent from scattering the ultrasonic beam being used to measure the fluid level.
We have used the TLM100 with great results on our freshwater and grey water tanks but it rarely works on the black water tank. Over the years, we have found there are some types of toilet paper that seem to work well and allow a good level reading but, since we’re never in the same region long and we haven’t come up with any reliable way of telling if a toilet paper was going to sink and/or breakdown quickly, we generally get poor results in reading black water level. The focus tube seems to have solved this issue and we’re getting very stable and accurate readings. What remains to be seen is how long an aluminum tube lasts in the caustic environment of a black water tank. So far, we’re impressed with how well it’s working and wish we had made this change years ago. |
 |
Fuel Gauge
Position: 63°26.00’N, 10°23.29’E
The fuel gauge on our new tender is an analog gauge that reads poorly. We want to move to a Maretron TLM150 NMEA2000 gauge to match the rest of the tender electronics and we’re hoping for more accurate level readings. The tank is very shallow and long, so it’s a hard tank to read levels in accurately and it’s made more difficult by the angle of the tank changing in operation.
The existing tank sensor uses a 1.5″ screw-in thread and someone at the AB factory has been spending too much time in the weight room. James applied enormous force on that sensor and it simply wasn’t even going to come out. So in Seattle we picked up a 2″ socket so we could apply more force and get this job done. |
 |
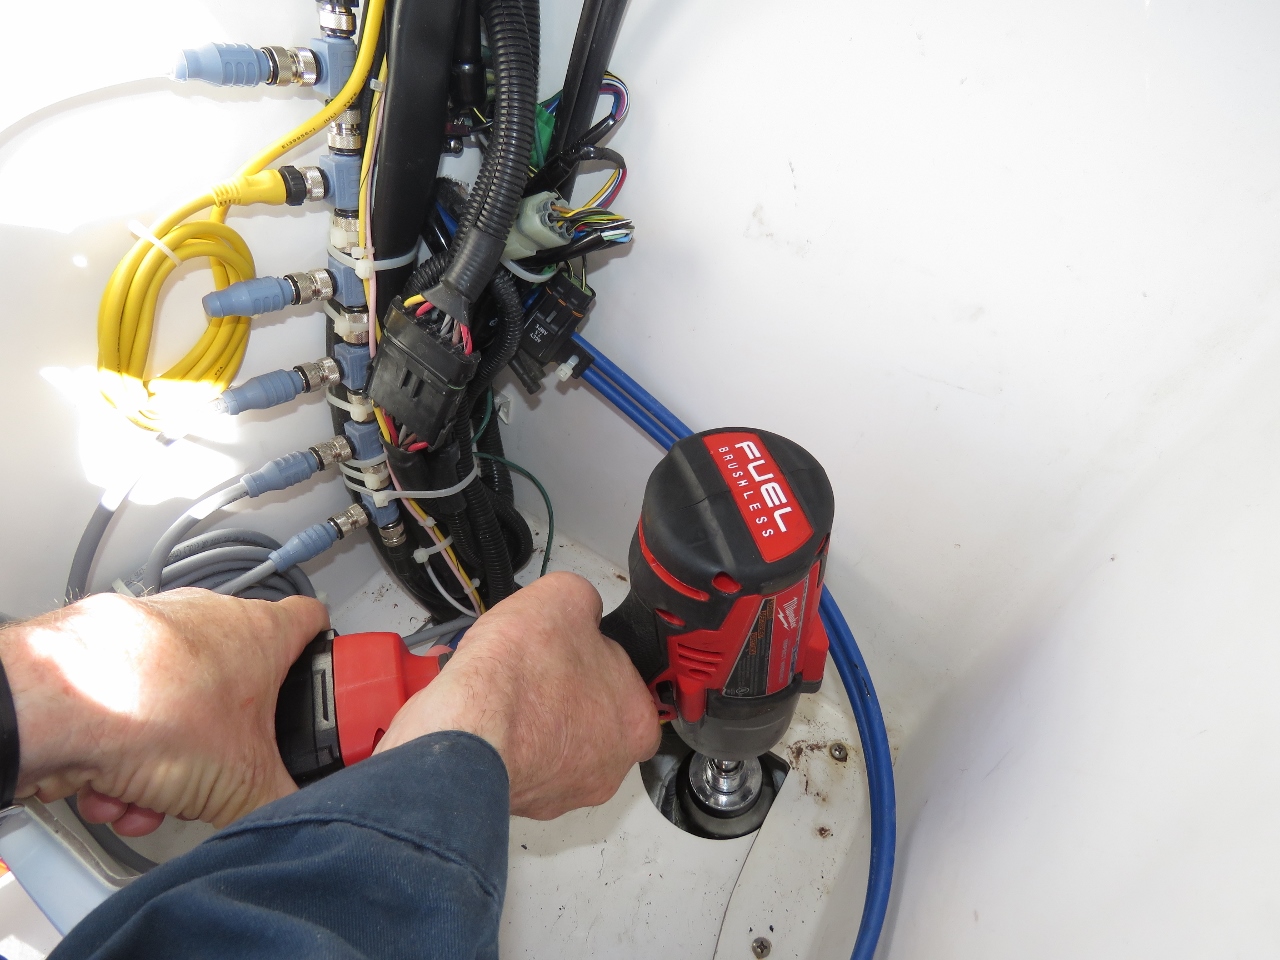
Impact Wrench
Position: 63°26.00’N, 10°23.29’E
Even with a correct-fitting socket, we couldn’t apply enough force in the restricted area inside the tender console to get the fuel sensor out. We eventually applied a Milwaukee impact wrench that we know from past experience has sufficient power to twist off a 3/4″ steel stud. It eventually did the job and we got the analog fuel sensor out, but the required forces were astronomical. We can now screw in the Maretron 1.5″ thread to SAE 5 bolt adapter, size and install the focus tube, and finally, install the TLM150 to measure gasoline level.
|
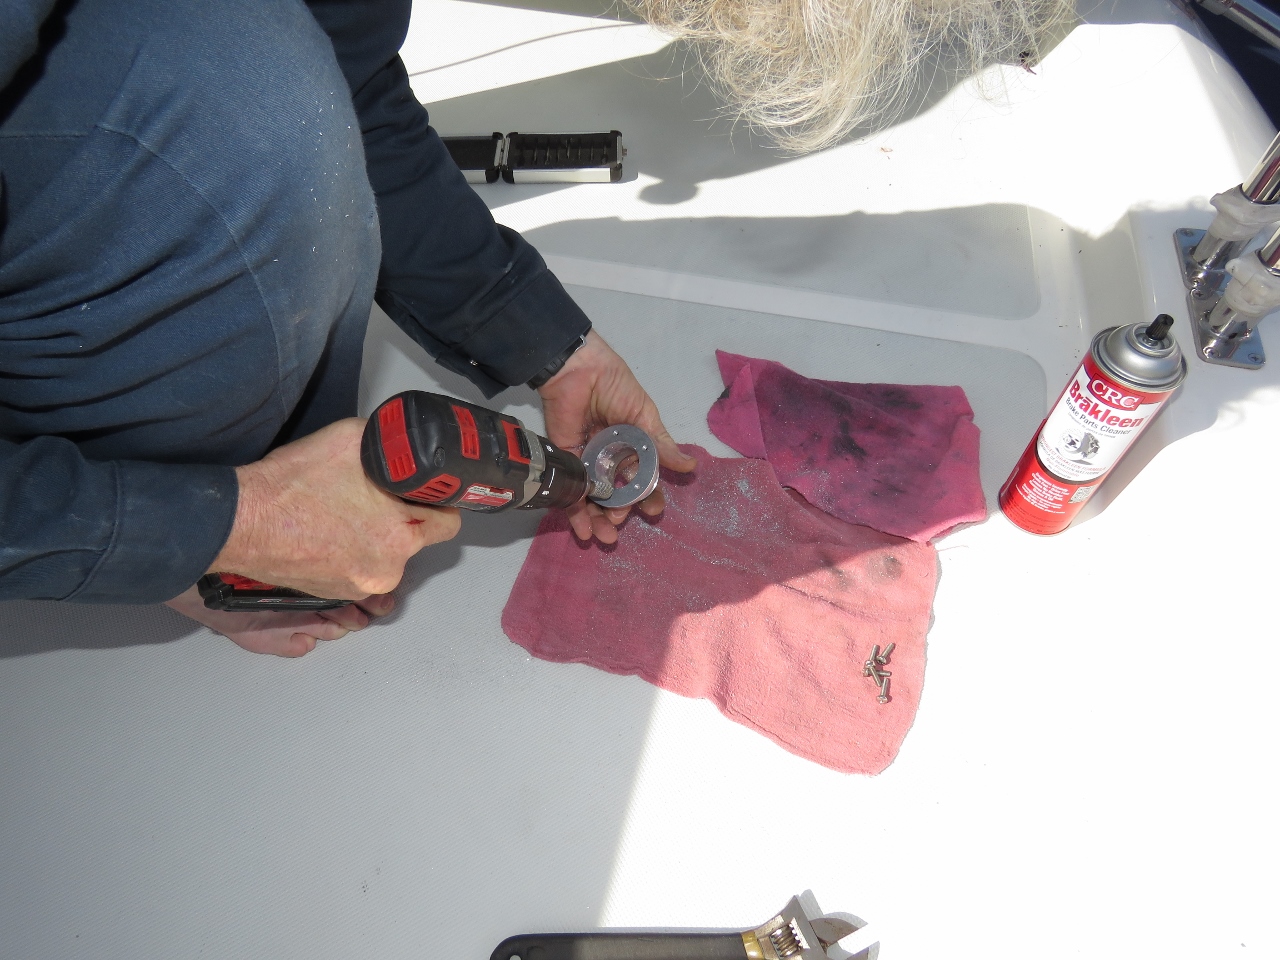 |
Fuel Focus Tube
Position: 63°26.00’N, 10°23.29’E
Earlier we explained how the focus tube helps an ultrasonic sensor get reliable black water readings. In a fuel application, the fuel is without floating debris but the focus tube still adds a couple advantages: 1) allows the sensor to only see reflections from directly below the sensor (hence the name “focus” tube), and 2) the sensor is also spaced 2″ above the tank top. This feature is referred to as dead-band elimination. Ultrasonic sensors have trouble reading levels where there is very little space between the sensor and the fuel level. This is solved by extending the focus tube up 2″ so that “full” is actually 2″ below the sensor where it can accurate read the level.
We bought a Maretron adapter to install it, but the inside hole was manufactured too small to allow the focus tube installation. So we needed to remove the adapter from the tank, re-machine the inside hole, test it, and re-install the assembly. |
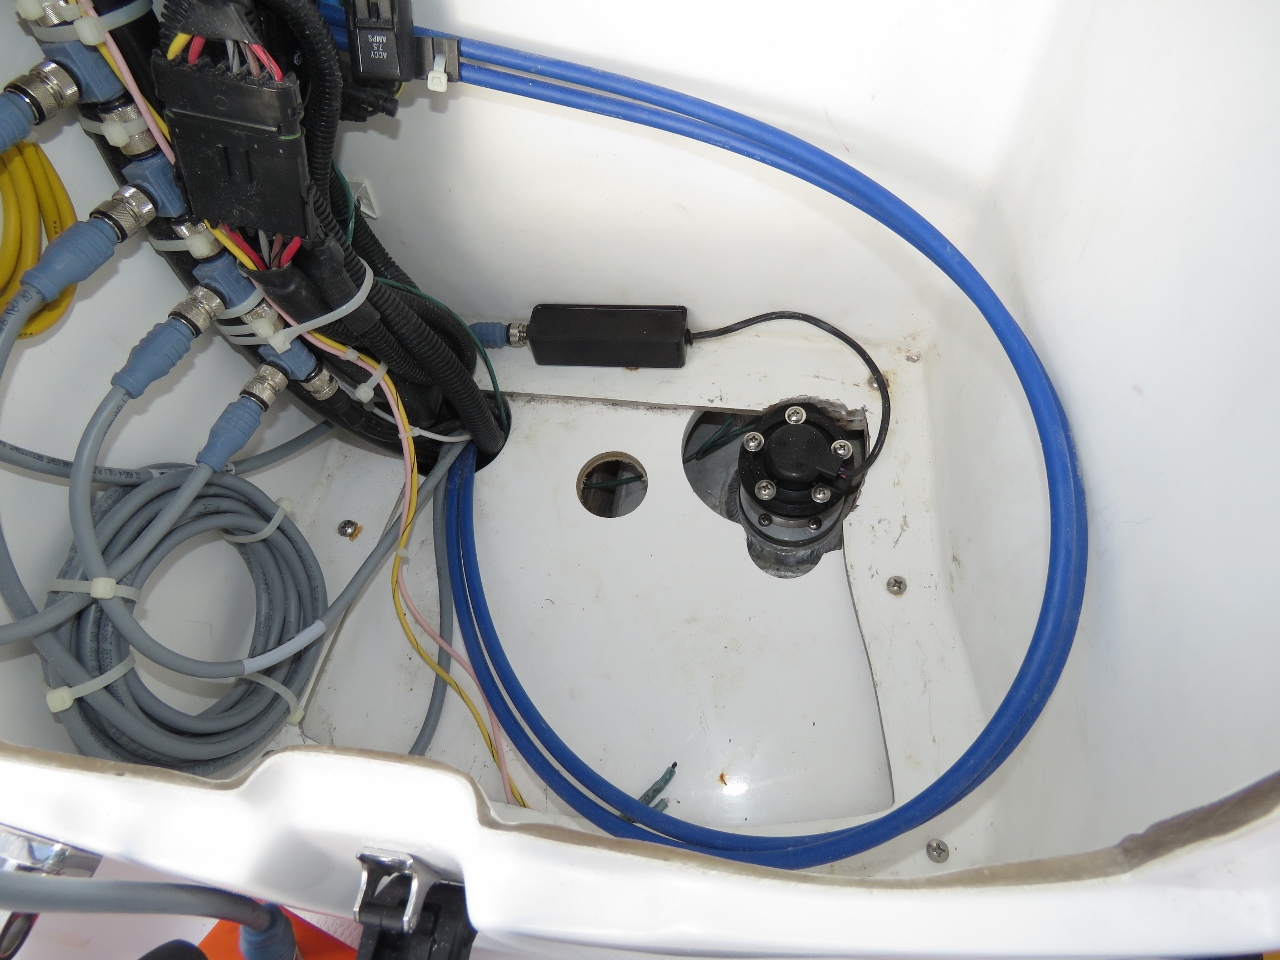 |
Final Product
Position: 63°26.00’N, 10°23.29’E
The final TLM150 installed on the tender at top right. We’ll have to drain the tank and calibrate it before it’s fully operational. We know from past experience the TLMs are quite accurate, but it remains to be seen how well it does with a long, shallow tank where the angle changes in operation as the tender goes on plane.
|
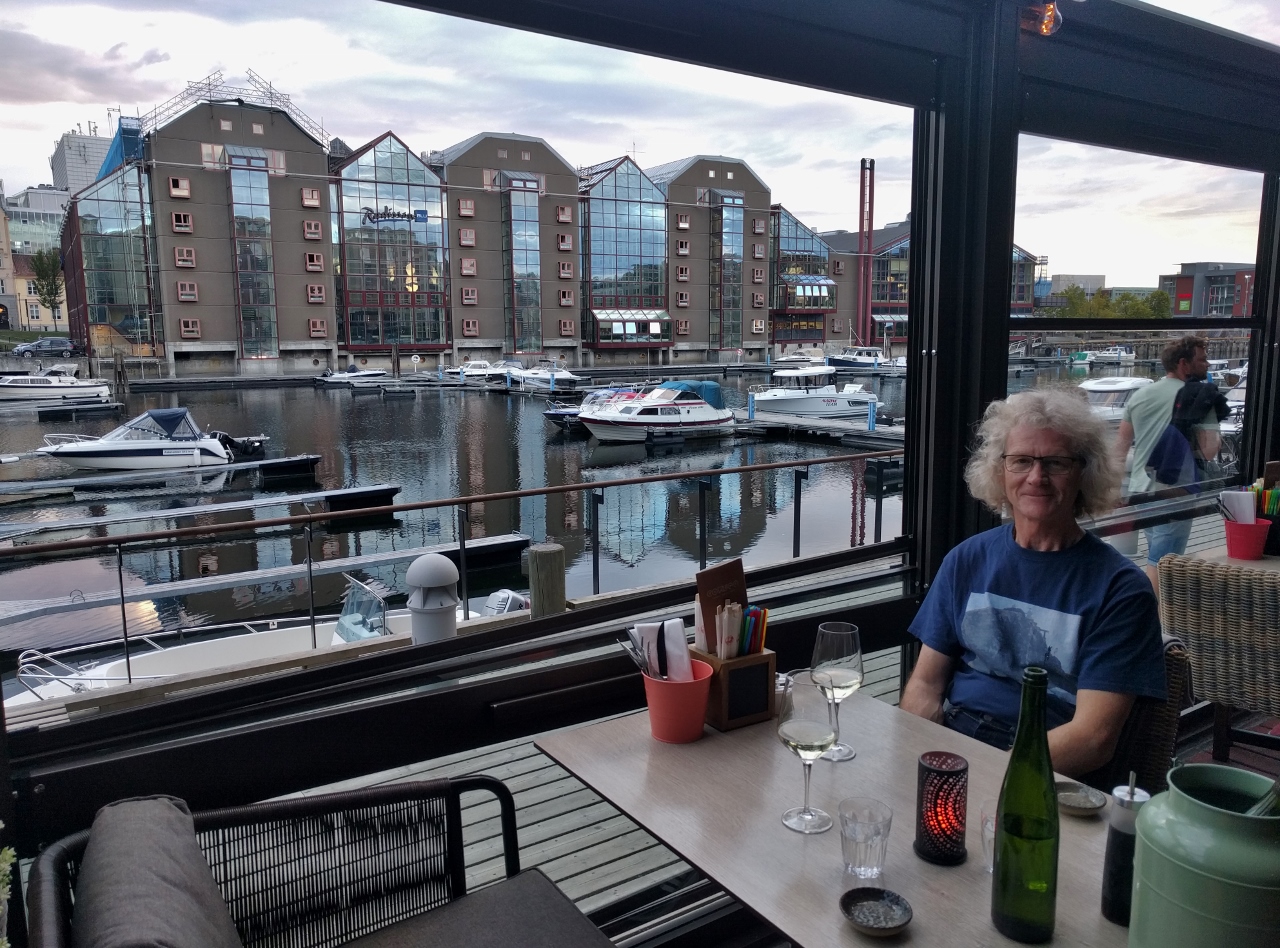 |
Happy Birthday!
Position: 63°25.97’N, 10°24.41’E
We took a break from installing all the new gear to have a birthday dinner for James canal-side at CowSea.
|
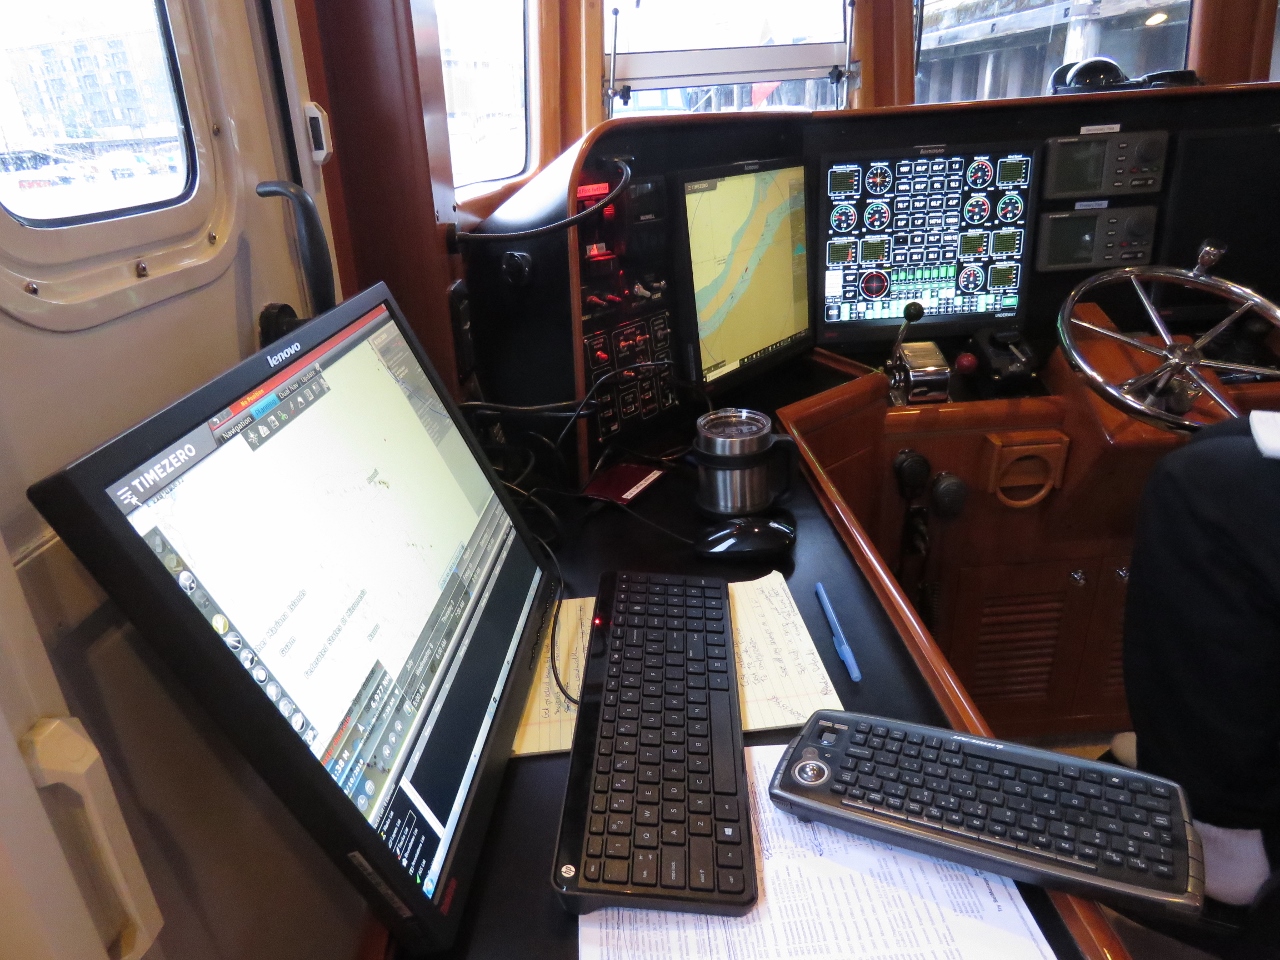 |
TimeZero Issues
Position: 63°26.00’N, 10°23.29’E
We’ve mostly got the new navigation computer up and running, except for our chart-plotter TimeZero. The 3.3 version we’re installing is more recent than the version on the old computer and includes a database format upgrade that fails in trying to process our existing data. We also tried importing an exported copy of the data, but that ran overnight and seemed to be hung. We suspected that the large size of our track data was the culprit.
In order to get the old system back running again, we hooked up a spare monitor. To recover the data, we brought up TimeZero on the old computer, deleted all the tracks, re-exported the rest of the data and transfered it over to the new system. This worked, and we then imported the tracks via GPX files created from the ones we post to the web site. |
 |
Air Freight
Position: 63°26.00’N, 10°23.29’E
Our new steering pump finally arrived via air freight today. It was sent five-day UPS air freight but took ten days. Nonetheless, were still very happy to see it and will install it over the weekend.
|
 |
Craning Aboard
Position: 63°26.00’N, 10°23.29’E
We ran a trailer strap around the steering pump box and through a looped line to crane the package down to the swim step.
|
 |
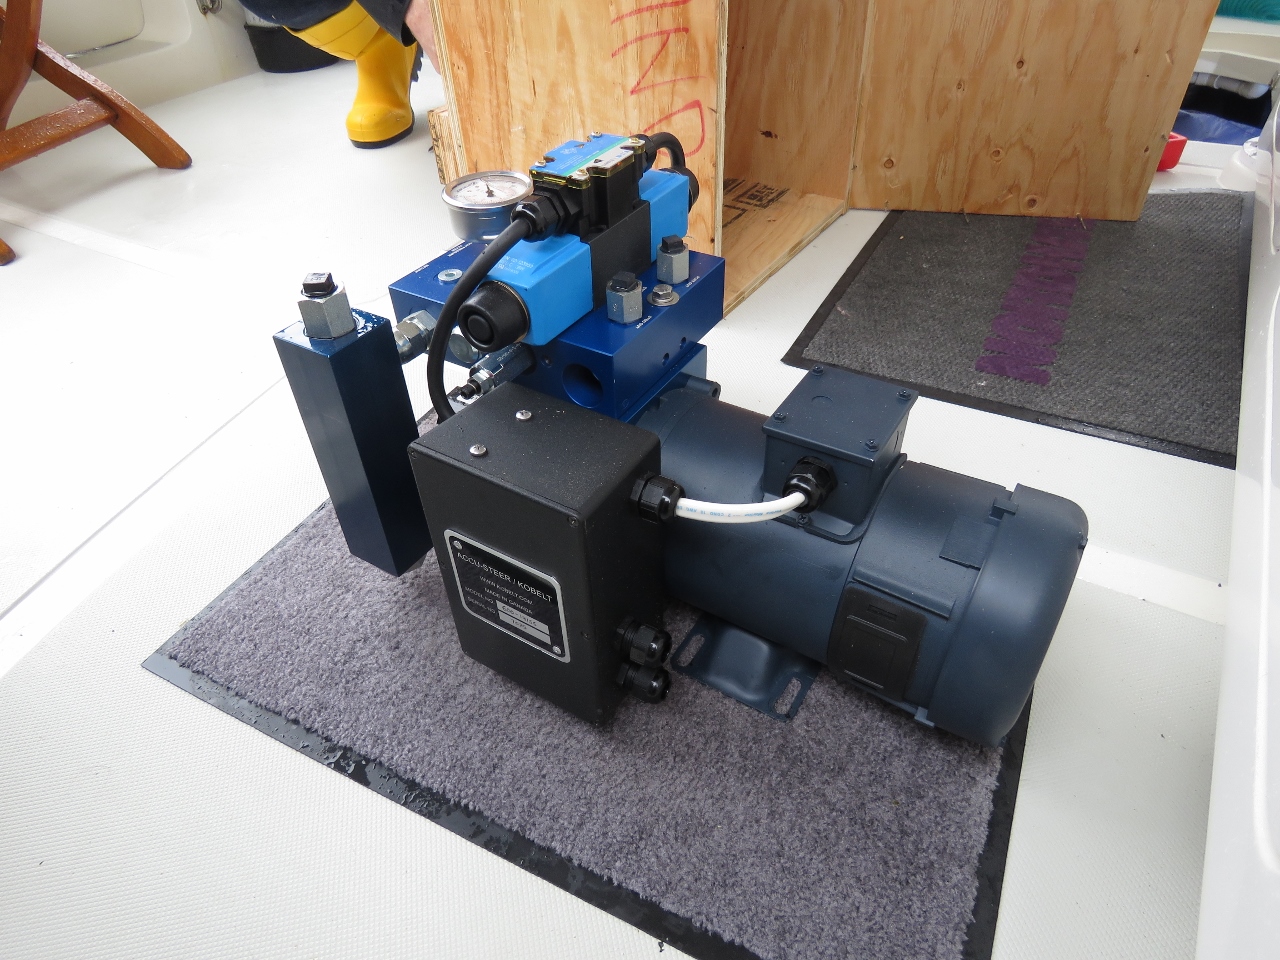
Accu-Steer HPU 200-24
Position: 63°26.00’N, 10°23.29’E
Our new Accu-Steer HPU 200-24 is a beast. After talking to many in the industry, we’ve learned the Accu-Steer HPU-212 200 pumps we have installed basically are a very poor pump and there have been many reports of early failure due to bearing failure and oil leaks. The HPU-200 and HPU-300 have excellent reputations so we went with the HPU-200 as a replacement, which has the same output as the HPU-212 200 but has a reputation of being a better built pump.
|
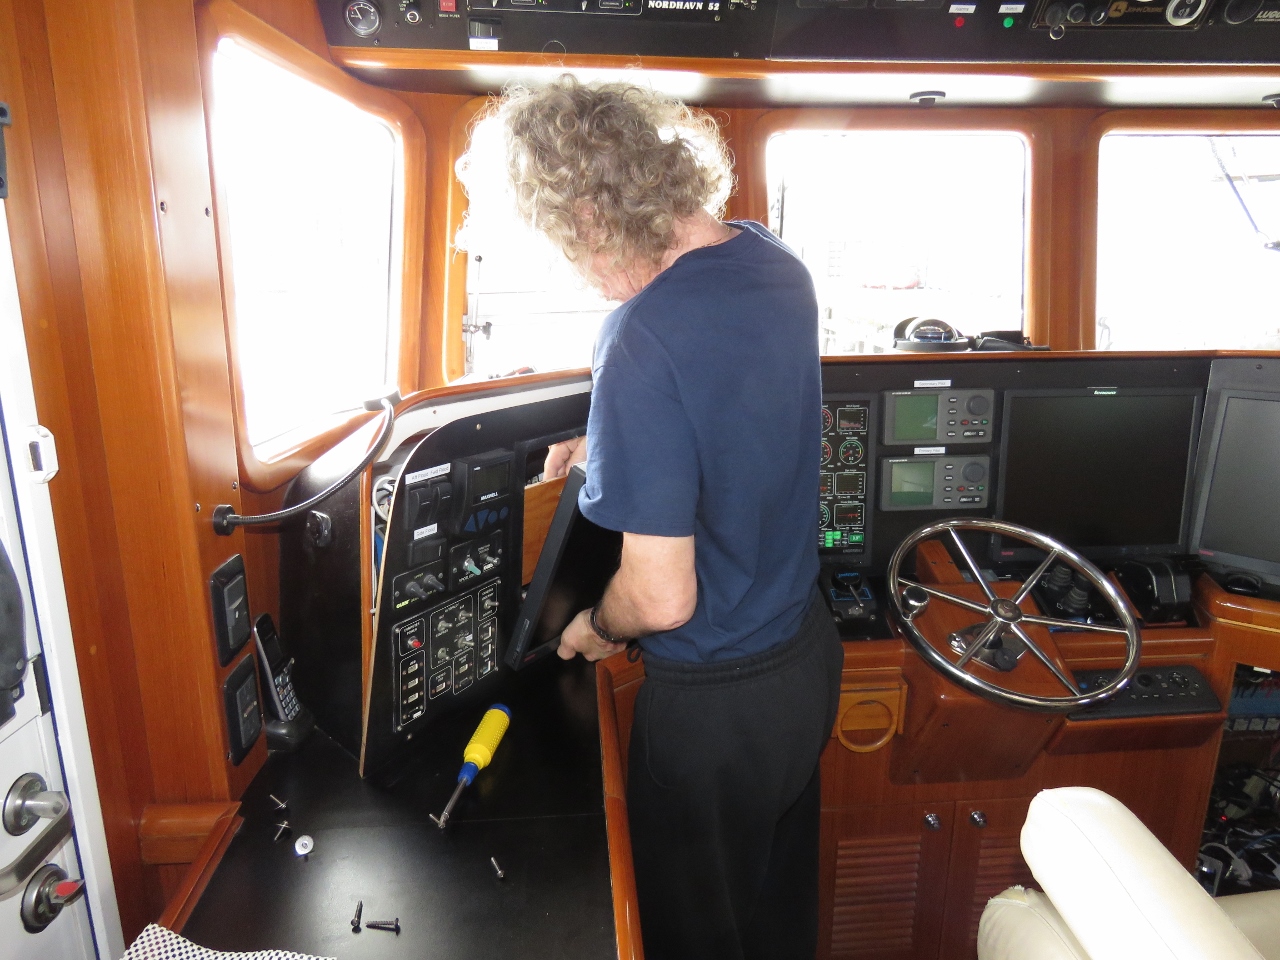 |
Monitor Replacement
Position: 63°26.00’N, 10°23.29’E
When we had the temporary monitor out to work through the TimeZero issues, we realized it was much brighter than our leftmost monitor, which has been in place for eight years. In fact, when we looked closely, we could see a ghost of all the text on the screen displayed slightly offset and making the text look fuzzy. We swapped out the monitors and the new one is sharp and bright.
|
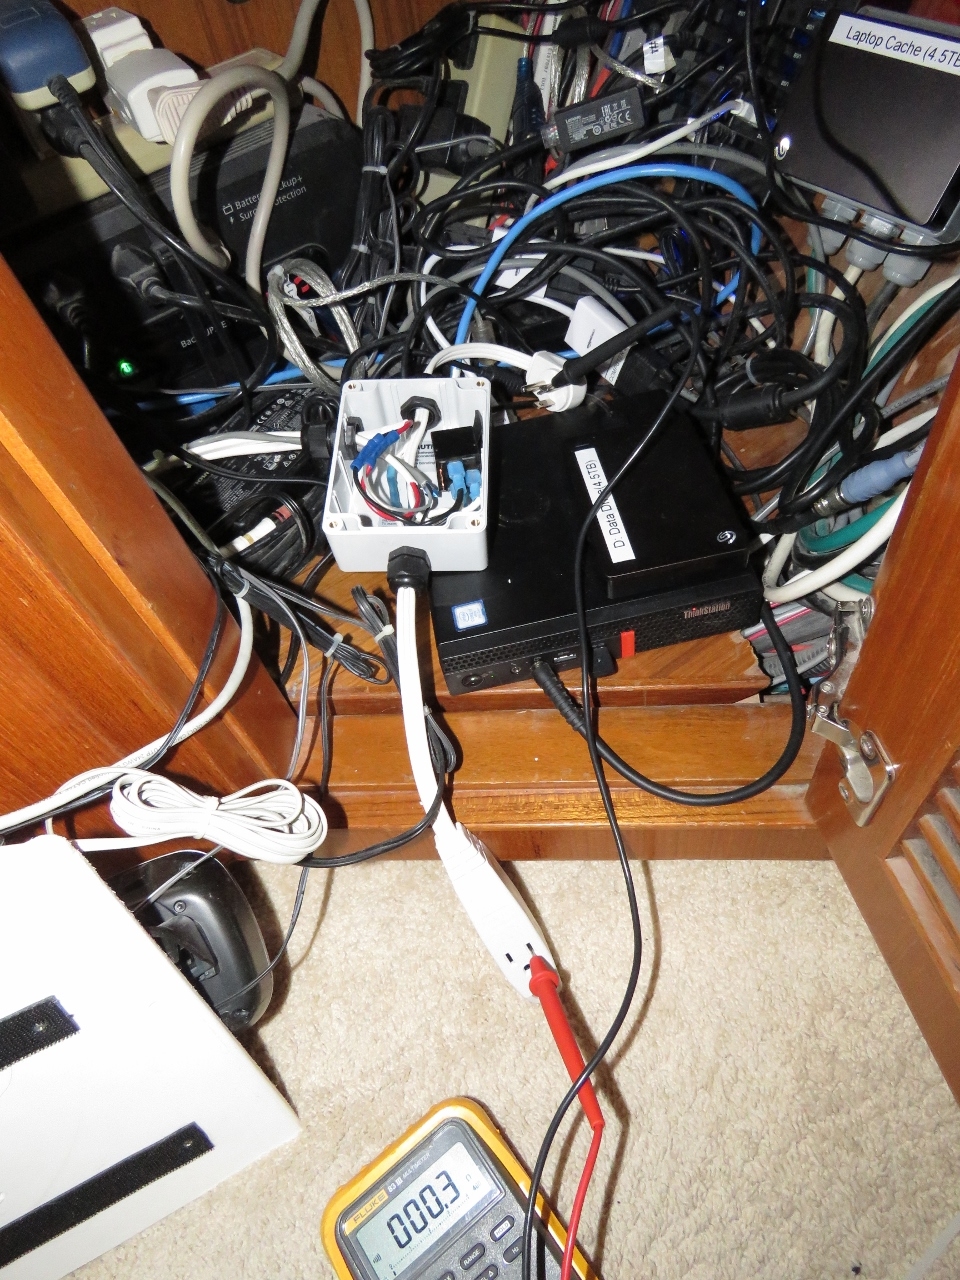 |
Reset Switch
Position: 63°26.00’N, 10°23.29’E
The old nav computer had an external off/on switch that we used for manual resetting of the system and our automation system used to force a reboot if the system locked up or was otherwise unresponsive. This worked well, but the new nav computer has no provision for an external reset switch. We could take it apart and install one but that defeats the primary goal of the approach we are taking with the new computer. We want it to be a single simple system with all devices and all disks except the boot disk external. The idea is we can just drop in a replacement in minutes if there is a failure.
So, sticking to that goal we needed a way force a reset without being accessing the power or reset lines inside the system. What we did was construct a relay-controlled 120V power socket that the old manual reset switch controls and the control system can use for an automatic reset switch. The new approach is functionally identical, but requires no changes to the Lenovo P320 Tiny computer. |
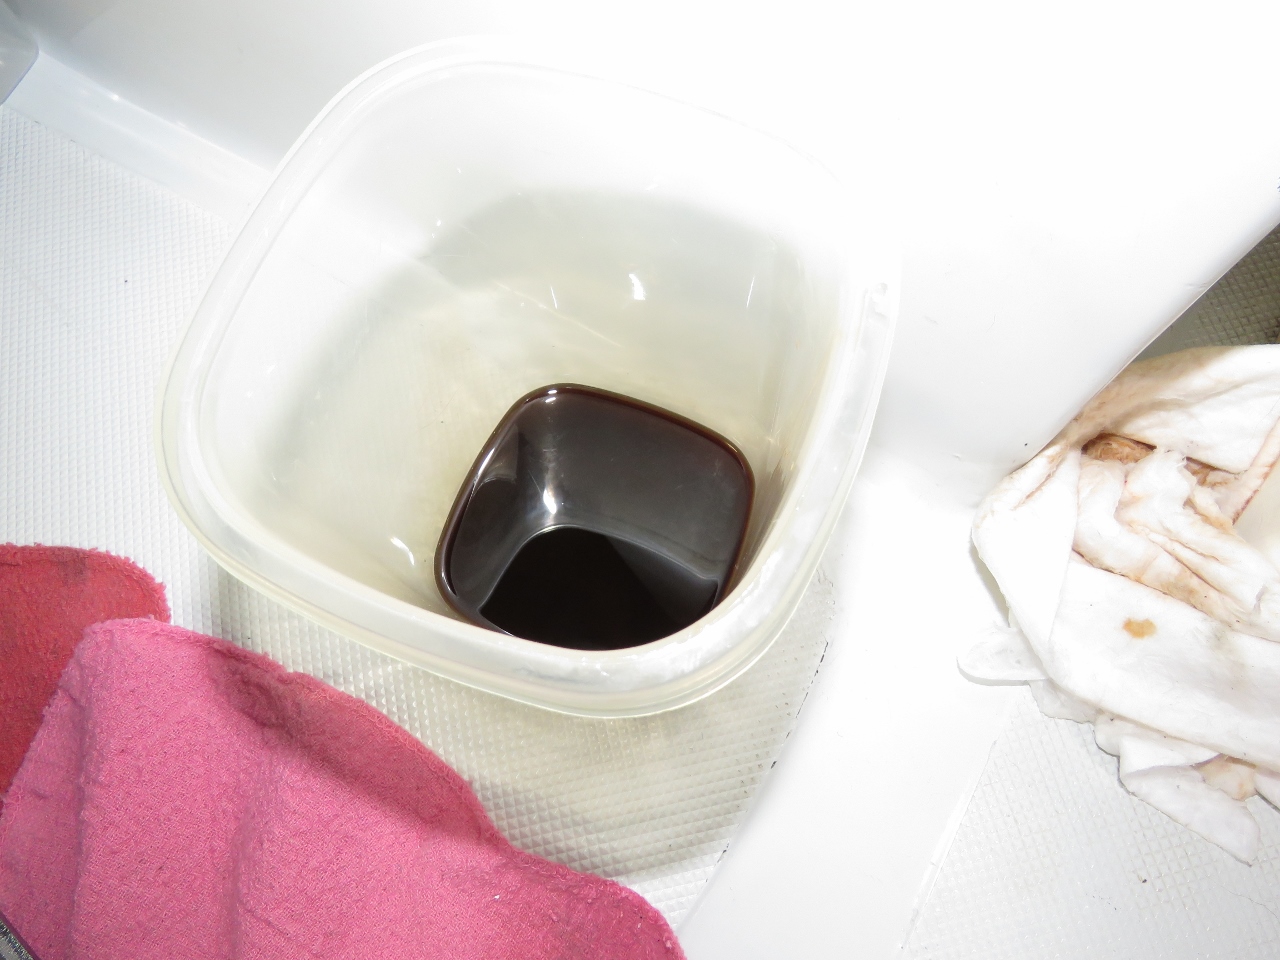 |
Overheated Steering Fluid
Position: 63°26.00’N, 10°23.29’E
Evidence that we were down to minutes to go before the steering pump stopped operating, this is the steering oil. It’s normally bright red automatic transmission fluid but what was in there was ruby to light brown. What has happened is the both pumps have experienced bearing failure. Apparently they can last just about exactly 4,900 hours. The first symptom is slightly more noise. The next symptom is a minor oil leak. What happened next is one pump started to run slower and slower as the bearing bound up so we stopped using it. Then the other pump began to run slower as its bearing bound up. But, it wasn’t yet leaking, so we stuck with that pump.
Then one winding burned out on the armature which meant if the pump was stopped in that position, it wouldn’t restart. But usually it stopped in another position and kept working fine. If it refused to start, it would start fine if the motor was turned a few degrees. But after a couple of weeks all the windings burned out and we switched to the other pump. It kept running but was sufficiently hot to darken the oil. These pumps are toast. |
 |
Temporary Mount
Position: 63°26.00’N, 10°23.29’E
The new steering pump temporarily mounted so we can test with it.
|
 |
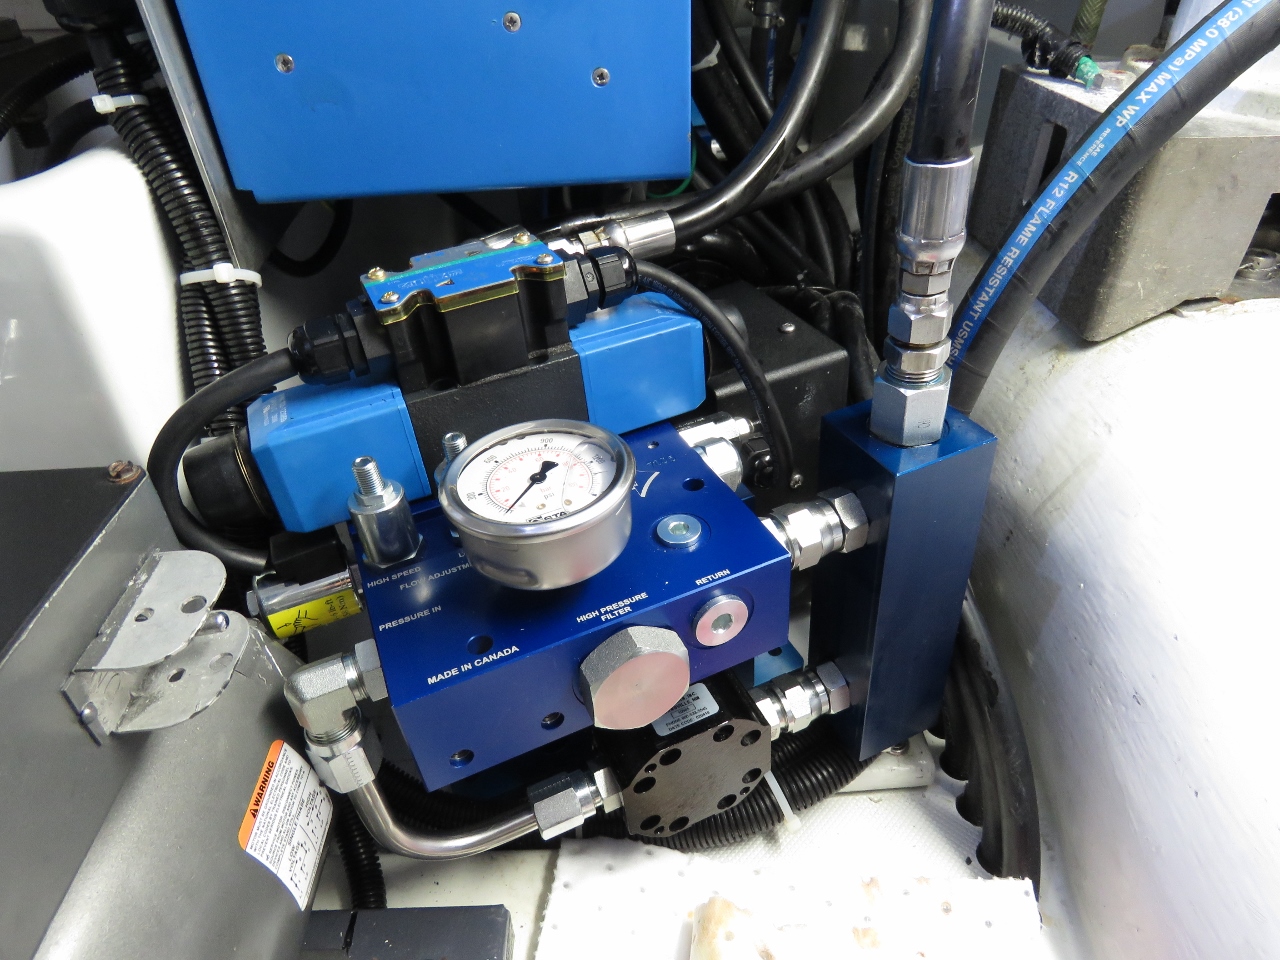
Steering Manifold
Position: 63°26.00’N, 10°23.29’E
This is one of the many examples of PAE attention to detail. We have a dual steering pump system where one pump is new and the backup pump is operational but leaks quite a bit. The PAE-designed steering manifold allows either pump to be removed from the system by closing valves. This stops the leak and allows the new pump to operate completely independently from the backup pump if needed. We could even have one pump entirely off the boat and being worked upon while we continue to operate on the other pump. It’s a really nice design and make the boat MUCH easier to service.
|
 |
And We Have Steering!
Position: 63°26.00’N, 10°23.29’E
The system bled quickly and was easy to get running again. The new pump works perfectly and we now are back to one good pump and a leaking backup. Our second new pump is on the way to the Netherlands via less-expensive sea freight and we’ll receive and install it when we’re in Amsterdam over the winter. When we change it, we’ll also change the oil again to get back to nice clean red fluid.
|
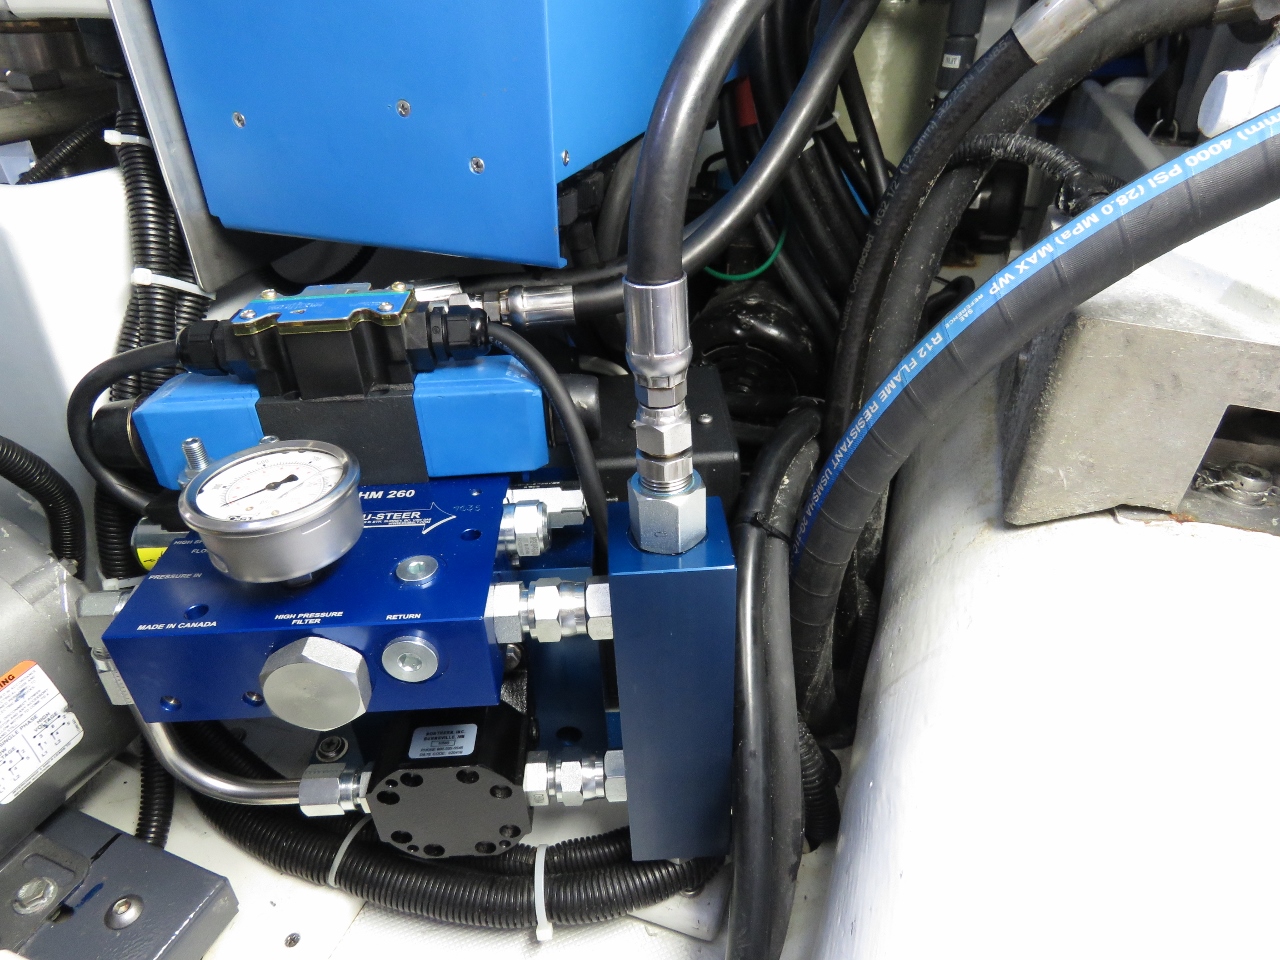 |
Permanent Mount
Position: 63°26.00’N, 10°23.29’E
The new pump is unfortunately slightly larger that the old pump and won’t fit in the same way, parallel to the stern. But we were able to mount it on a slight angle with 1/4″ clearance between the SCUBA compressor and nearby bulkheads.
|
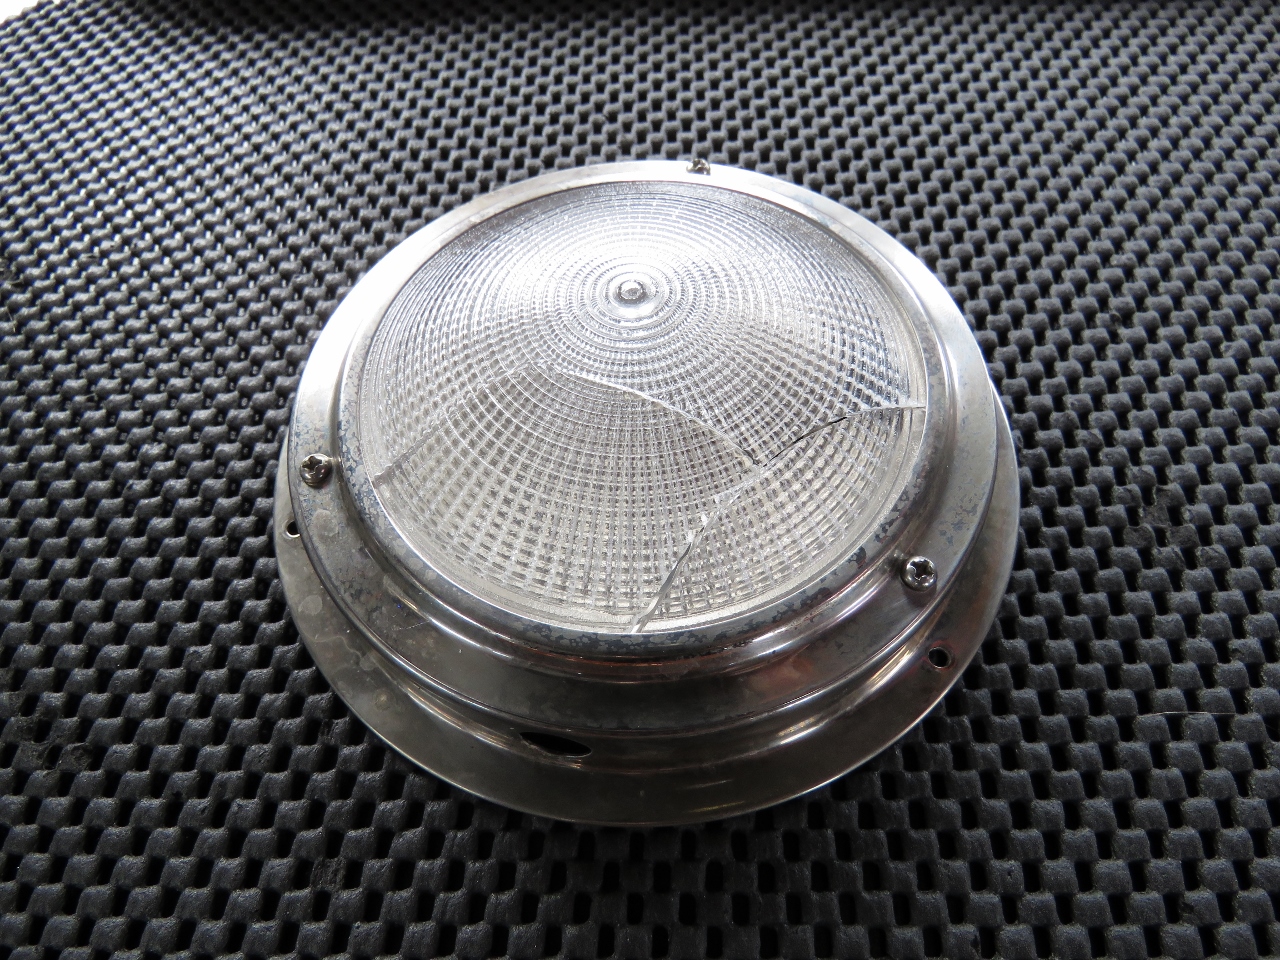 |
Broken Light
Position: 63°26.00’N, 10°23.30’E
This is the second time that James has bumped his head and broken the fixture of this light in the lazarette. Last time he replaced it, so he could bump his head again. This time, it’s coming down. We have ample fluorescent lights and several additional LED floodlights, brightly illuminating the lazarette, so this light is unnecessary.
|
 |
New Computer
Position: 63°26.00’N, 10°23.29’E
The new Lenovo ThinkStation P320 Tiny navigation computer in place inside the case of the old computer. It’s so small! We kept the old computer case as a platform to support the chargers, telephone and other accessories mounted higher in that cabinet.
|
 |
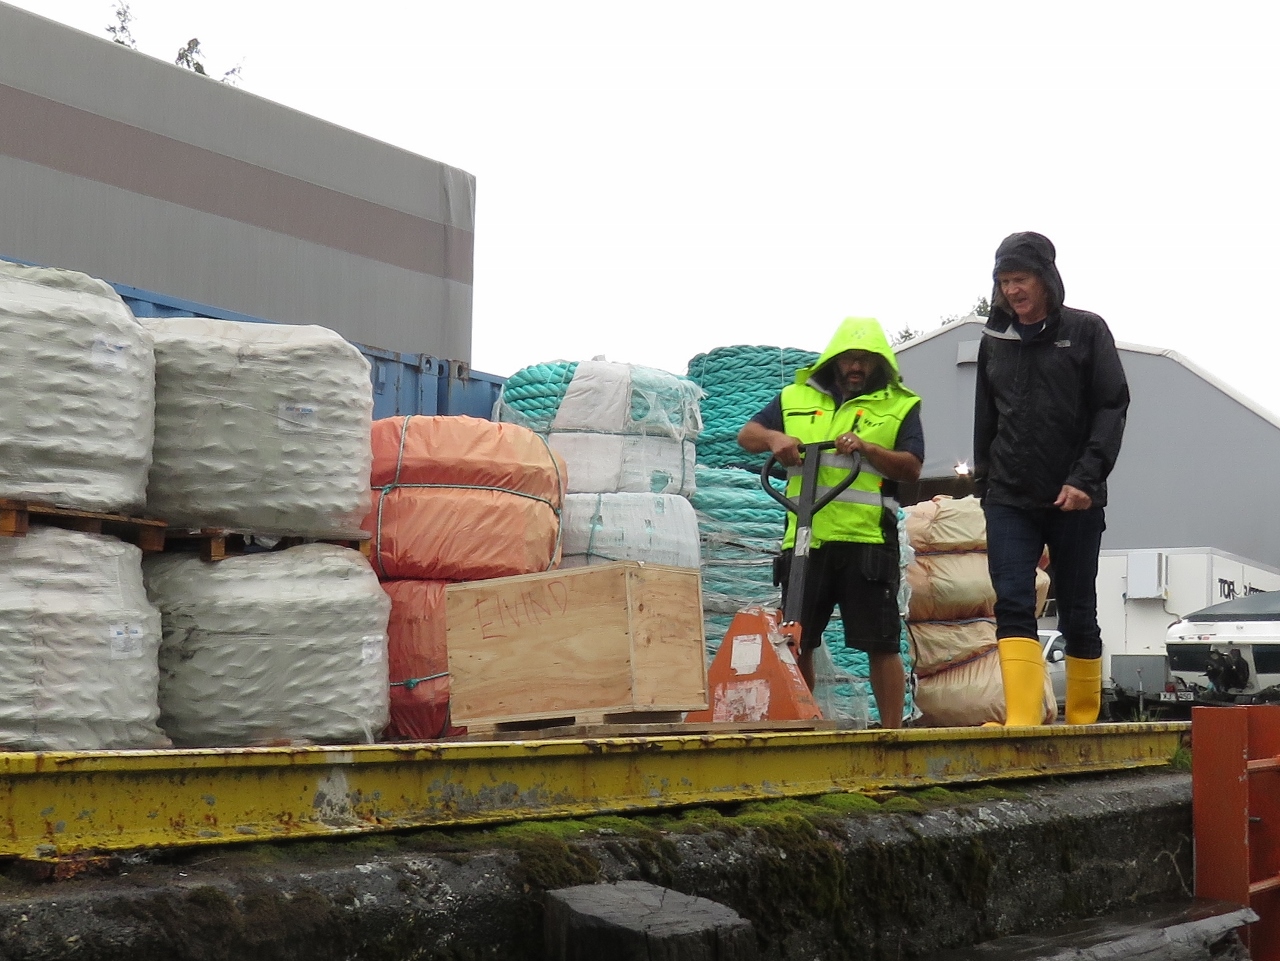
Folding Cart
Position: 63°26.00’N, 10°23.29’E
Jennifer unpacking our folding cart to make a couple of big grocery shopping trips before we leave Trondheim. You can see beautiful large ropes behind Jennifer. The business that owns the warehouse behind sells to the fishing industry and their warehouses are full of interesting goods. But they have a particularly large amount of ropes in various sizes.
|
 |
Meny
Position: 63°26.11’N, 10°24.69’E
Filling our cart at the excellent Meny grocery store in Solsiden Mall. The tan grocery bags are Earthtote Reusable Bags from reuseit.com. We love them—they last super-well (we’ve never replaced one yet), we can pack them right to the top, and they can handle very heavy loads. When transferring groceries to the boat (and sometimes to the dinghy first), it’s much more convenient to have a few large sturdy bags than many smaller ones that might rip and risk dropping items in the water. We fill the bags as we shop with the cart, partly to keep things organized, but also to maximize what we can carry and speedup the checkout process.
|
 |
Raspberry Pi
Position: 63°26.00’N, 10°23.29’E
The Raspberry Pi mounted above the helm (at center directly below the two vertical black hoses) is the original one that was put into production on Dirona during our 2015 Indian Ocean crossing. It picked up more features, more connections, and become an error prone mess of directly-connected wires. James made a mistake working on it and damaged the Pi—this is the first Pi damaged in production while working on it, but it was a hard one to change. The other three Raspberry Pis on the boat connect all signalling with a single 40 pin ribbon cable so they can be changed in 5 minutes. All we have to to is switch the signal cable, power cable, networking cable, and storage to make a new one operational.
Since the original Pi needed to be changed, James redesigned the system to be as simple as the others. It took more than a half day to get it into a plugable form. Then the job ended up growing to a full day since two of the spare Pis had manufacturing defects. One had pins 6, 7, & 8 with faulty pull-up resistors and the other had pin 20 with a faulty pull-up resistor. This shouldn’t have taken more than a few minutes to figure out but he naively assumed that “new” meant working and gave up a lot of time. Lesson learned: test before installing. |
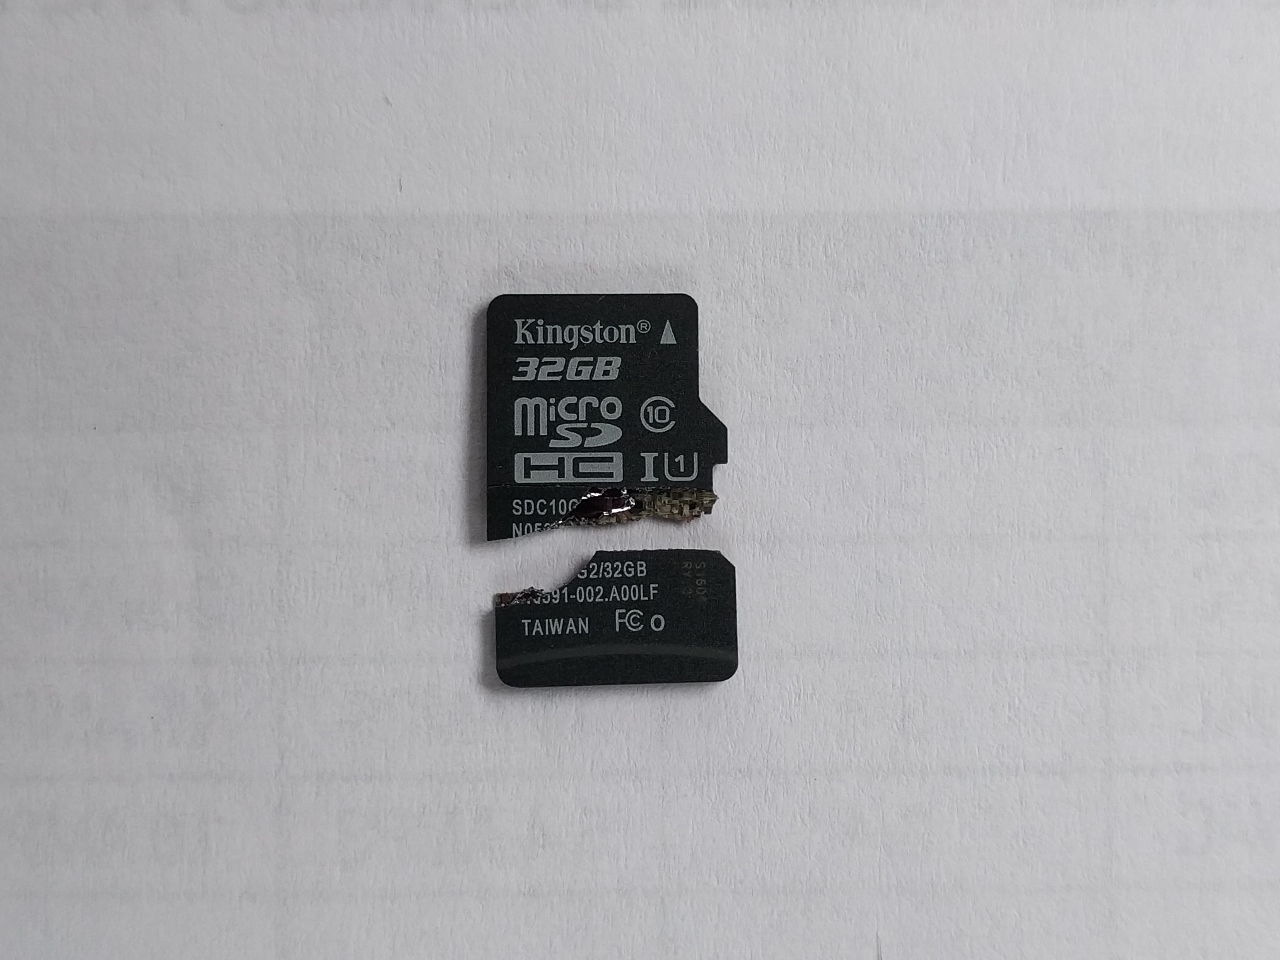 |
Memory Card
Position: 63°26.01’N, 10°23.29’E
While installing the new Raspberry Pi, James caught the storage card on the edge of the case and broke it when snapping the new Pi into place. He has a backup memory image, so it’s not much work to replace the storage, but it does take time to transfer the entire contents to a new storage card.
|
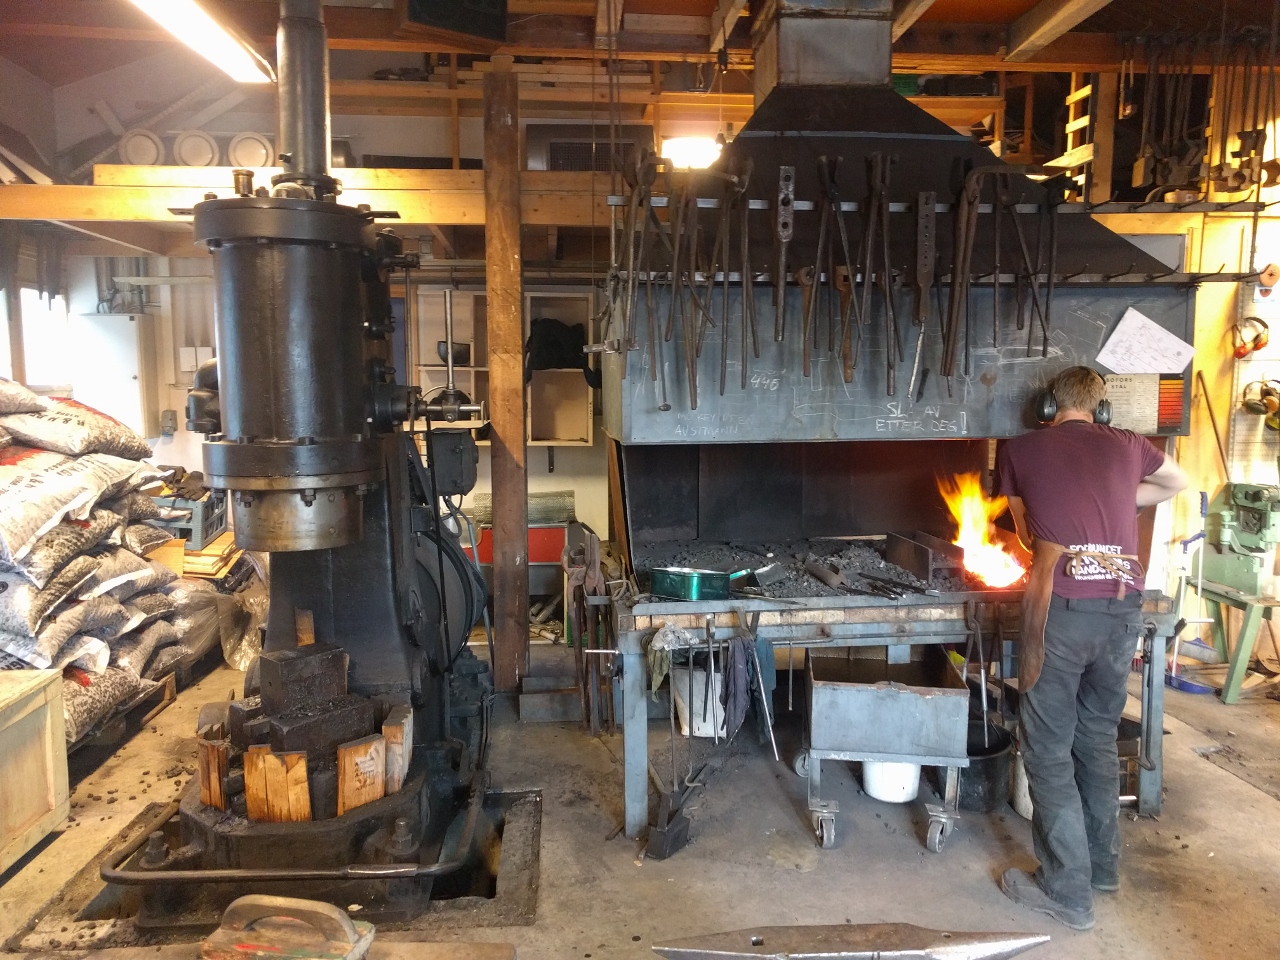 |
Forge
Position: 63°26.14’N, 10°23.78’E
On our way back from dinner, we noticed someone working at a metal forge in one of the waterfront buildings and stopped in to chat. He was generous with his time and showed us in detail how he was making a knife. What he was doing is folding steel back on itself and pounding it flat with the press to the left. He was repeating this process many times for both strength and the pattern it formed. He would then drive a chisel through the center of the folded steel block, making the pattern more interesting. Then he would form the final blade and acid etch it to bring out the pattern.
|
 |
Click the travel log icon on the left to see these locations on a map, with the complete log of our cruise.
On the map page, clicking on a camera or text icon will display a picture and/or log entry for that location, and clicking on the smaller icons along the route will display latitude, longitude and other navigation data for that location. And a live map of our current route and most recent log entries always is available at mvdirona.com/maps. |
James, what would you guess the operating months and hours to be on your newer Lenovo computer to be before issues would arise to cause its replacement. Would cooler climes be beneficial for operating life.?
As you’ve heard countless times, you guys have the boundless skills and energy to accomplish many things we mere mortals envy. Mother time will eventually intrude. I ask because having gotten to know Tony Fleming and how he keeps going seems quite doable with a trusted smart and dedicated crew member. Your thoughts?
We usually get 3 to 4 years out of a laptop and Lenovo’s are fairly well made. My last one was way shorter — the control key broke but, with a keyboard replacement, it would go another couple of years and even with a cracked control key, it’s functional. Right now it serves as the backup for Jen and my laptops.
We will definitely slow down over time and we already have a bit. Dirona will get harder to service but it’s pretty easy to operate so I suspect we’ll be able to keep going with it after we slow considerably assuming we are still having fun. We chose a smaller boat partly to be able to afford to operate it comfortably but also so there would not be need for crew. The upside is crew is not needed but the downside is there is no place for crew. If we ever decided we wanted to operate with crew, we would definitely need a bigger boat.
Hi James,
Been following your blog for a long time and I really like the hands on approach. We are specifying our own build at the moment and like the Lenovo tiny pc solution you have. Would you mind to share which spec you bought?
Sure Ed. It’s a Lenovo P320 Tiny:
https://www.lenovo.com/us/en/think-workstations/thinkstation-p-series/ThinkStation-P320-Tiny/p/33TS3TP320T
We ordered it with 32GB memory, a 500GB SSD, and an Intel Core i7-7700T (2.96Ghx, 4 core). A 256GB SSD would have been 100% fine and if we were doing it again, we would go wiht 256. A 16GB memory would be fine as well but the memory consumption of everything grows with time so, if we did that one again, we would stick with 32GB.
Thanks for the info. I keep studying your technical posts and take in account your rational when you have done something and hope I will limit my mistakes. The hours of research are not countable ?
I would imagine the yard that did the work will stand behind their workmanship and the engineered parts they supplied. Are the engine mounts good?
Yes, the mounts are excellent. Polyflex makes a good mount and we just changed them in 2016: https://mvdirona.com/2016/10/replacing-engine-mounts-take-two/.
The yard agreed to repair the problem at no further expense to me and lifted the boat a second time and the prop shaft went back to the machine shop. That work did help and it’s much more usable now but it still vibrates and the run-out is beyond ABYC specs. We decided to cut our losses and continue the trip rather than lift the boat for a third time. I’m not happy about it but, over the last nearly 20 years, we’ve never had a problem with a yard so arguably we have been lucky.
Last week, I just was contacted by the folks who did the work — they would like to invoice an additional $3,000, 6 months after I was paid in full, for work that still isn’t right. This is pretty unreasonable and kind of hard to put up with but, in answer to your question, no, they don’t seem willing to stand behind their work.
As a retired engineer I’m disappointed to read that, James. Personally, I wouldn’t pay anymore money as UK consumer law and supply of goods act might come into play on the grounds of non compliance with specification.
PS: is it feasible to retro fit a props shaft vibration damper as a temporary fix?
Thanks for the tips and your thoughts. In this application, I think it would be challenging to add a vibration damper given clearances involved. The ABYC spec for a prop shaft of this length is less than 0.007″ and it’s currently running 0.008″. It’s not as good as it was before the new shaft was installed and it’s worse that the manufacturer recommended spec but it’s more of a comfort thing that likely to damage the transmission or other equipment.
Your computer/electrical/mechanical skills never cease to amaze me. The systems you have installed are beyond impressive.
Thanks John. All the gear runs well but it’s good to be operating a more current nav computer. We probably made a bit of a mistake to run the computer from 20123 to 2018 — it’s just too long and, as the system gets out past 4 years old, windows updates become dangerous for it. Drivers aren’t tested on systems of this age — we’ll make 3 to 4 years old the end of the line for the nav computer and just replace it.
Hello!
On the shaft runout, perhaps it would be an idea to get a set of Keith Fenners rollers? It would make it easy to verify the work of the machine shop prior to installing the shaft. http://turnwrightmachineworks.com/the-wright-store/the-wright-roller-kits/
Clearly this should not be needed when using a good machine shop, but when you travel all over the world it might not be easy to know which machine shop is ok to trust wherever you might be at the time.
Good suggestion and I really like the Turn Write Machine Works site. Nice find. My hope is the next time work gets done, I have the right skills involved and the work is sufficiently accurate to meet specs. I’ll also have a look myself before it leaves the machine shop to avoid future disappointments.