Dronningruta is a strenuous (for us) 9-mile (15km) mountain loop walk between Stø and Nyksund with exceptional scenery. Dronnigruta means “The Queen’s Route”—the trail was named in honour of Queen Sonja of Norway who walked the trail in 1994. The pictures we’ve seen of the trail in the summer look beautiful, but the previous night’s snow added another dimension altogether. We’ve hiked all over the world and this was definitely the most spectacular trail we’ve ever walked.
Below are trip highlights from June 7th in the Vesterålen islands, Norway. Click any image for a larger view, or click the position to view the location on a map. And a live map of our current route and most recent log entries always is available at mvdirona.com/maps
 |
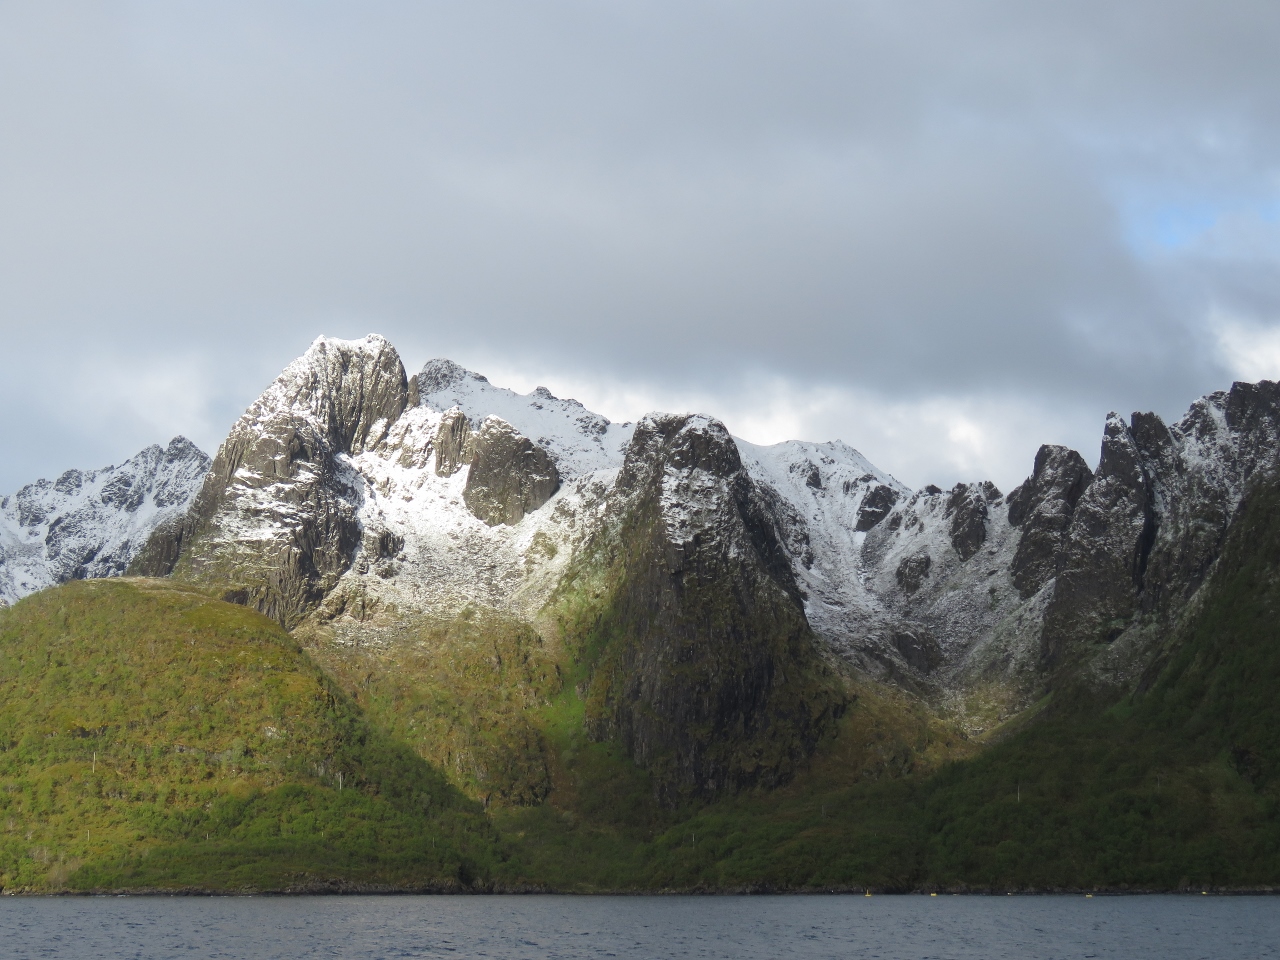
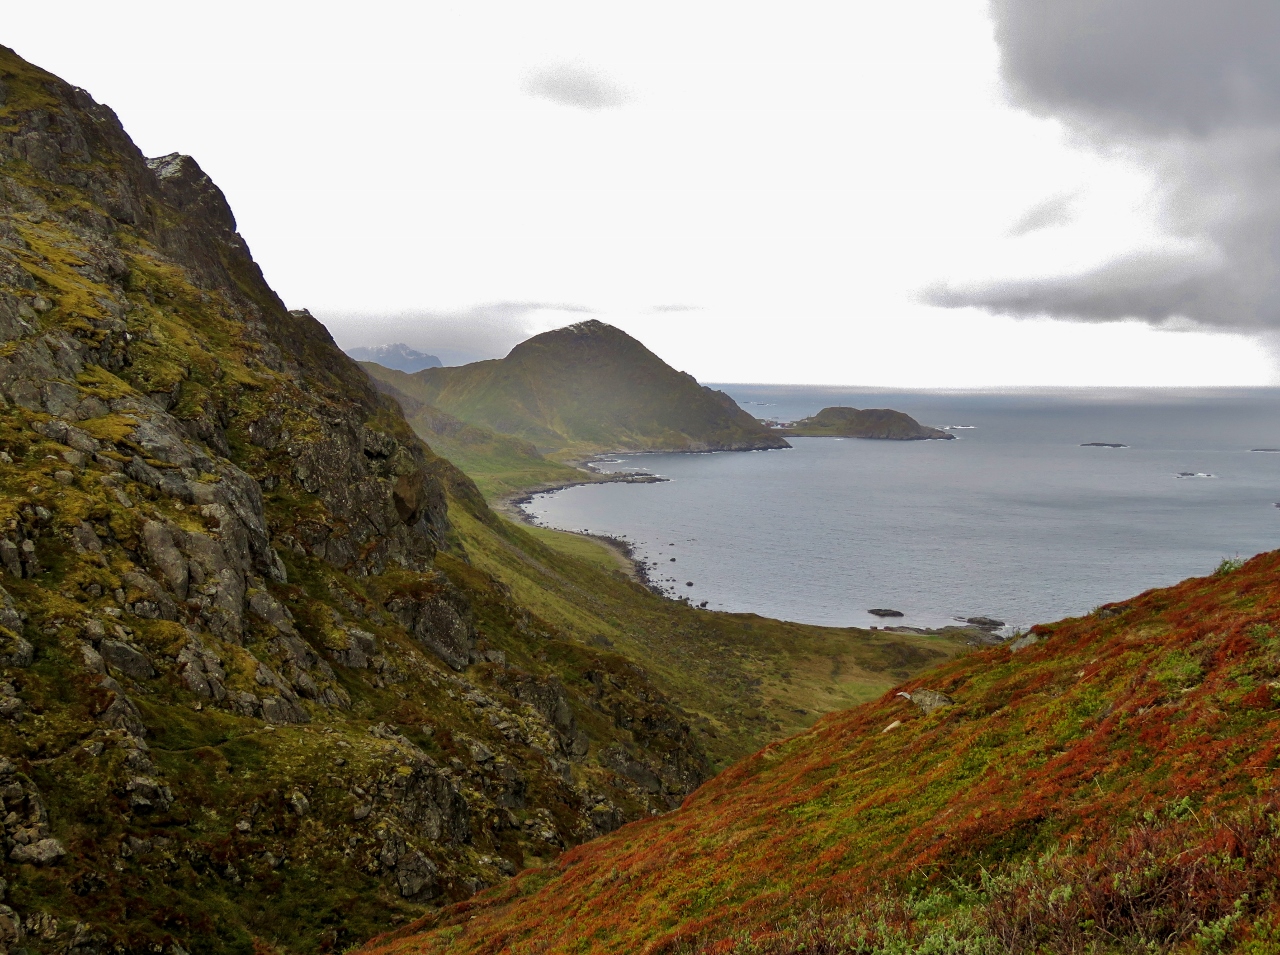
Blåtinden
Position: 14°51.75’E, 68°48.63’N
A close-up to other side of Blåtinden, the backdrop for last night’s anchorage at Finnvågen, with a cloud passing in front as we cruise along the eastern side of the island of Drøya.
|
 |
Skogsøya
Position: 15°0.17’E, 68°55.16’N
Snow-dusted mountains at the northeast corner of the island of Skogsøya.
|
 |
Breakwater
Position: 15°0.03’E, 68°55.28’N
A mile-long breakwater has been built almost halfway across the channel to protect the town of Myre from northerly wind waves and swell.
|
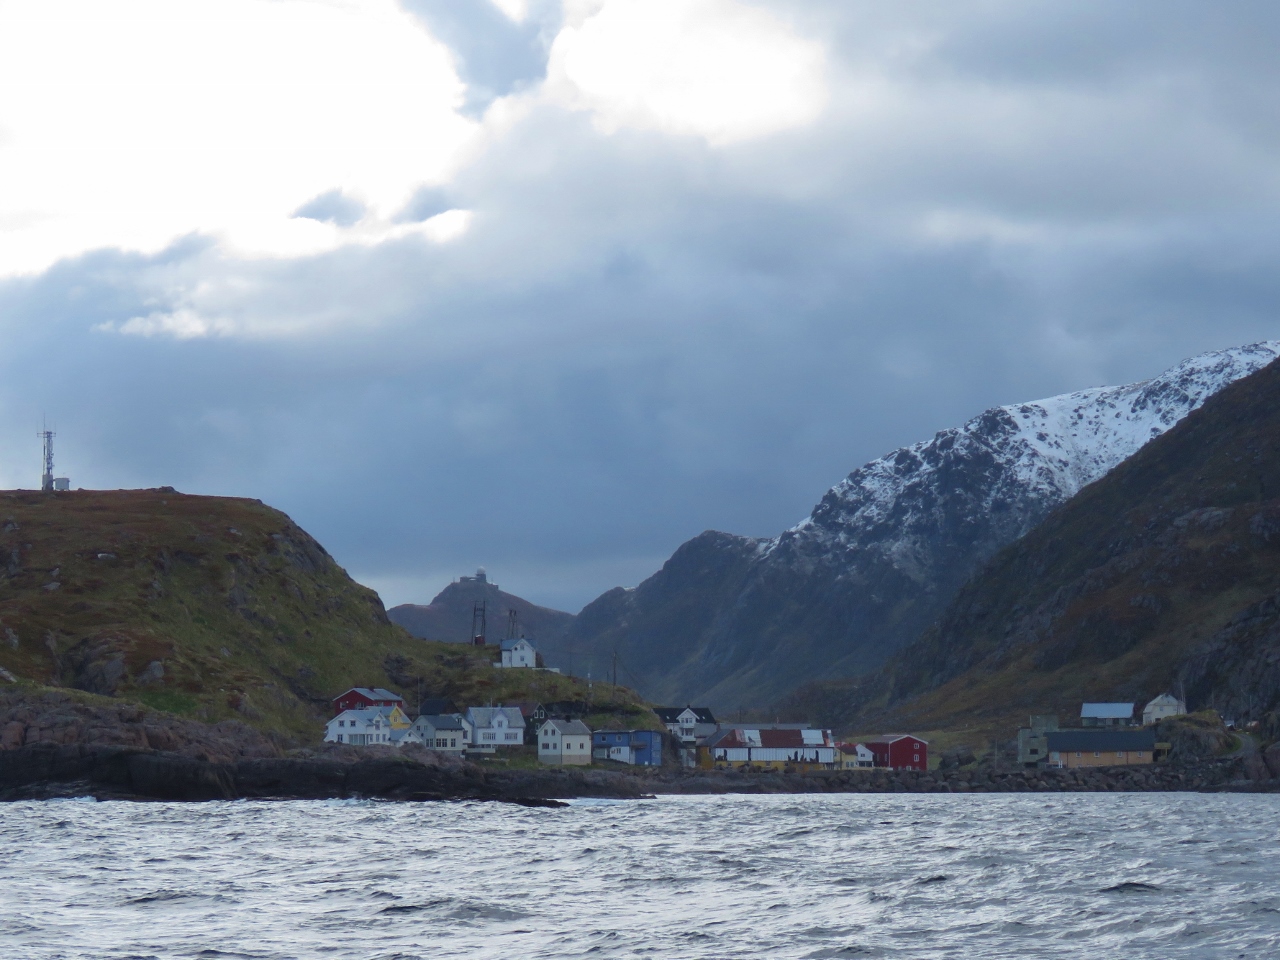 |
Nyksund
Position: 14°59.13’E, 68°59.53’N
The town of Nyksund near the northern tip of the island of Langøya. Our plan is to hike there from Stø along the spectacular Dronningruta trail.
|
 |
69 Degrees
Position: 15°4.94’E, 69°0.86’N
We just crossed 69 degrees north. That’s the final latitude line we’ll be crossing on this trip. We plan to turn south at Tromsø, at 69°39’N.
|
 |
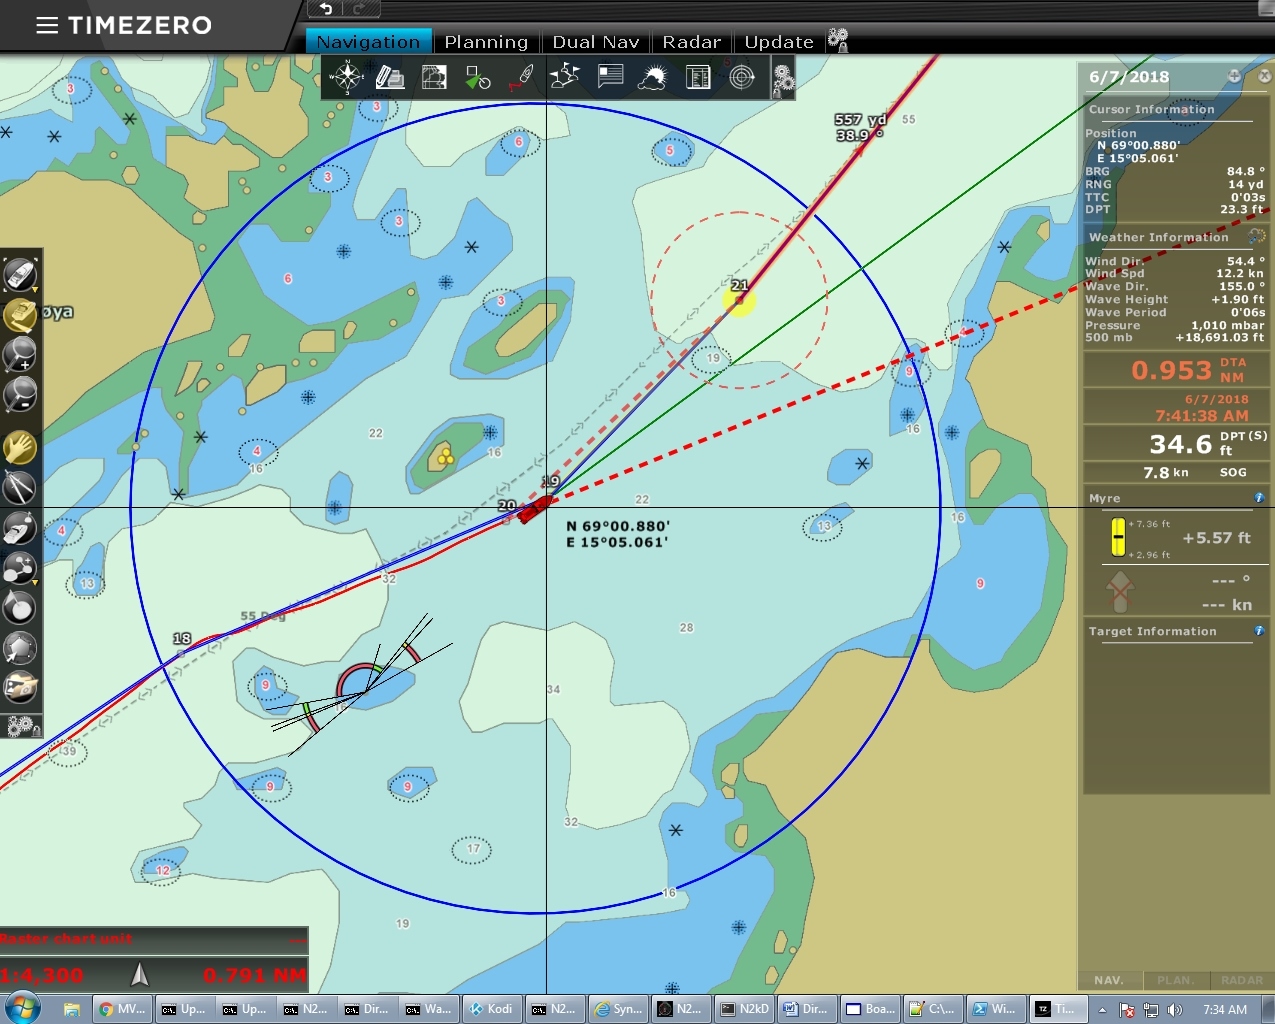
Anchor Plan
Position: 15°7.06’E, 69°1.21’N
When we anchor, we use the dividers tool on our chart plotter to check distances to shore or other obstructions, then we drop anchor at the mark and pull back in the direction we expect to pull. We then set the anchor by pulling back at 1200 RPM. We use 1200 RPM as it pulls the anchor rode out to roughly the same angle as a 40-kt wind. Many would say its crazy to set the anchor so aggressively and point out that it will sometimes not hold when giving the anchor time to soak would have worked. This is true, but our approach has the upside of letting us know if we have a potential problem with anchor holding at this location. Once we have set that way, we sleep well and haven’t dragged for more than a decade. We have seen winds as high as 60 kts in an anchorage but not felt the need to post an anchor watch. Sleeping well is worth a lot to us so we set aggressively.
Once we have set the anchor, we again use the dividers to measure back to the anchor to see if it set instantly or dragged before setting. This tells us where the anchor actually is and we can see how close we are to any other possible obstruction knowing our entire swing diameter. If you look closely at the screen shot, you’ll see the shorter dashed line which is the anchor rode radius. This tells us if an obstruction or a new boat arriving is in the swing circle. The diameter of a boat’s swing radius is easy to compute so it shouldn’t be surprising and yet, at least to us, it’s surprisingly large when overlaid on a chart. And if we subsequently move past this point, we know we are dragging. |
 |
Pitch and Roll
Position: 15°7.06’E, 69°1.21’N
We encountered a fairly large northwesterly swell as we rounded the exposed northern side of Langøya, generating a fair bit of boat motion (pitch and roll graphs slightly right of center) but it’s nice and calm in the anchorage.
|
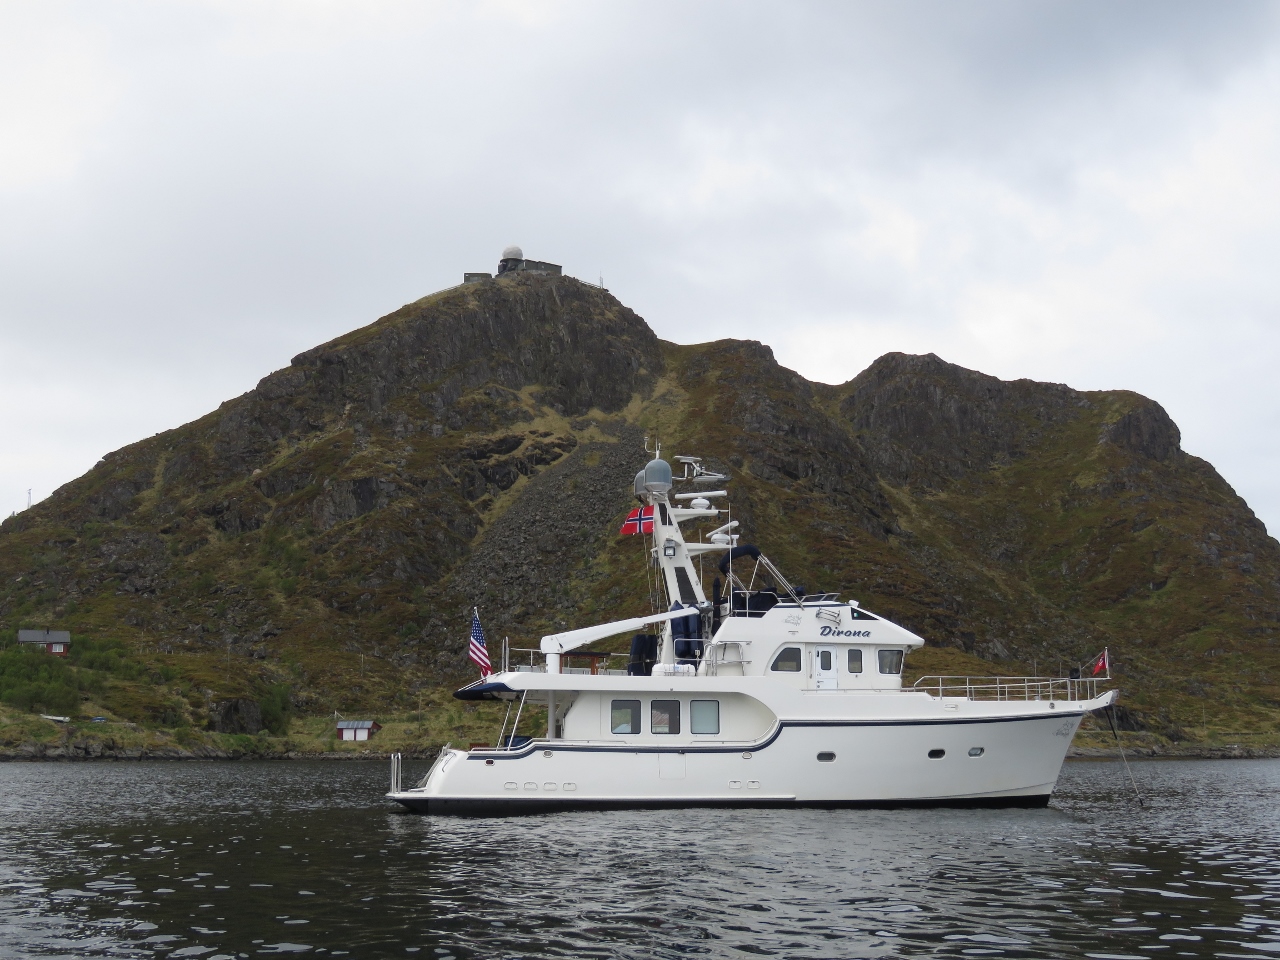 |
Stø Anchorage
Position: 15°7.25’E, 69°1.25’N
Our first anchorage north of 69° at Stø. The holding is good and we have plenty of swing room, so we’re quite happy with it. Behind us atop the hill is another radar station similar to the one we hiked to on the island of Sanna.
|
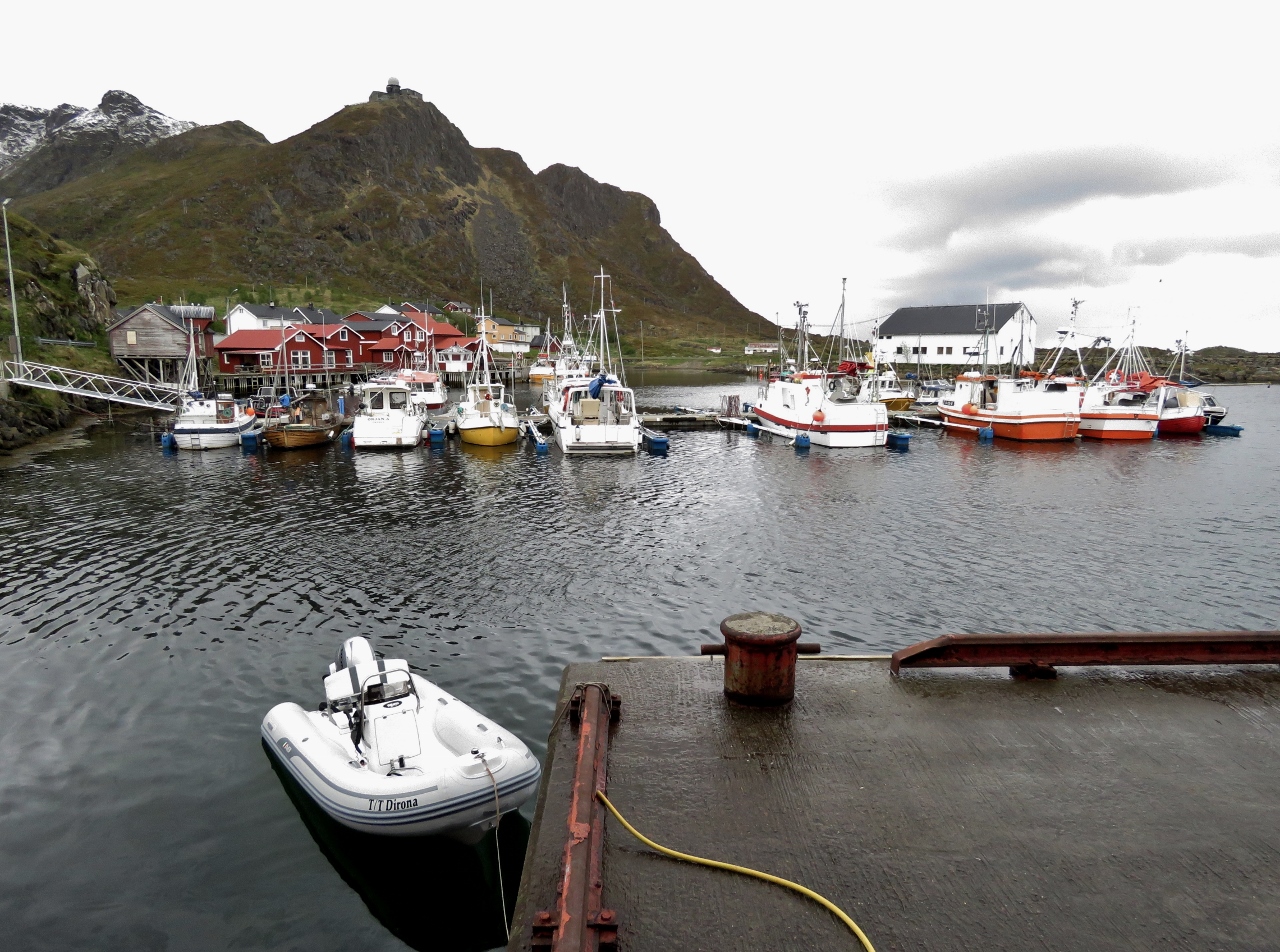 |
Tender
Position: 15°7.56’E, 69°1.18’N
The tender tied off at side of the community wharf in Stø.
|
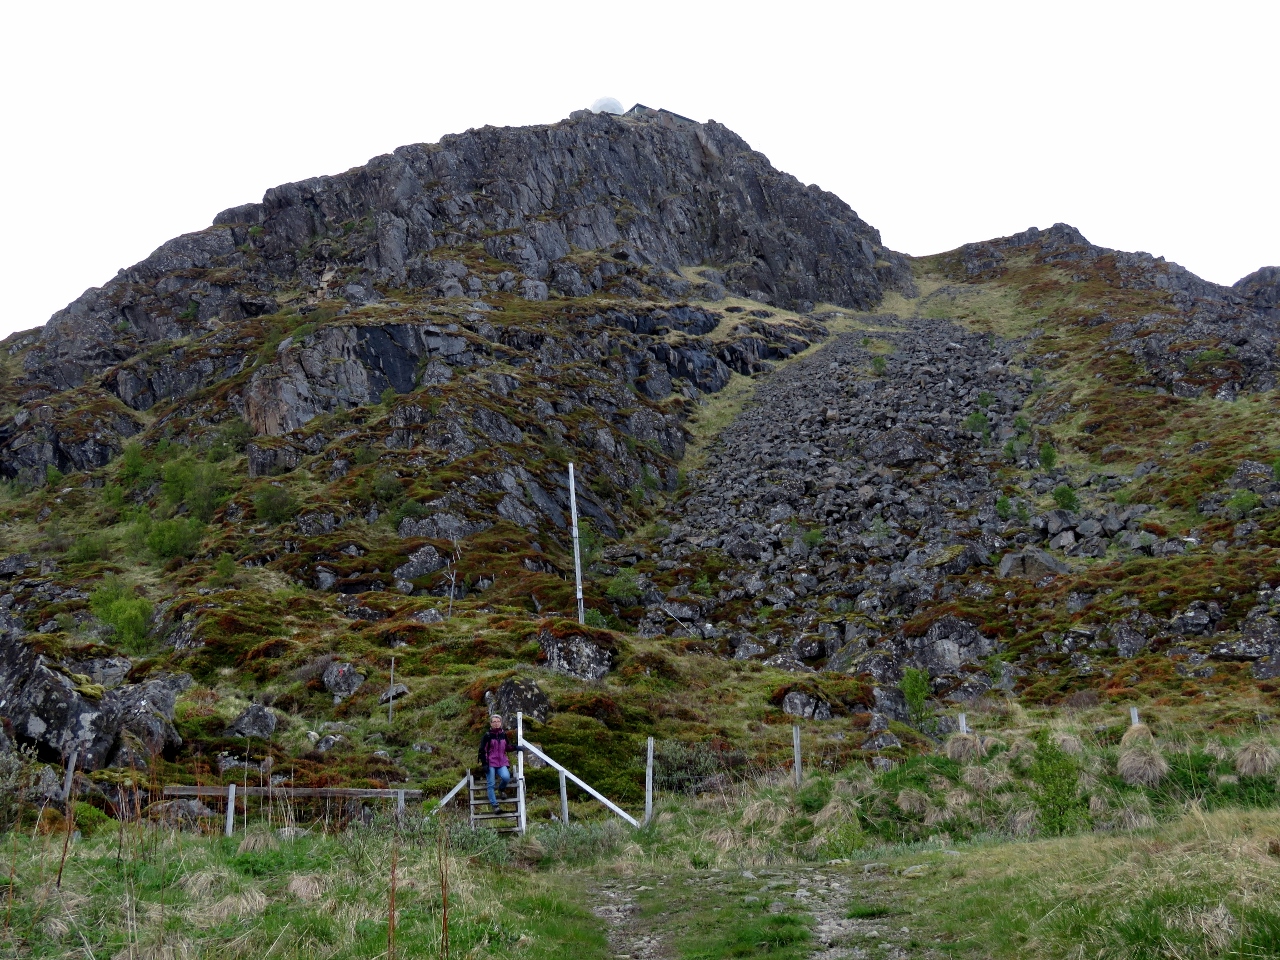 |
Trailhead
Position: 15°6.98’E, 69°1.08’N
At the Dronningruta trailhead.
|
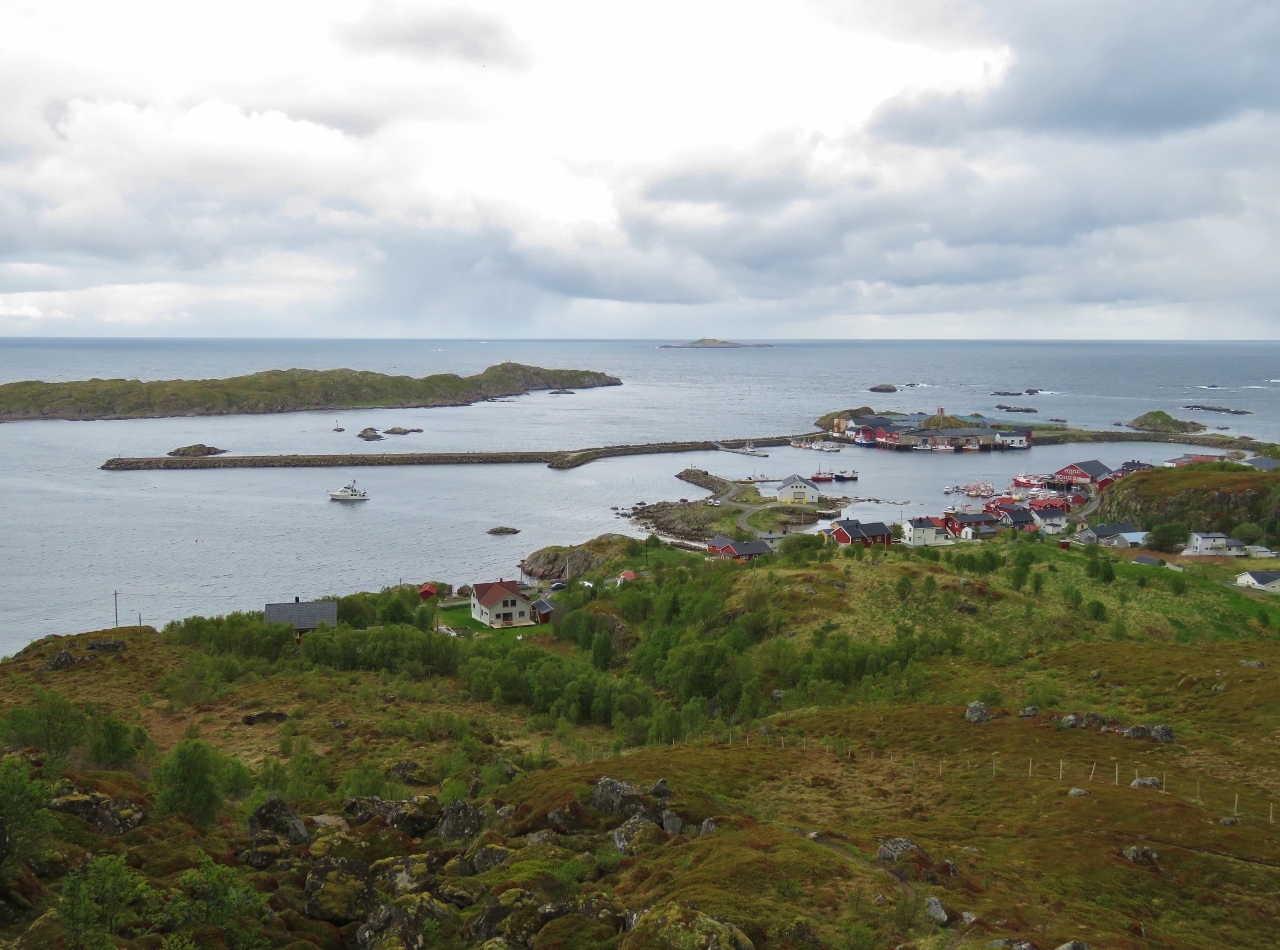 |
View to Stø
Position: 15°7.04’E, 69°0.95’N
The view back down to our anchorage and the village of Stø from 185ft (56m).
|
 |
View to Nyksund
Position: 15°6.78’E, 69°0.90’N
Looking southwest at altitude 576ft (175m) toward Nyksund, our eventual goal.
|
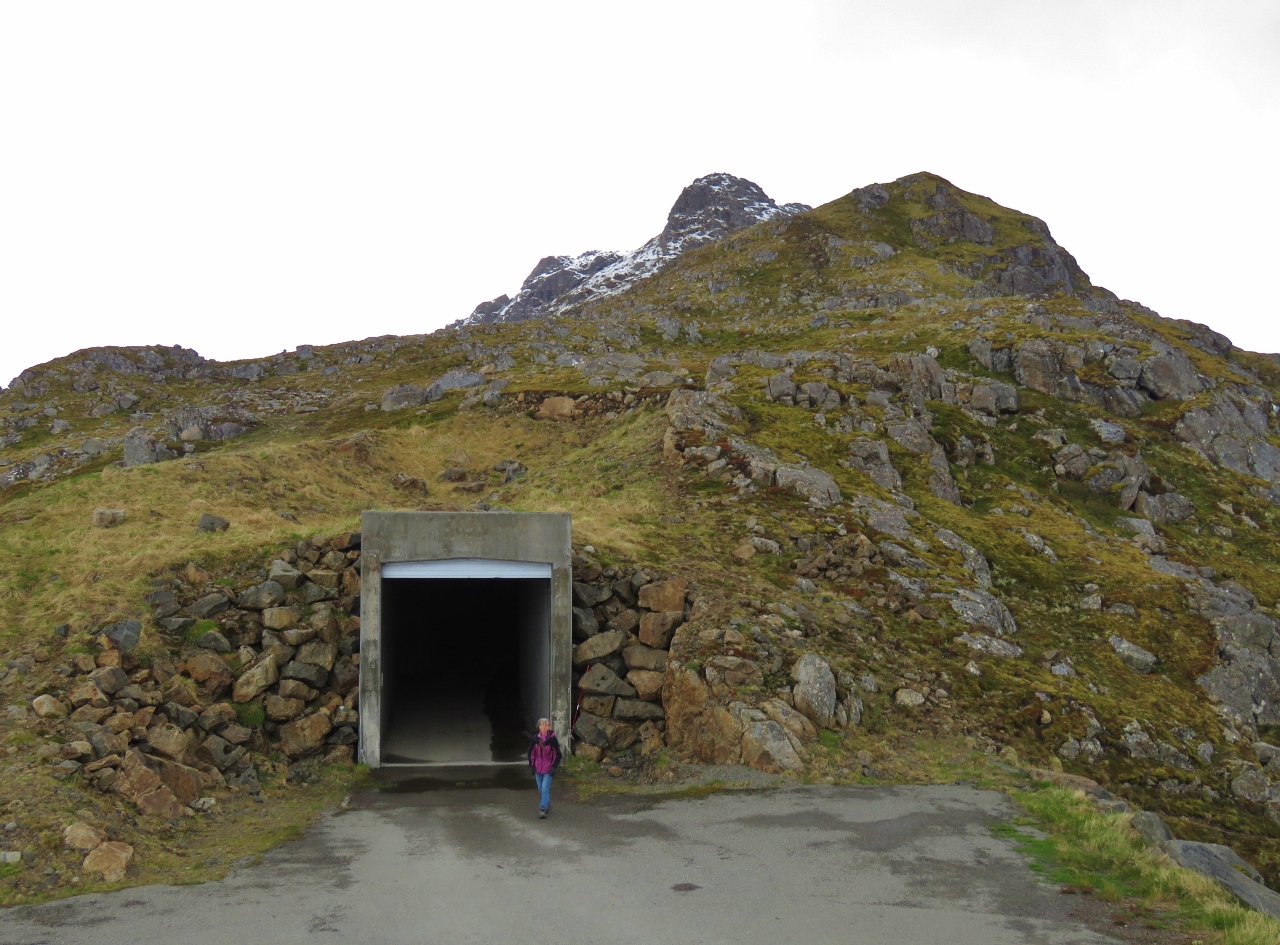 |
Tunnel
Position: 15°6.78’E, 69°0.87’N
This tunnel brings a road through the mountain Valaksla to the radar station we can see above the anchorage. Photographing the station isn’t allowed up here, but it’s directly behind the camera.
|
 |
Hail
Position: 15°6.59’E, 69°0.74’N
We could see a squall coming, and we debated whether we should wait for clear weather in the tunnel or continue. We decided to continue and just put up with it if we got a little bit damp. It turns out it was hail, so we threw on our hoods and stayed warm and dry. Here we’re passing through the squall at 756ft (230m).
|
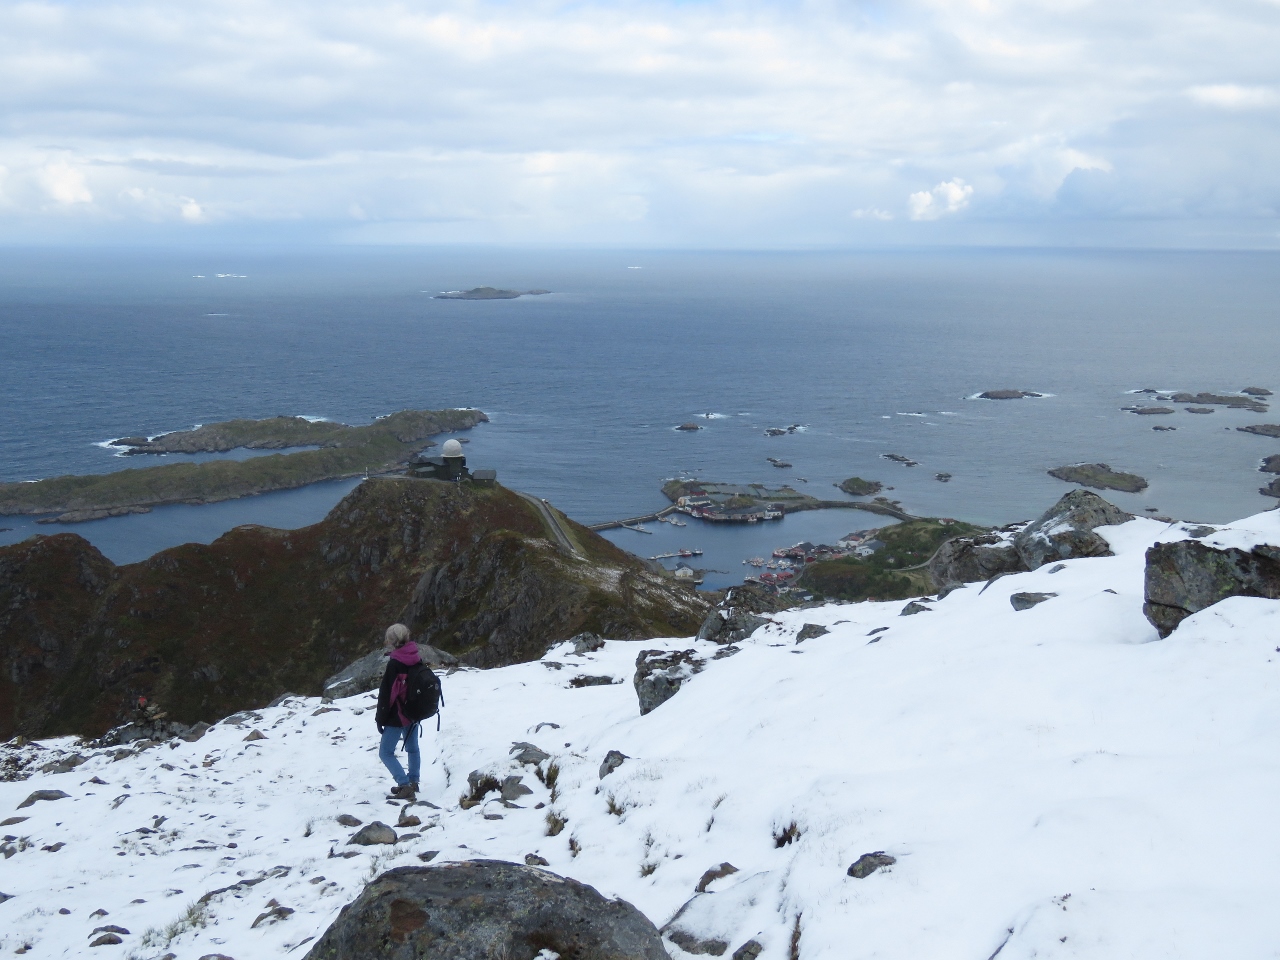 |
Snow Line
Position: 15°6.38’E, 69°0.60’N
We’re above the snow line now at 1,019ft (310m) with a fabulous view back down to the radar station and Stø. Dirona is hidden by the mountain Valaksla where the radar station stands.
|
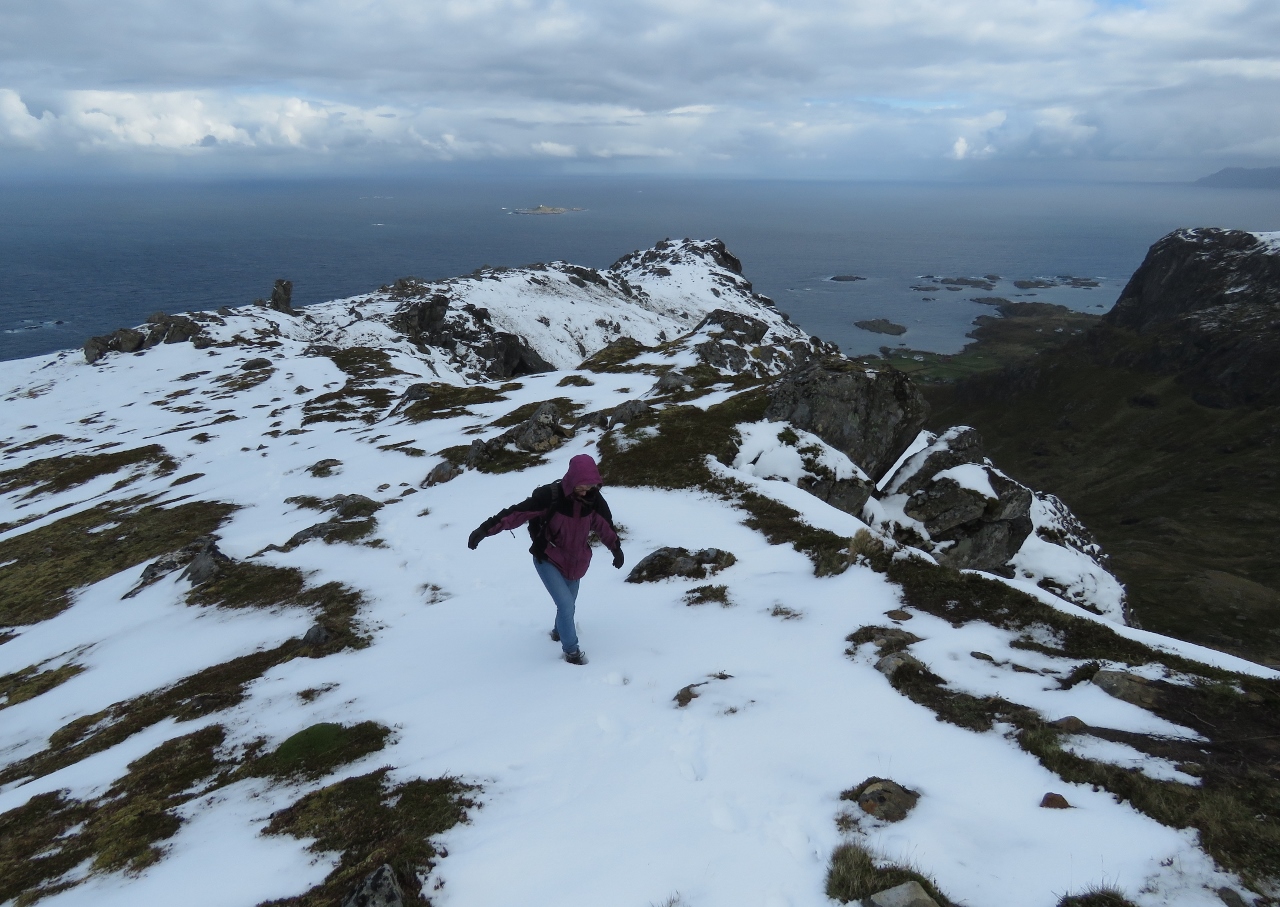 |
Deeper Snow
Position: 15°6.22’E, 69°0.45’N
The snow generally wasn’t very deep on the entire trail, but we did pass through a few patches that were up past our shins.
|
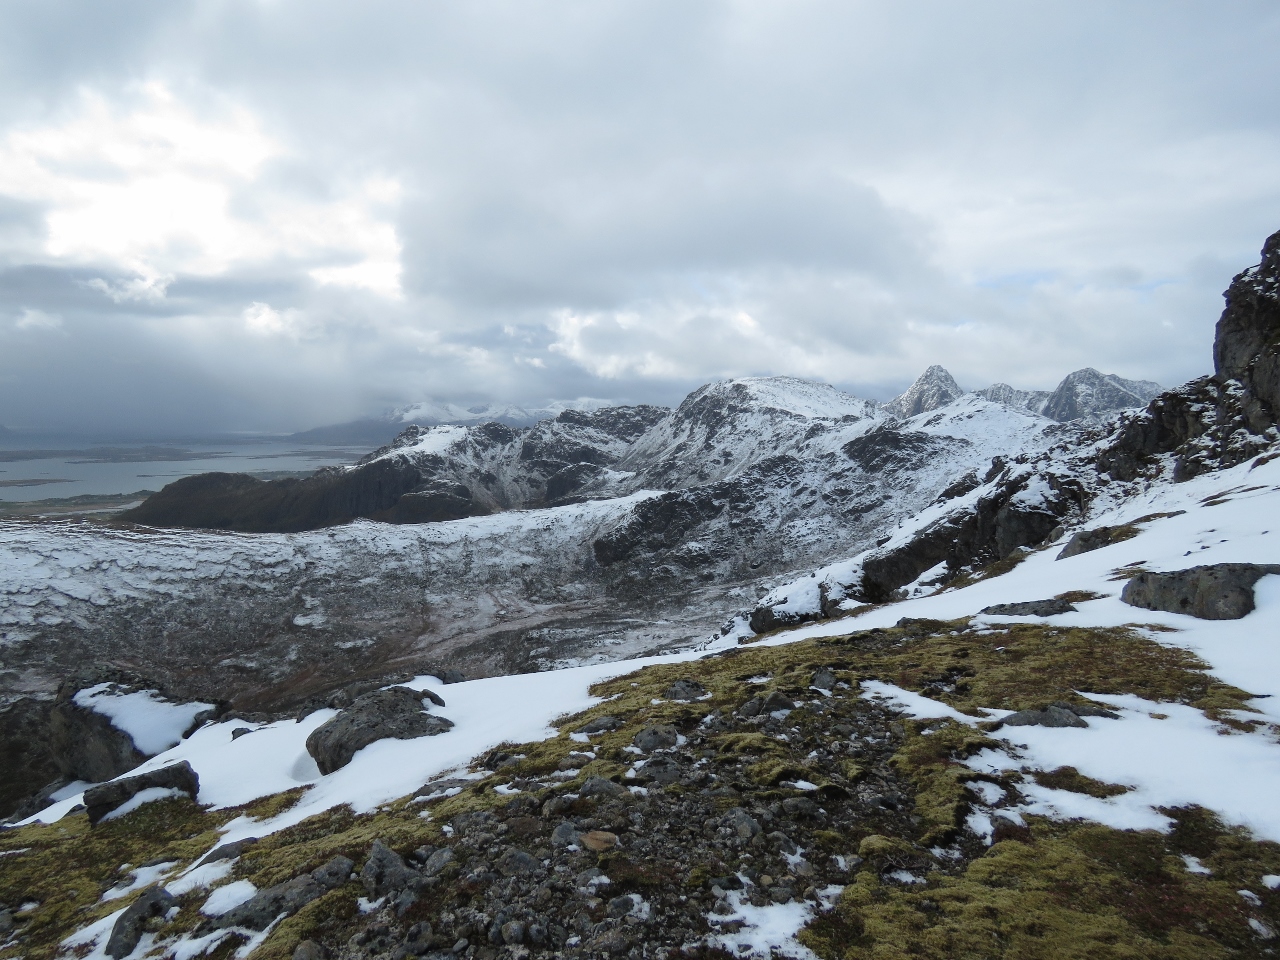 |
Sørkulan and Norkulen
Position: 15°6.36’E, 69°0.36’N
The view south to the peaks of Sørkulan and Norkulen.
|
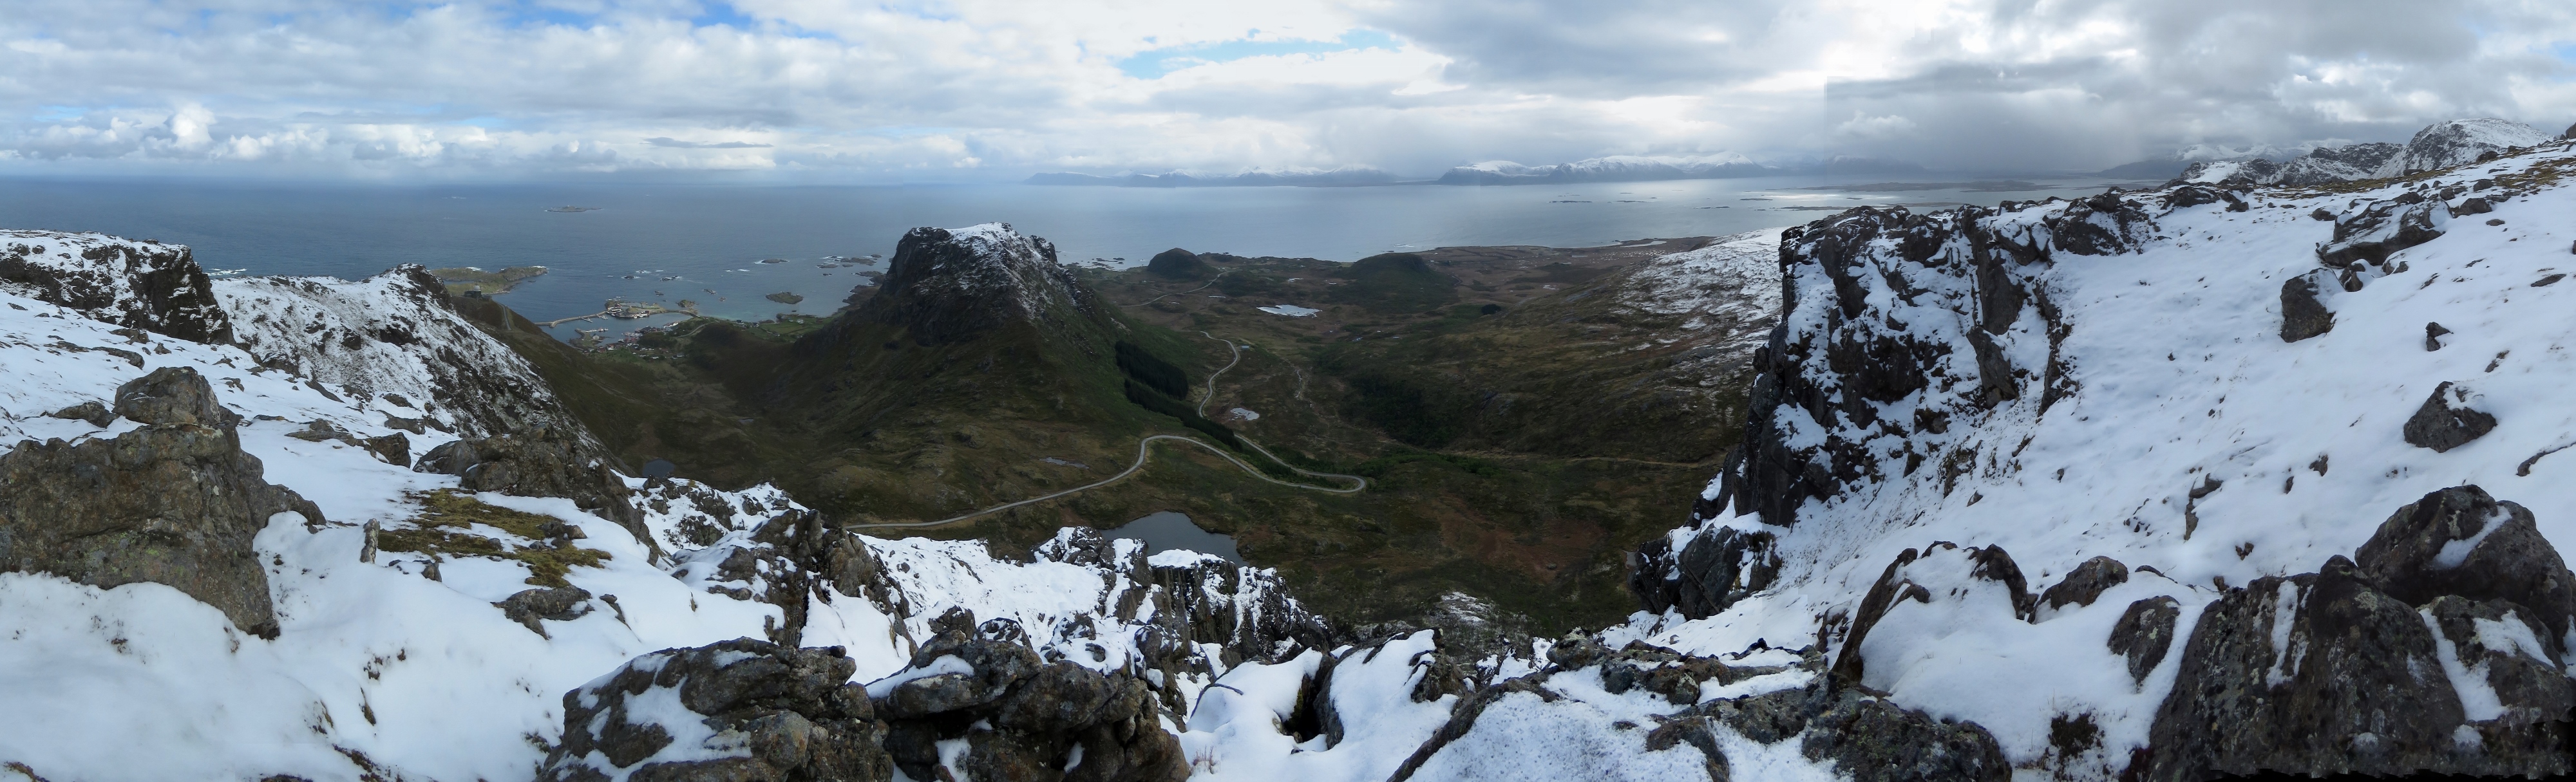 |
Panorama North
Position: 15°6.36’E, 69°0.36’N
A panoramic view north toward Stø (click image for a larger view). The road to the radar station snakes around Geitberget and then disappears into the tunnel through Valaksla on the left. The island visible in the distance is Andøya.
|
 |
Vertical Drop-off
Position: 15°6.35’E, 69°0.34’N
Vertical drop-off above the lake Kjolvatnet at 1,285ft (391m).
|
 |
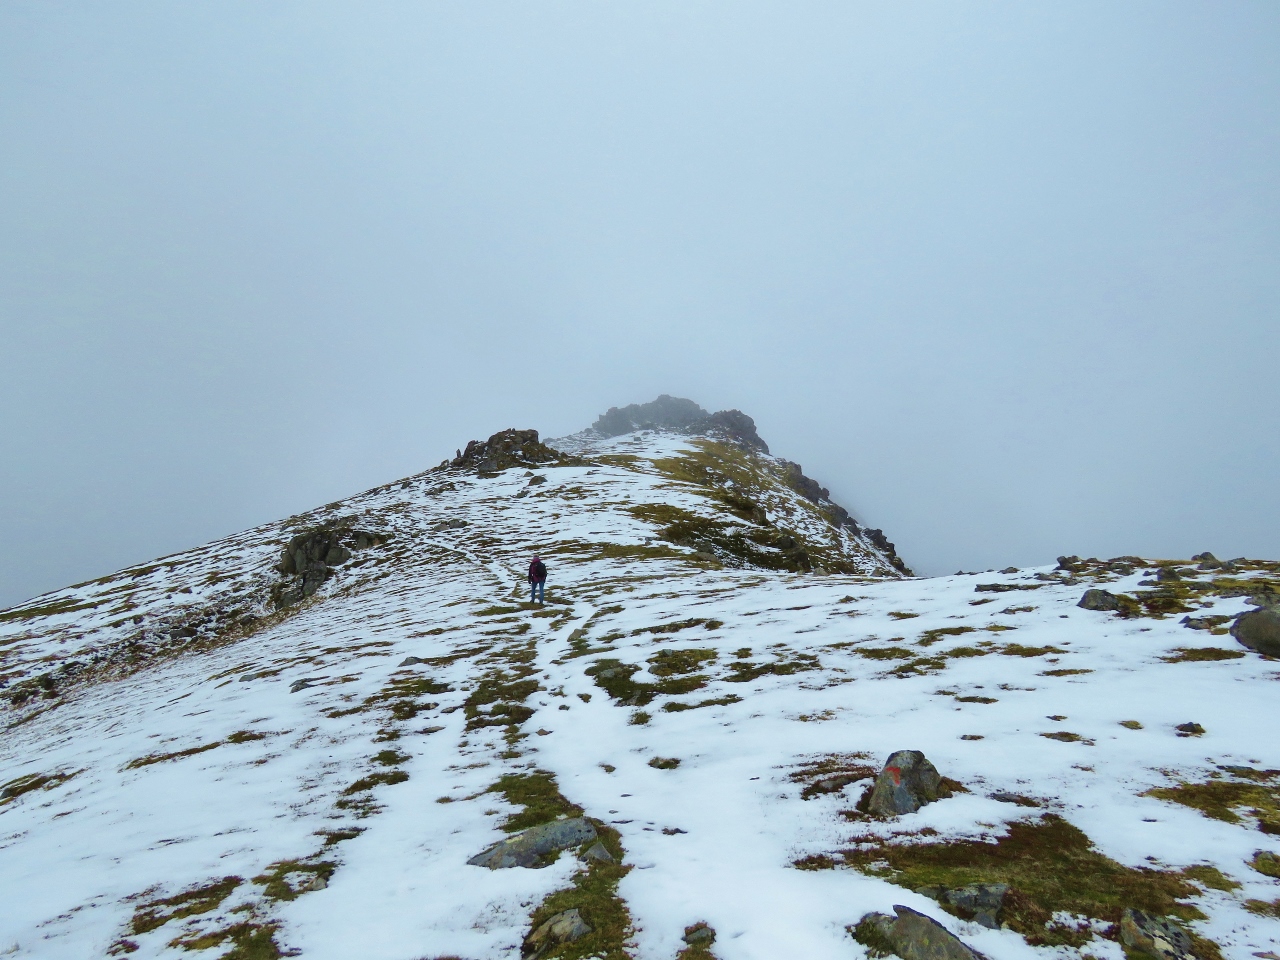
Toward Kjølen
Position: 15°6.02’E, 69°0.23’N
The trail snaking away beyond Jennifer toward the top of Kjølen at 1,590ft (460m).
|
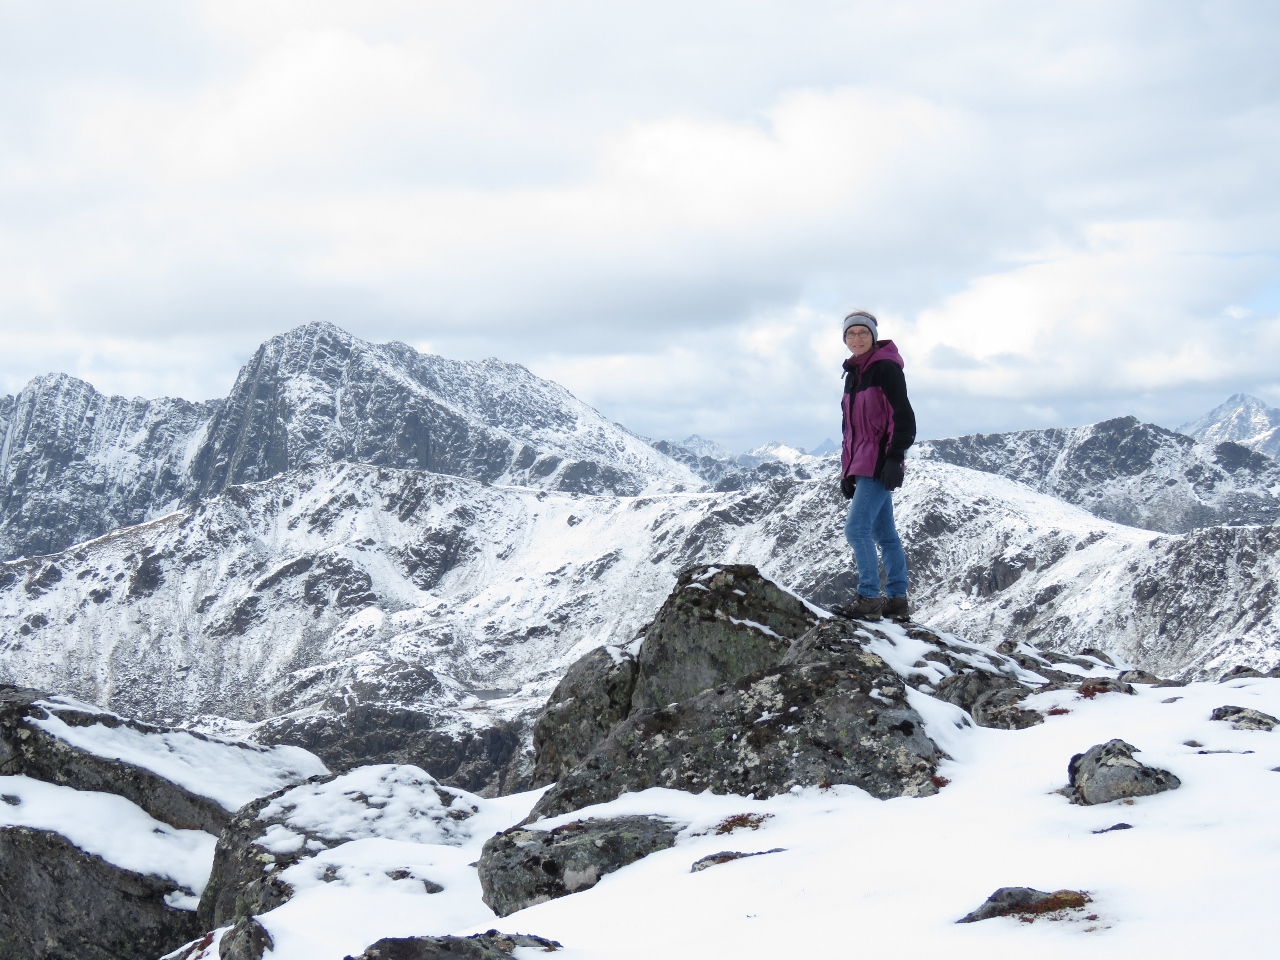 |
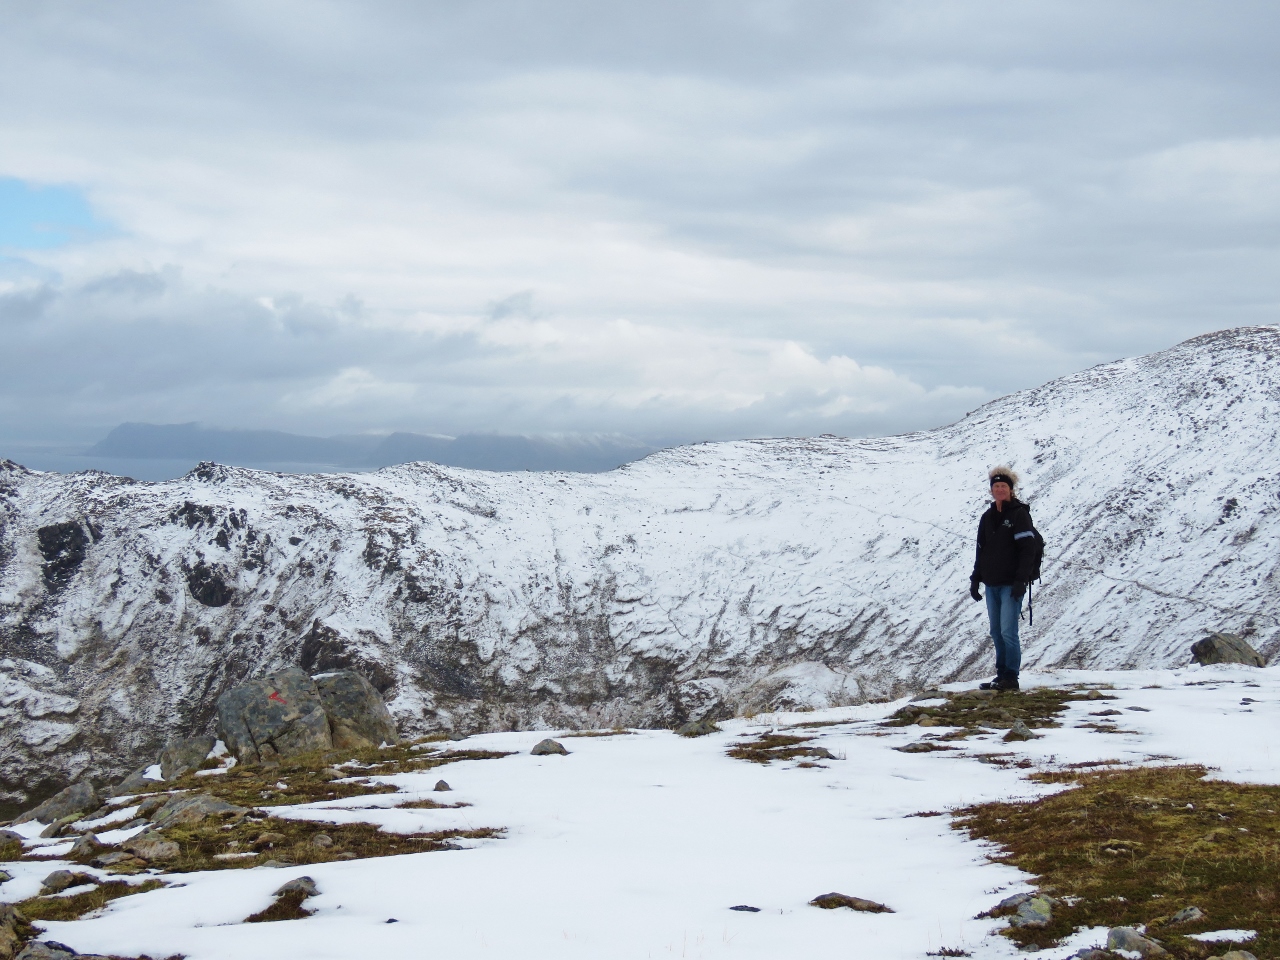
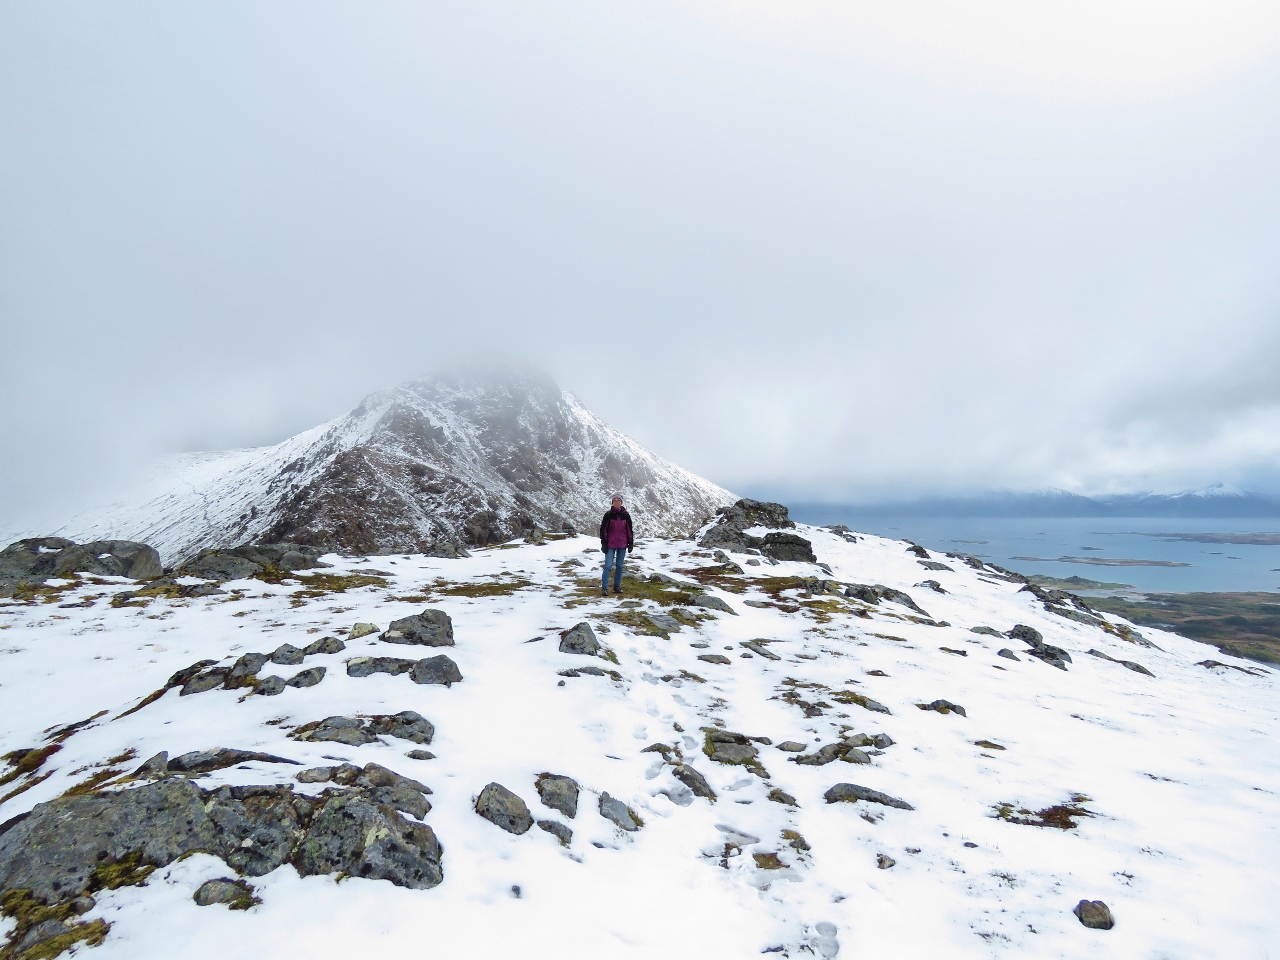
Kjølen
Position: 15°5.56’E, 68°59.97’N
The spectacular mountain scenery at 1,248ft (380m) near Kjølen. The pictures we’ve seen of the trail in the summer look beautiful, but the snow really adds another dimension altogether.
|
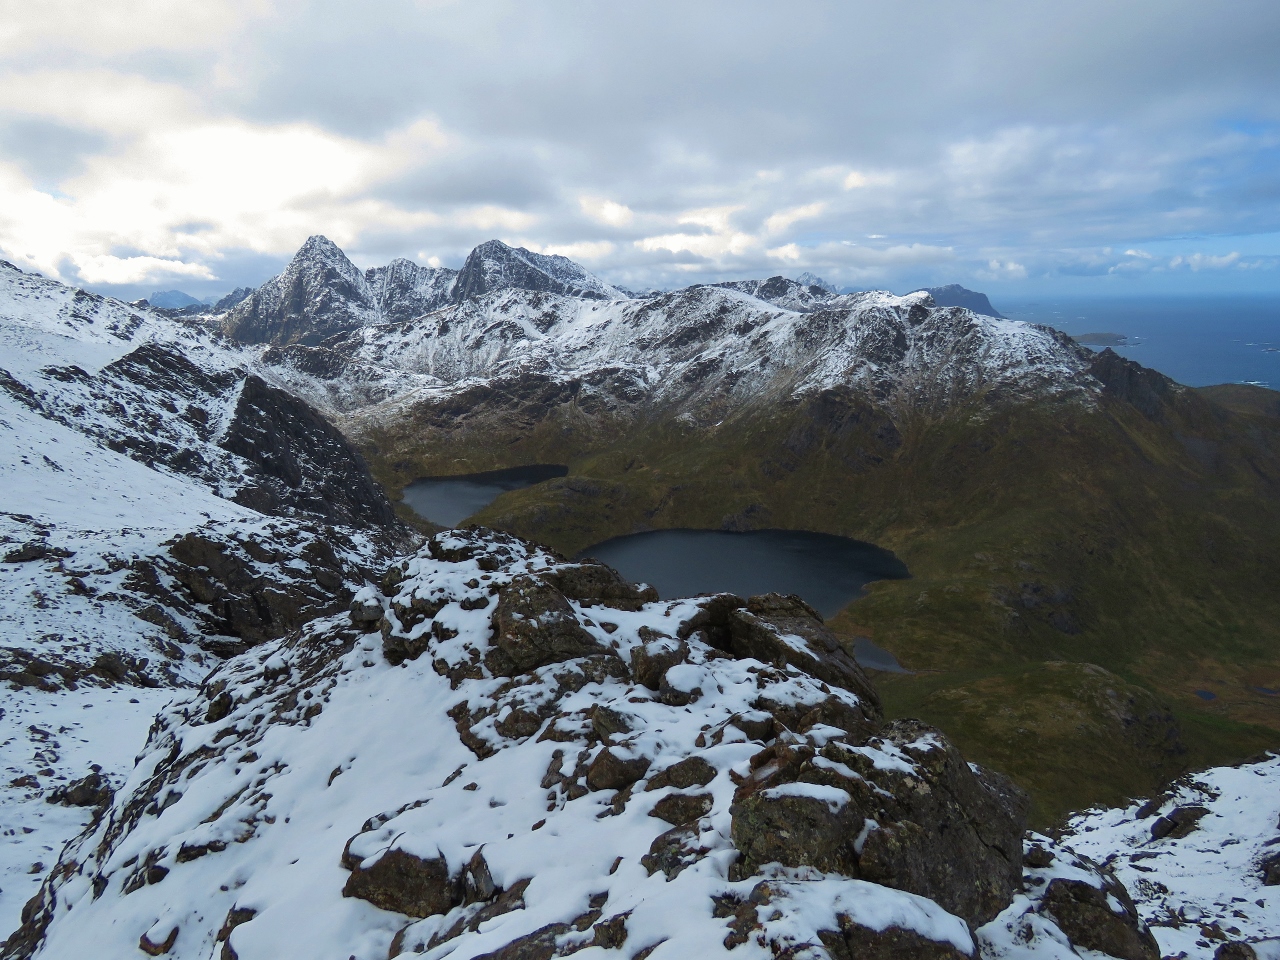 |
Langvaddalsvatnan
Position: 15°5.60’E, 68°59.93’N
The Langvaddalsvatnan groups of lakes to our southwest. The trail loops to the left and around the south of these lakes and across to the other side. Did we mention it is a strenuous hike?
|
 |
Trail to Sørkulen
Position: 15°5.72’E, 68°59.86’N
Way in the distance we can see the trail heading across a ridge toward 1,700ft (518m) Sørkulen.
|
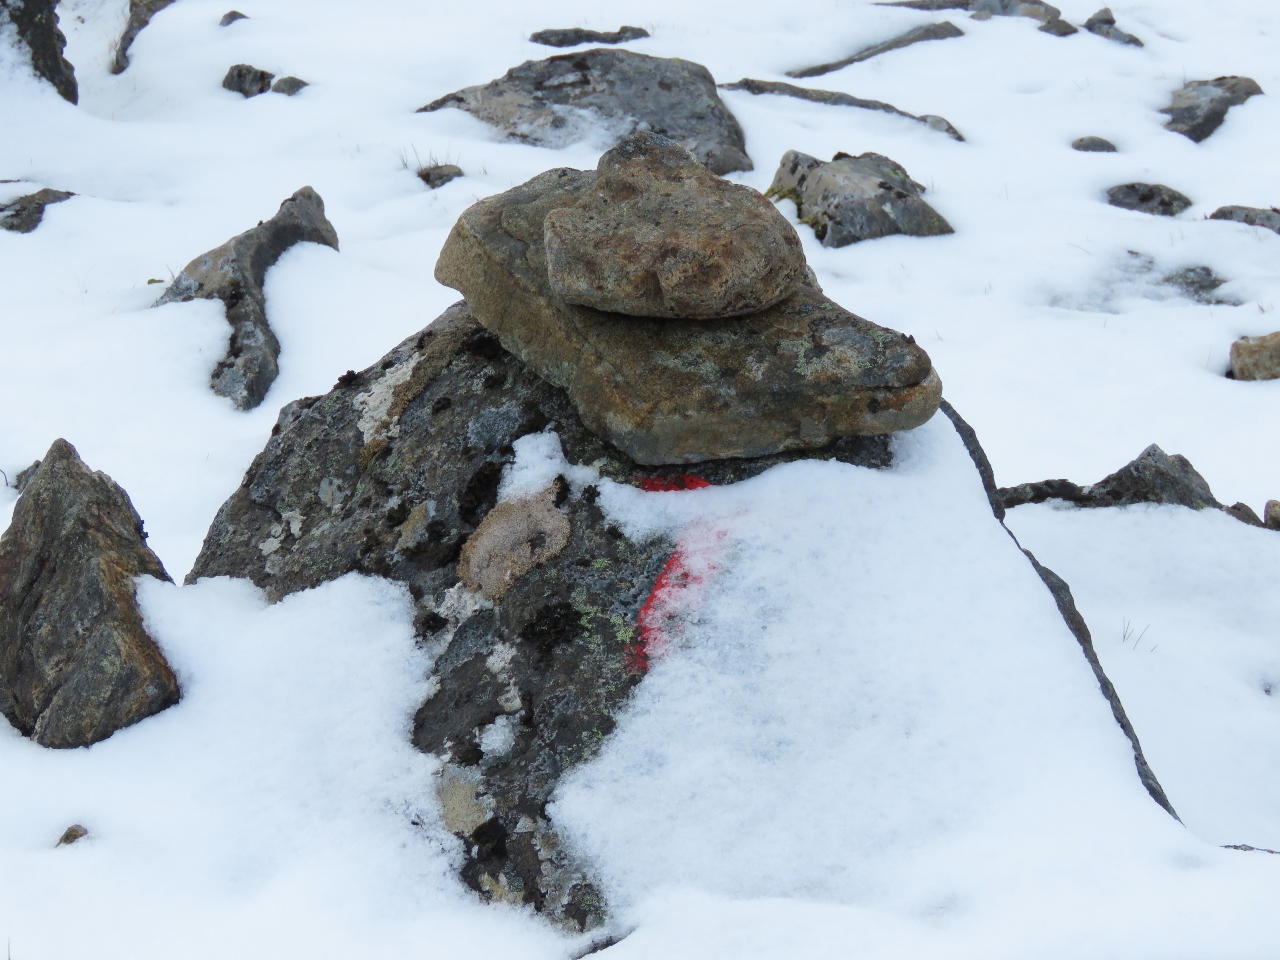 |
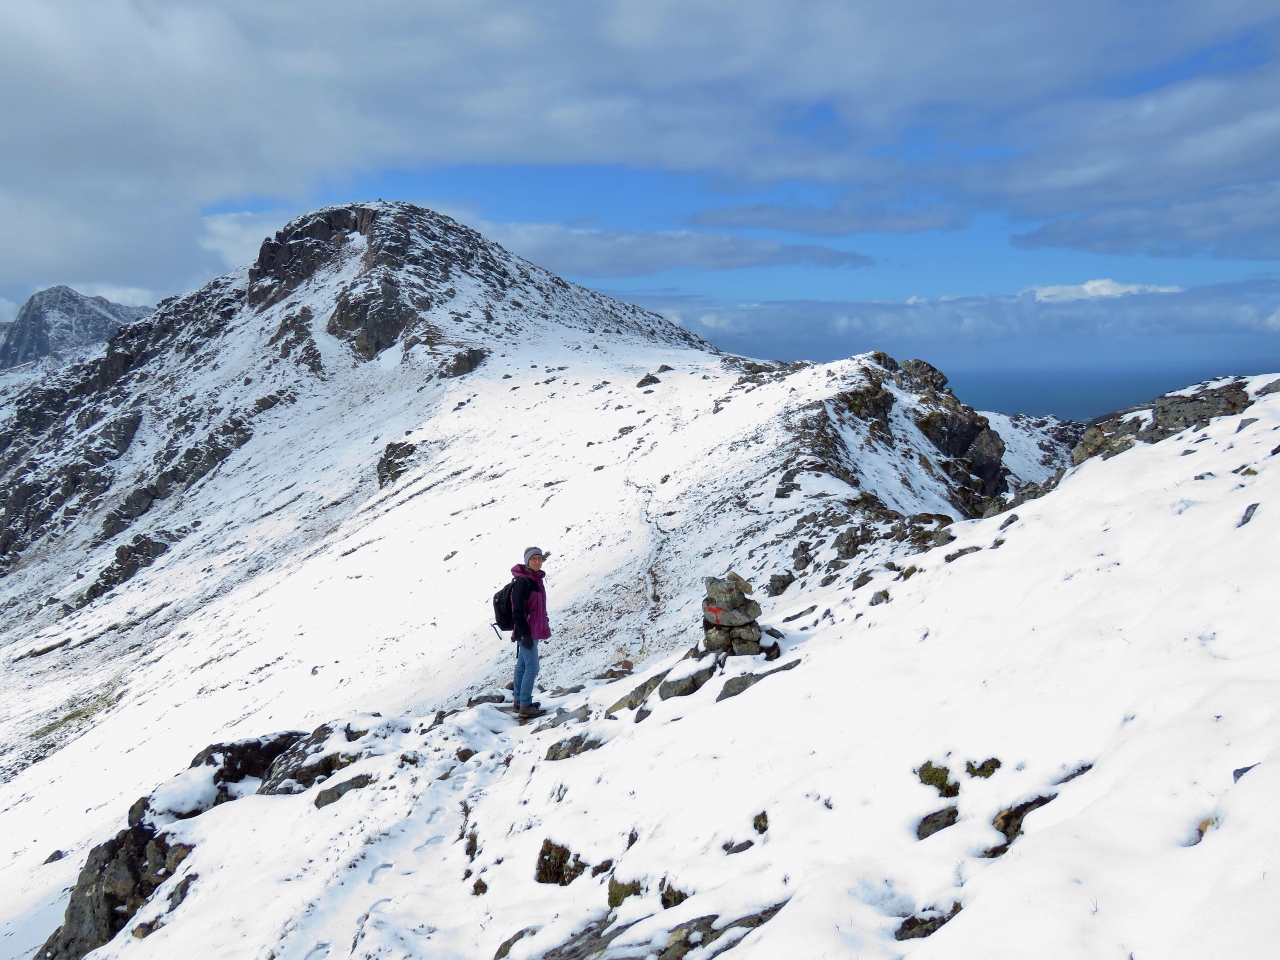
Trail Mark
Position: 15°5.75’E, 68°59.83’N
The trail is well-marked with the National Trekking Association’s red T’s, and generally easy to follow. But occasionally snow obscures one of the markers.
|
 |
Break
Position: 15°5.85’E, 68°59.74’N
Taking a break just beyond the Kjølen.
|
 |
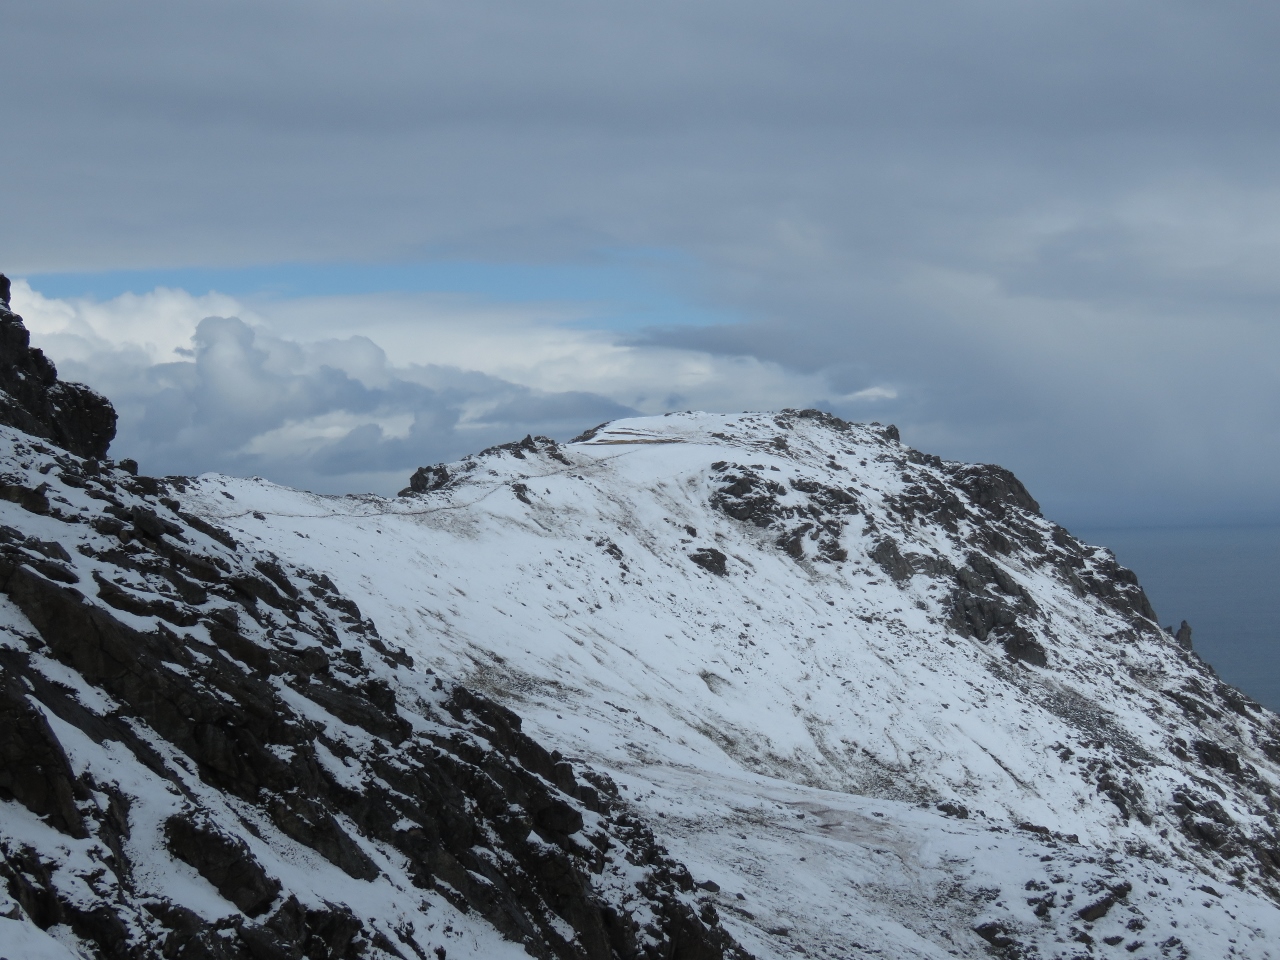
Next Ridge
Position: 15°5.90’E, 68°59.54’N
Crossing another ridge toward 1,700ft (518m) Sørkulen.
|
 |
Sørkulen Flank
Position: 15°6.11’E, 68°59.32’N
The trail turns southwest and ahead crosses along the steep slide-riddled flank of Sørkulan. Generally the trail felt pretty safe, but towards the end of this face the going is getting very steep and some fresh slides have come through the area. So the combination of nothing to grab onto and a snow-covered steep slope made this section difficult.
|
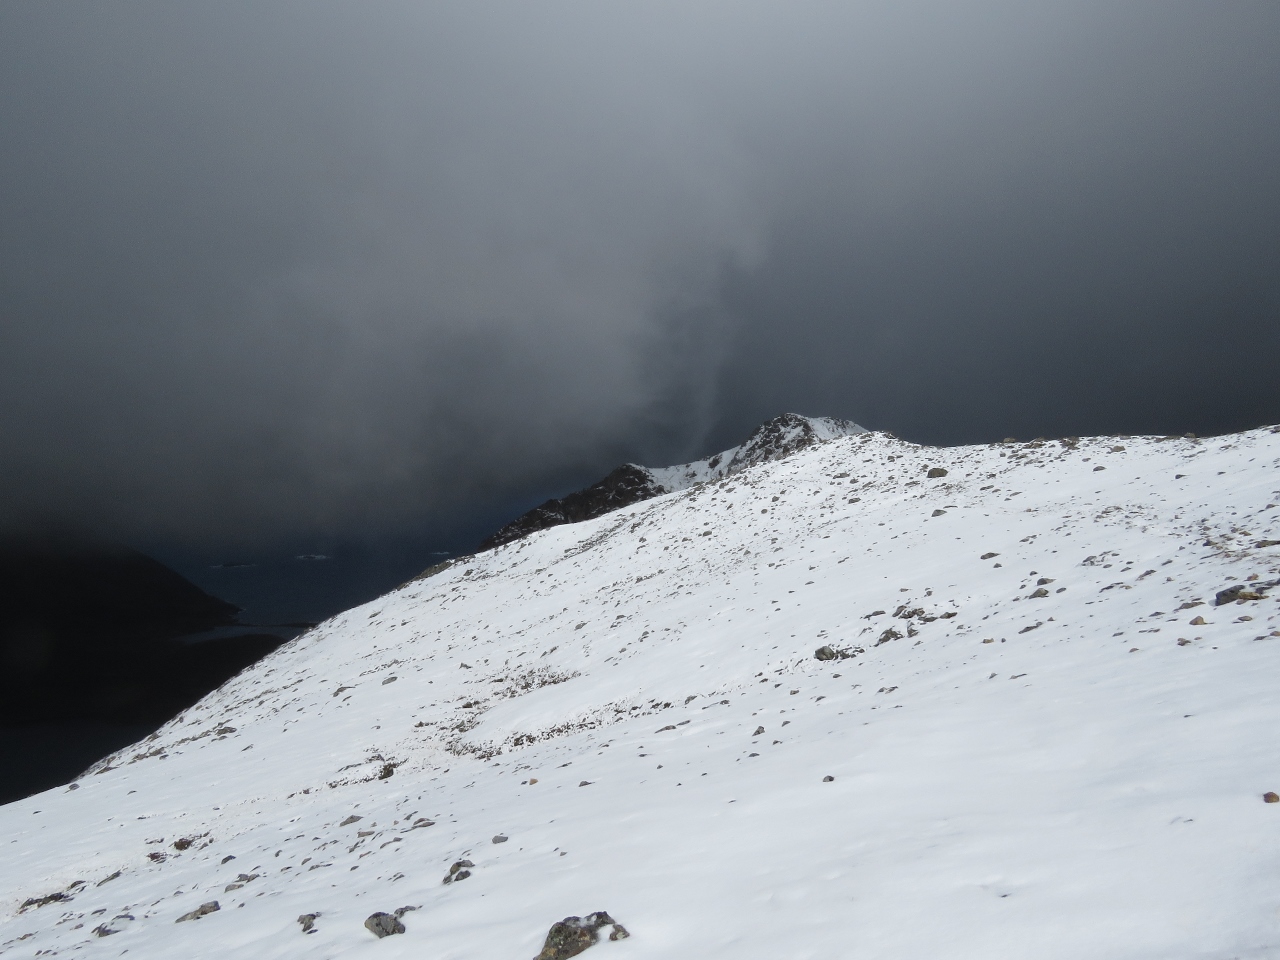 |
Weather System
Position: 15°6.09’E, 68°59.27’N
As we passed along the most difficult section of the trail, a small weather system came in behind us, bringing dark clouds, strong winds and hail. The gusts were probably only to around 25 kts, but they felt bigger on the steep slope.
|
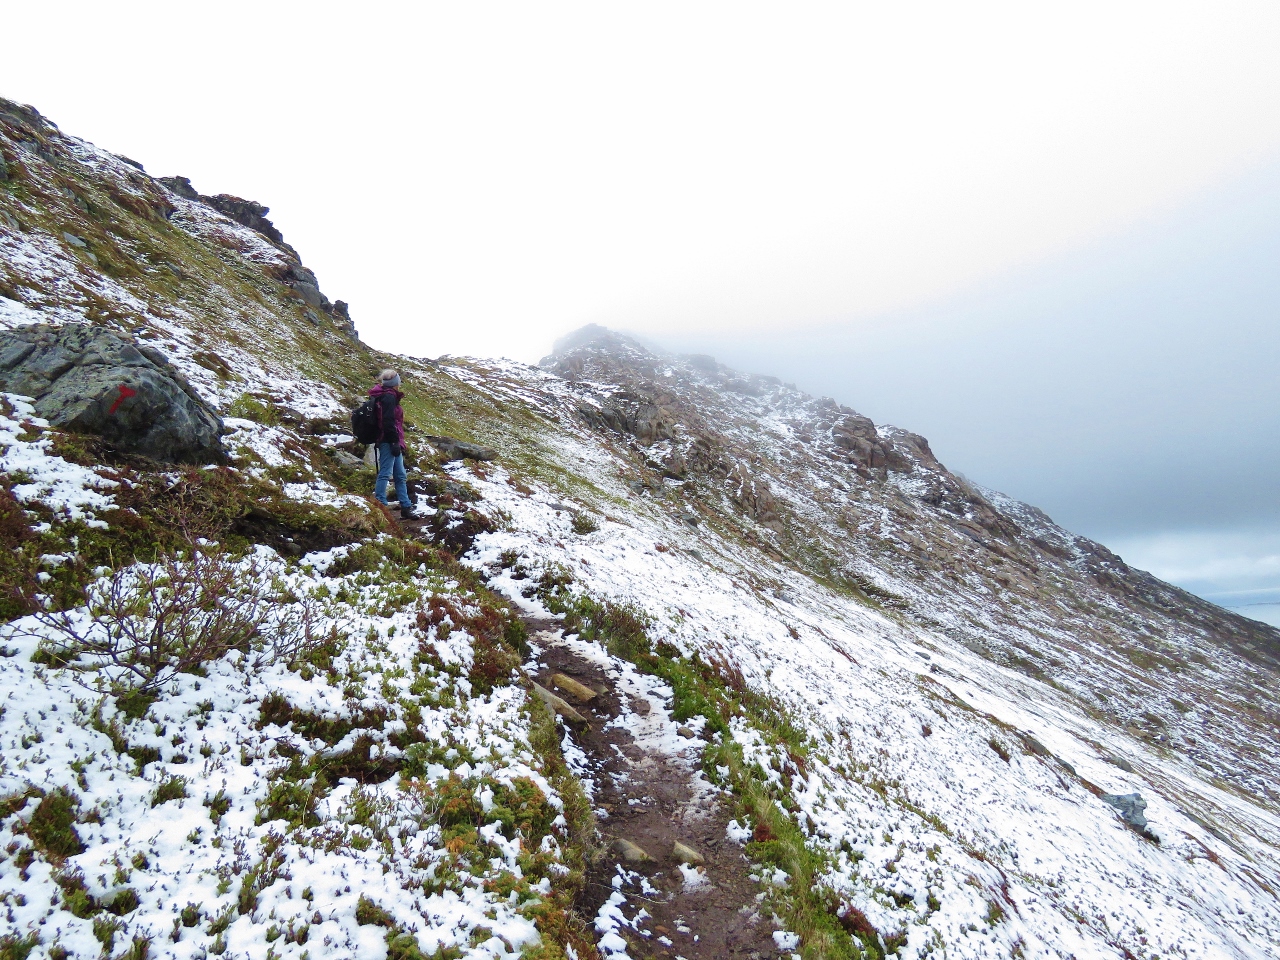 |
Near Snow Line
Position: 15°5.30’E, 68°58.98’N
At 979ft (298m) we’re almost below the snow line again. Our hike had a maximum altitude of 1,469 ft (448 m), but a total altitude gain of nearly twice that as we ascended and descended between the high points.
|
 |
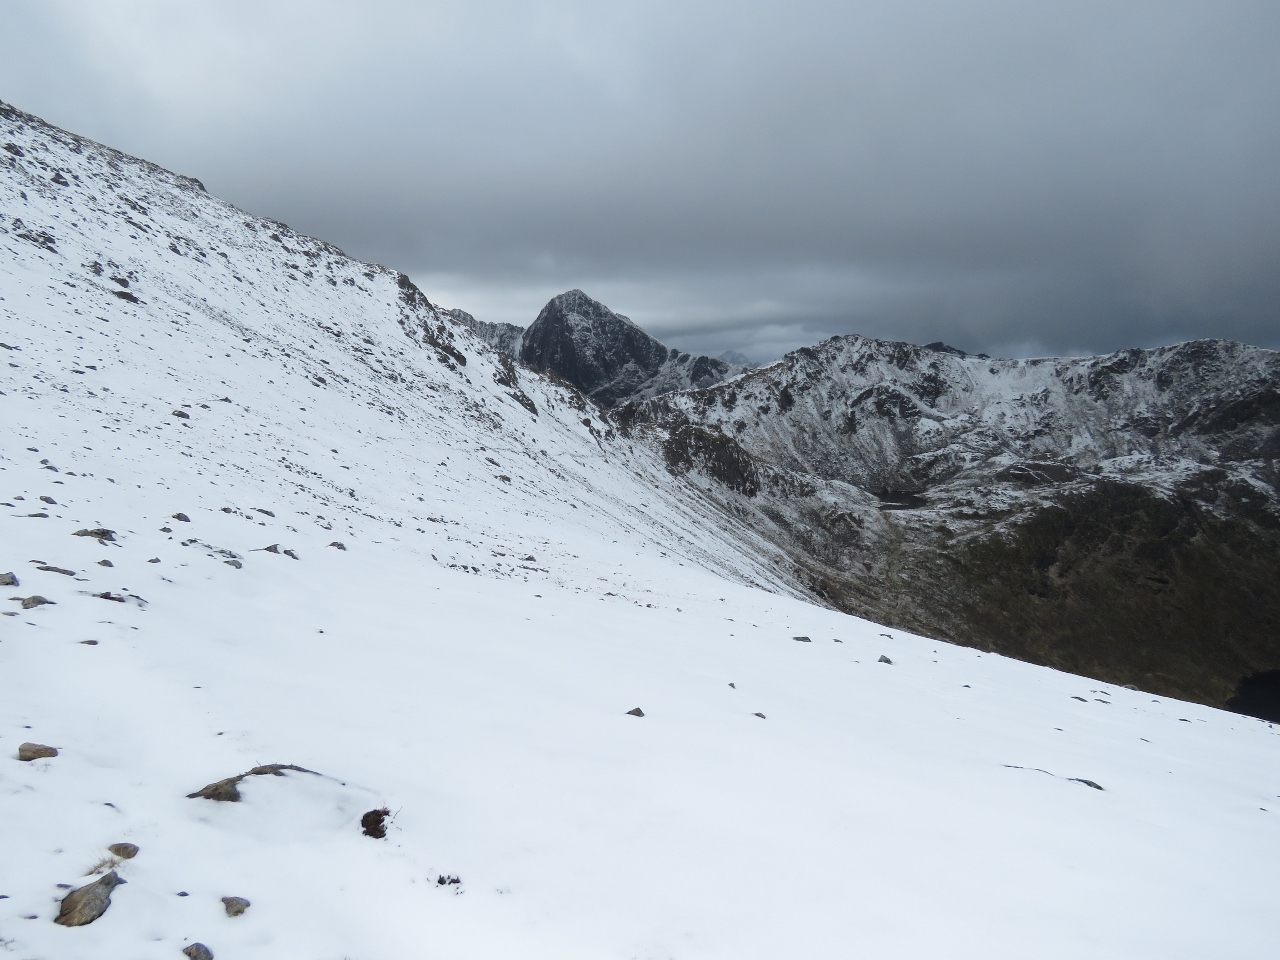
Sørkulen
Position: 15°5.00’E, 68°58.87’N
1,700ft (518m) Sørkulen almost hidden in the clouds behind Jennifer.
|
 |
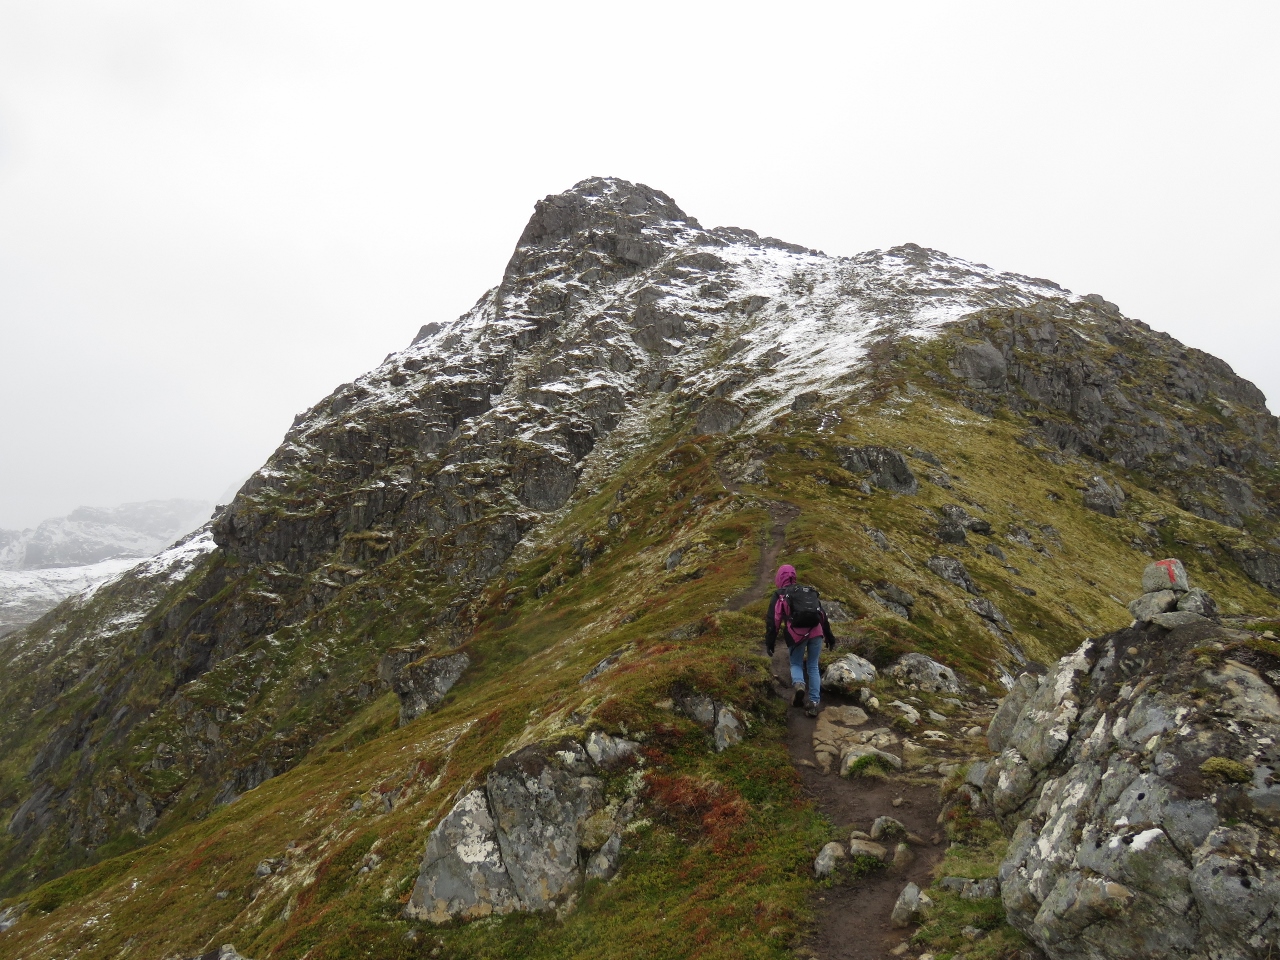
Re-ascending
Position: 15°4.98’E, 68°58.87’N
At 1,179ft (459) and ascending to 1,469ft (448m) Finngamheia.
|
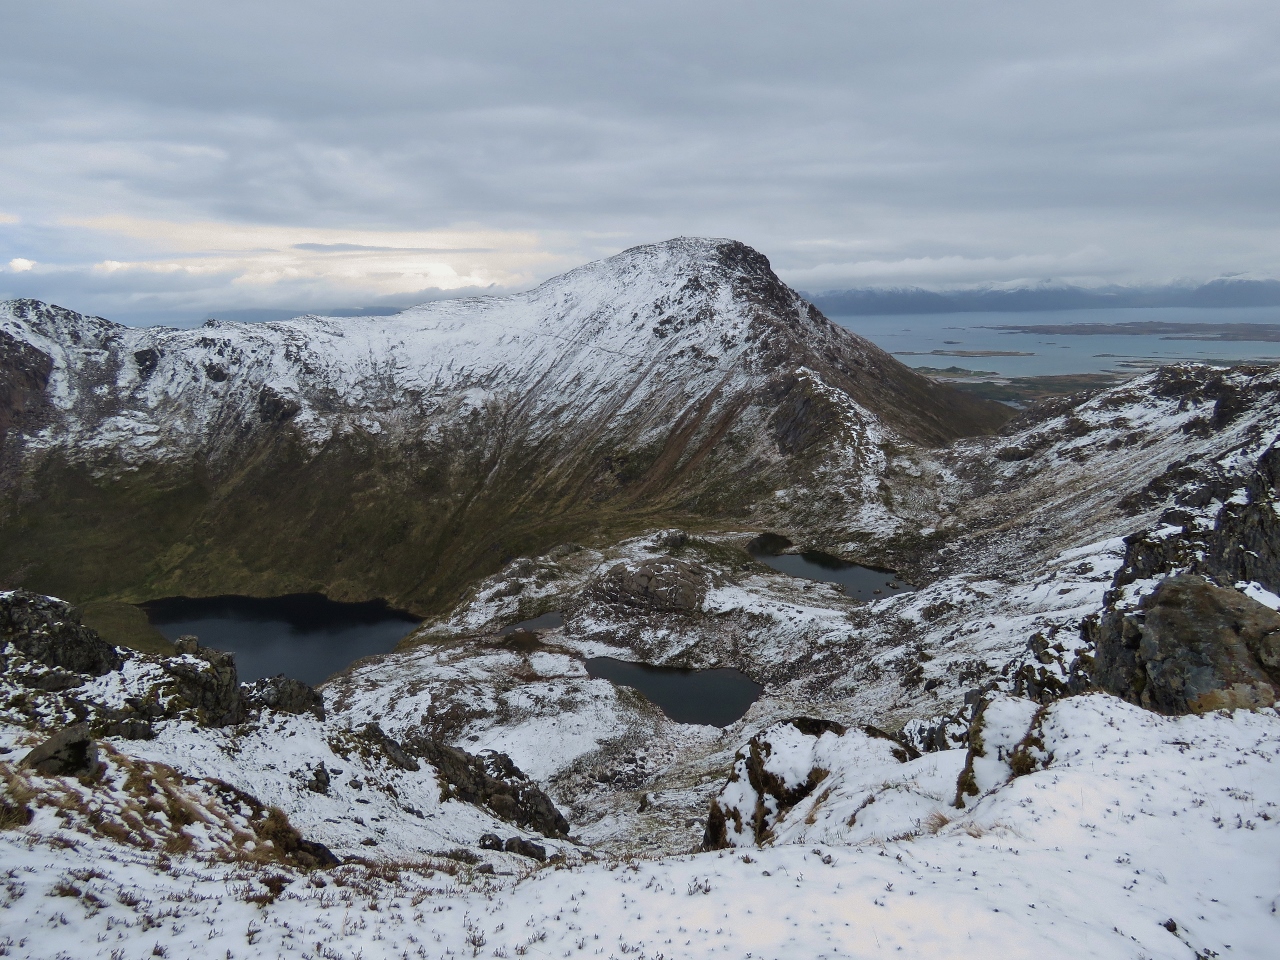 |
Langvaddalsvatnan and Sørkulen
Position: 15°4.12’E, 68°59.05’N
Looking southeast near the summit of Finngamheia across the Langvaddalsvatnan lakes to our trail across the face of Sørkulen.
|
 |
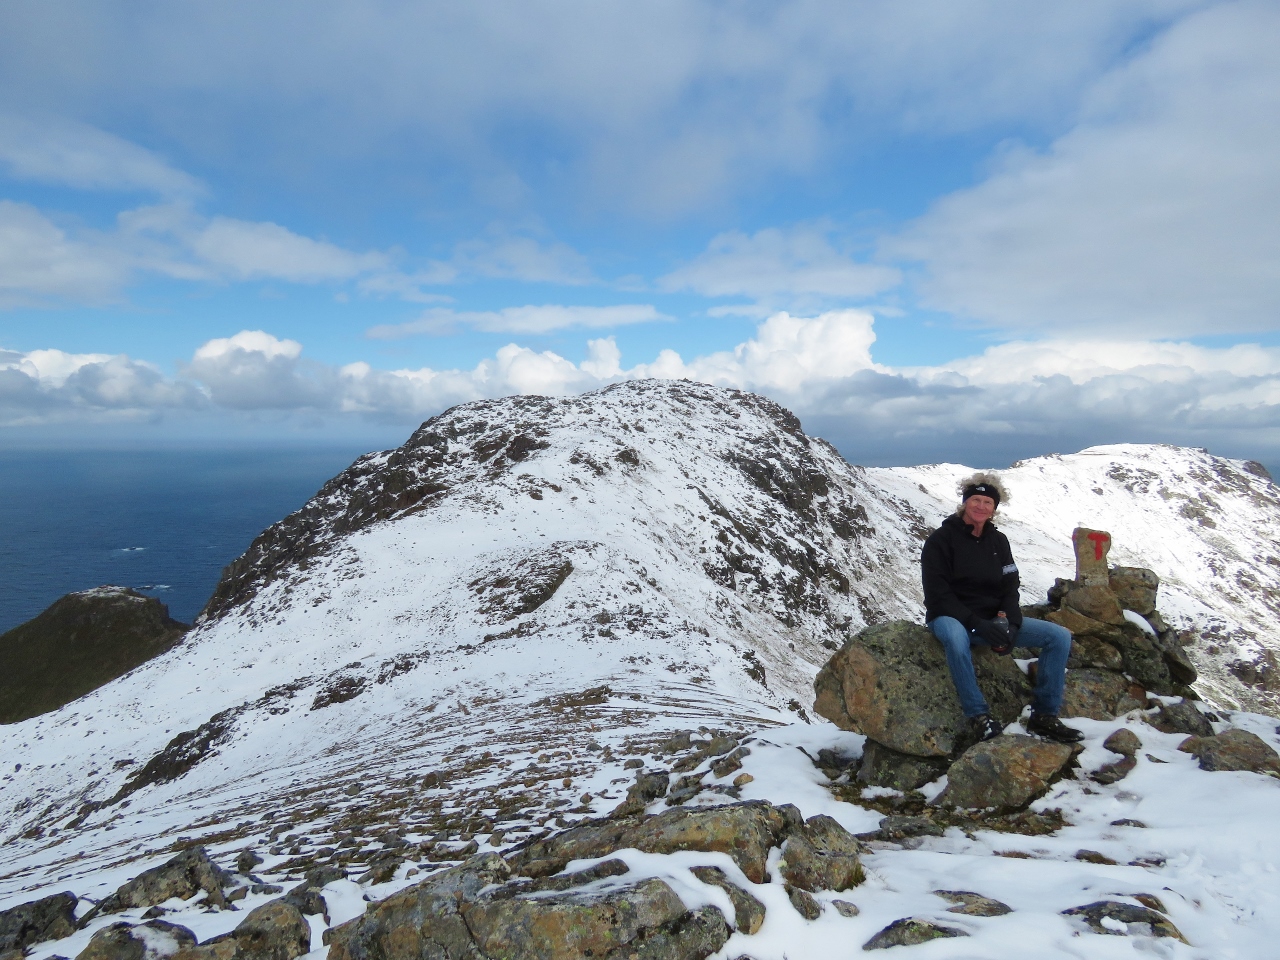
Finngamheia
Position: 15°4.09’E, 68°59.09’N
At the summit of 1,469ft (448m) Finngamheia, the highest point on the route, with the trail across the face of Sørkulen visible beyond James. We’ve hiked all over the world and this was definitely the most spectacular trail we’ve ever hiked. And amongst the most strenuous as well.
|
 |
Closer to Nyksund
Position: 15°4.08’E, 68°59.09’N
We’re getting closer to our goal of lunch in Nyksund, but we have a lot of “down” left in front of us.
|
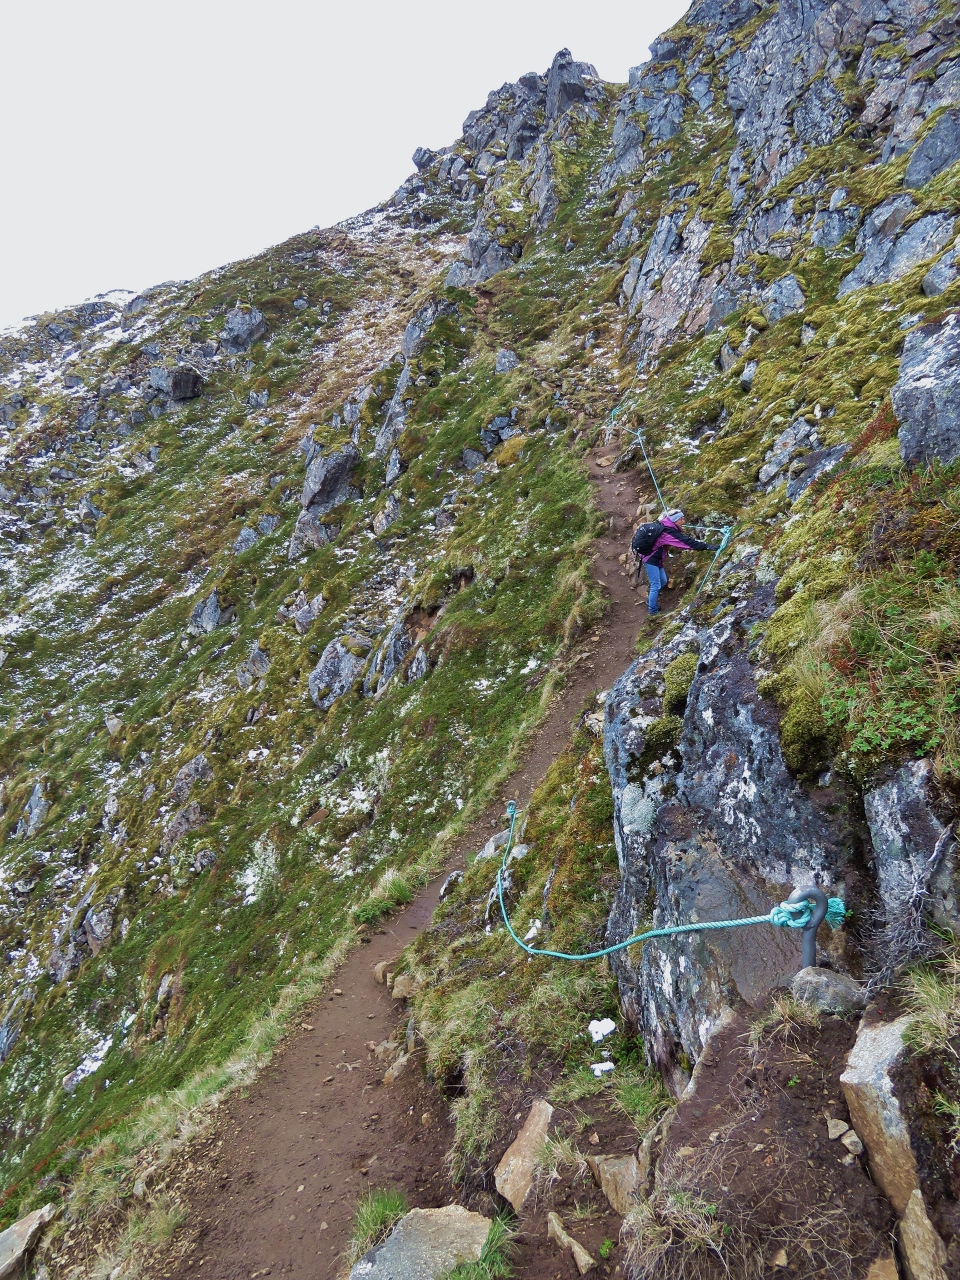 |
Climbing Ropes
Position: 15°3.58’E, 68°59.45’N
The track down the north side of Finngamheia is steep. Here climbing ropes are in place not so much because of the difficulty of the trail, but because of the drop-off to the left. It’s a really long way straight down.
|
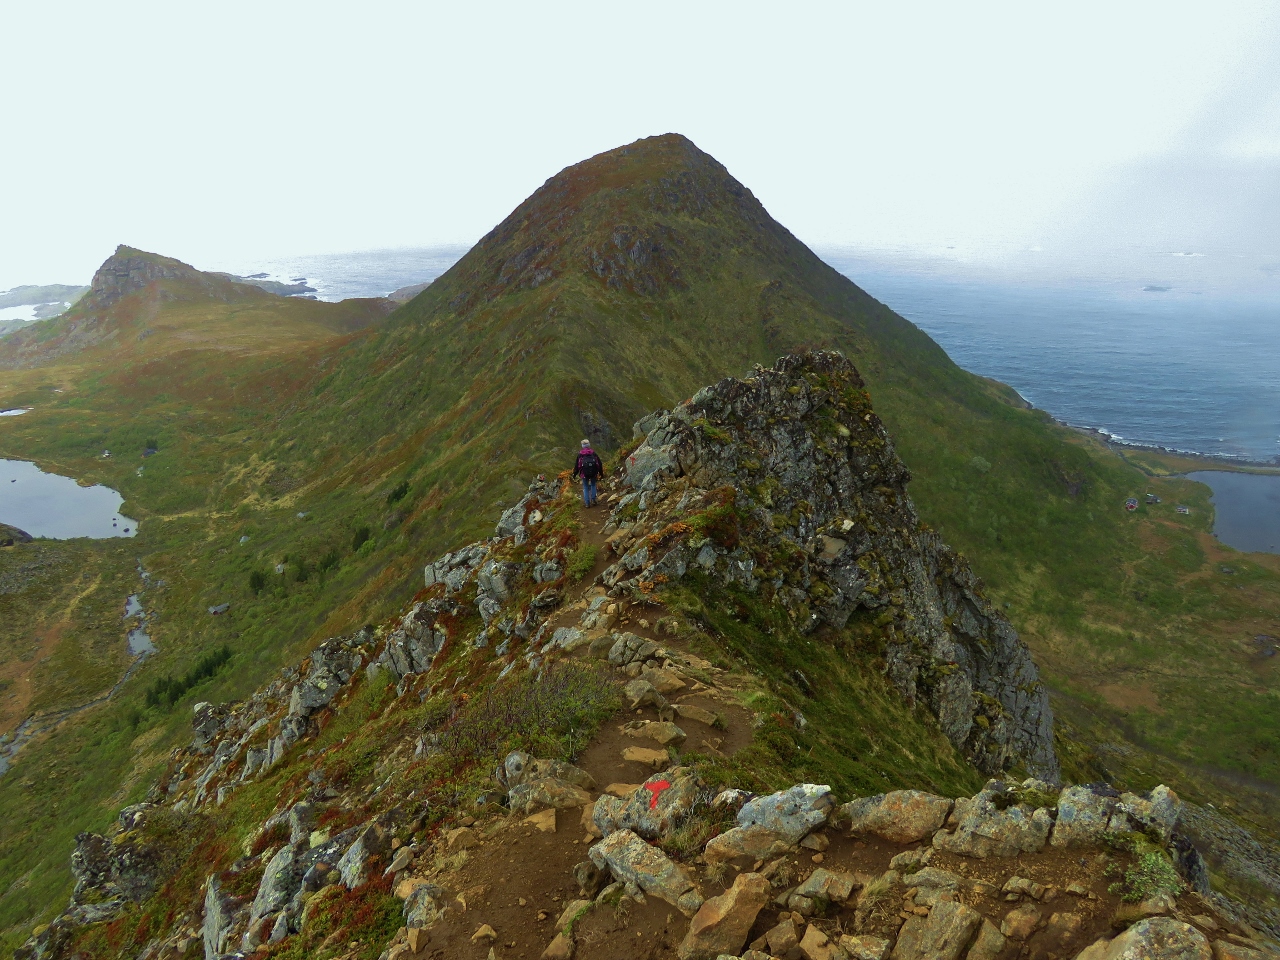 |
Ridge Down
Position: 15°3.49’E, 68°59.47’N
The trail down follows a razorback ridge and then switchbacks down a face just in front of Jennifer. The scenery remains astonishing as we descend toward Nyksund.
|
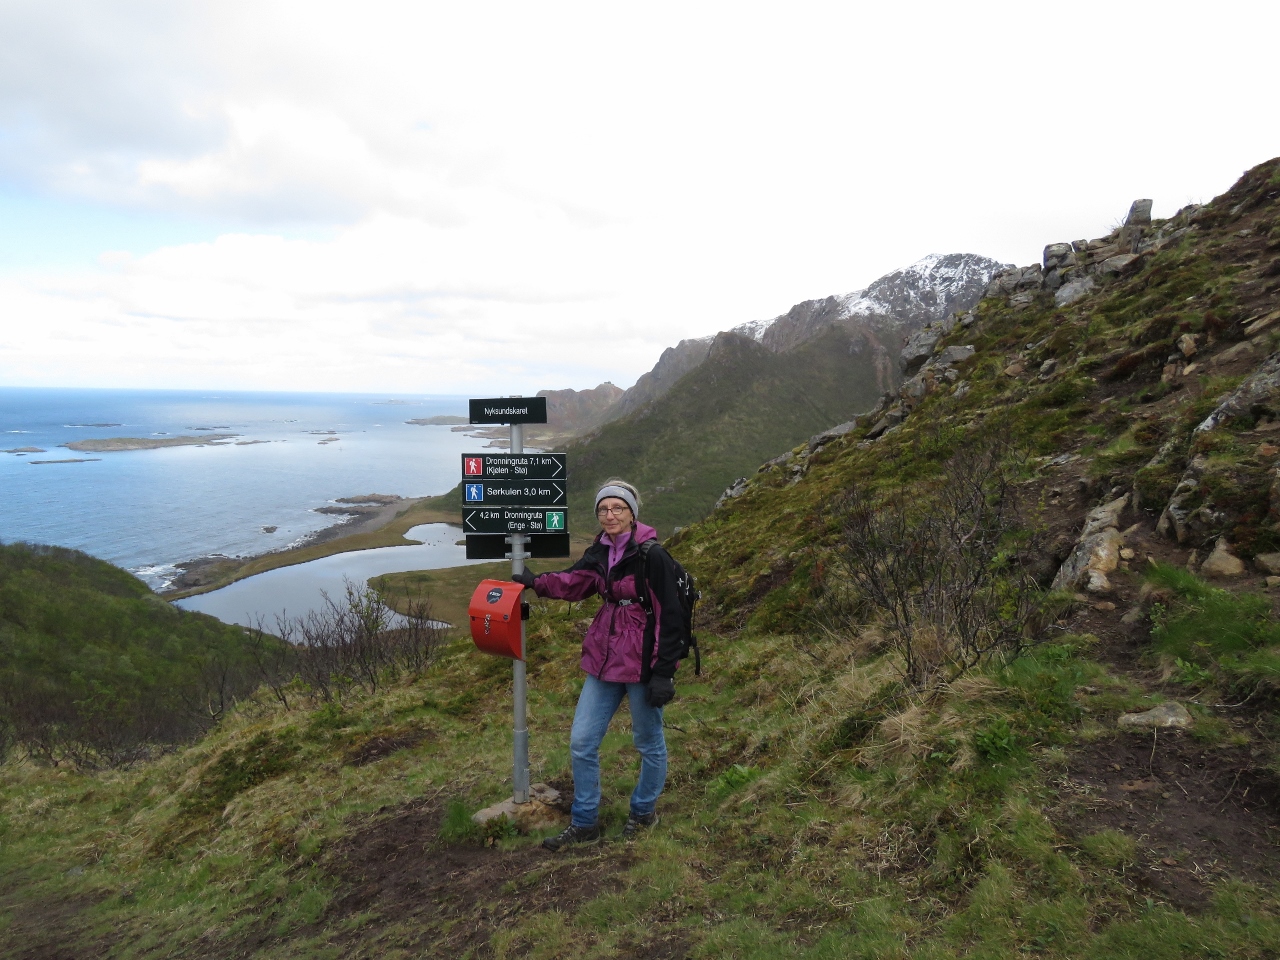 |
Intersection
Position: 15°3.10’E, 68°59.59’N
At the intersection of the high mountain route we just took from Stø and the low, mostly coastal route. We’ll continue on to Nyksund, then return back to take the coastal route home.
|
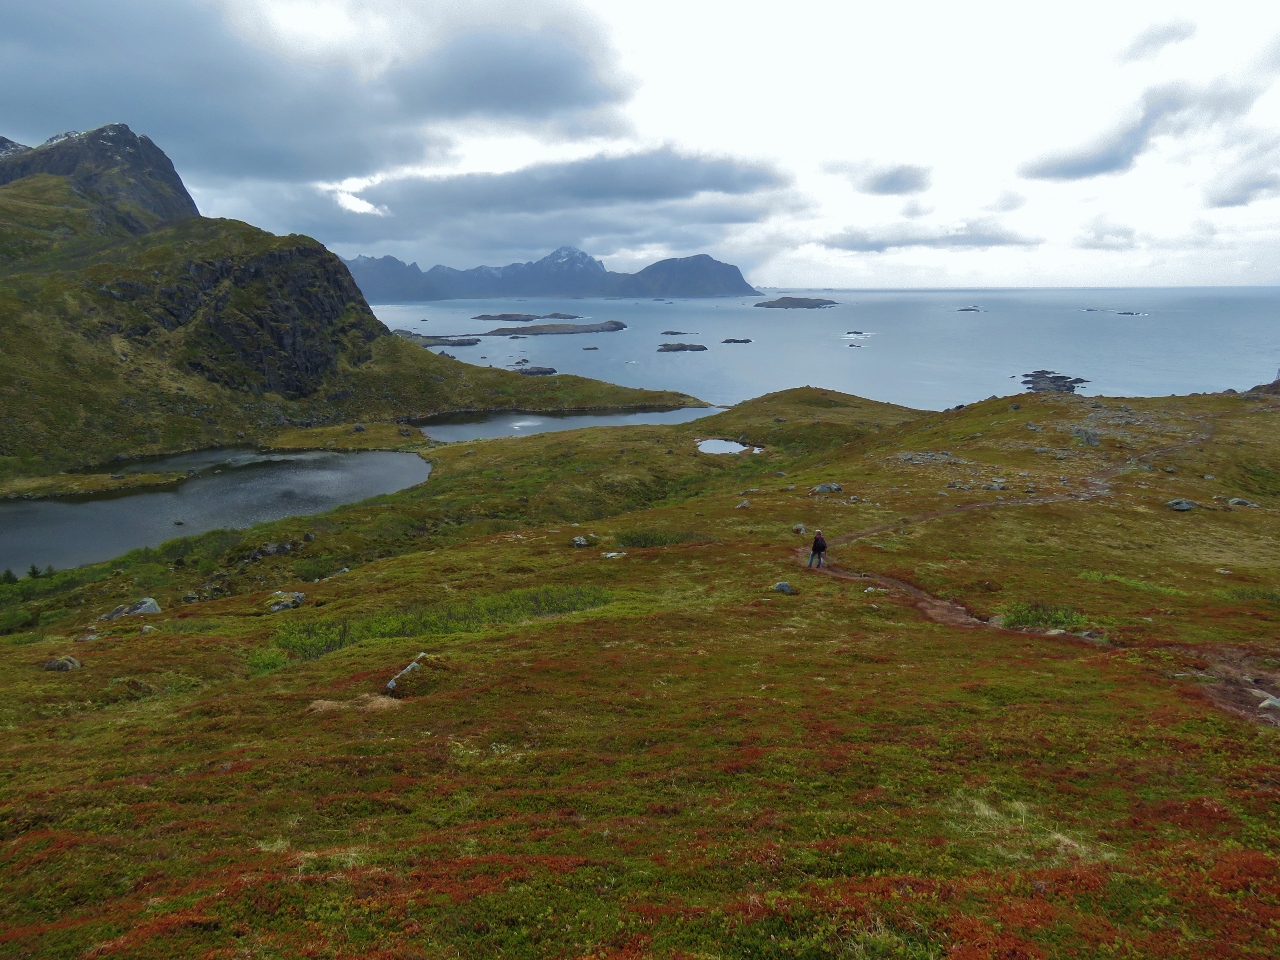 |
Nyksundvatnet Lakes
Position: 15°2.41’E, 68°59.68’N
The Første Nyksundvatnet and Andre Nyksundvatnet lakes that provide freshwater to Nyksund.
|
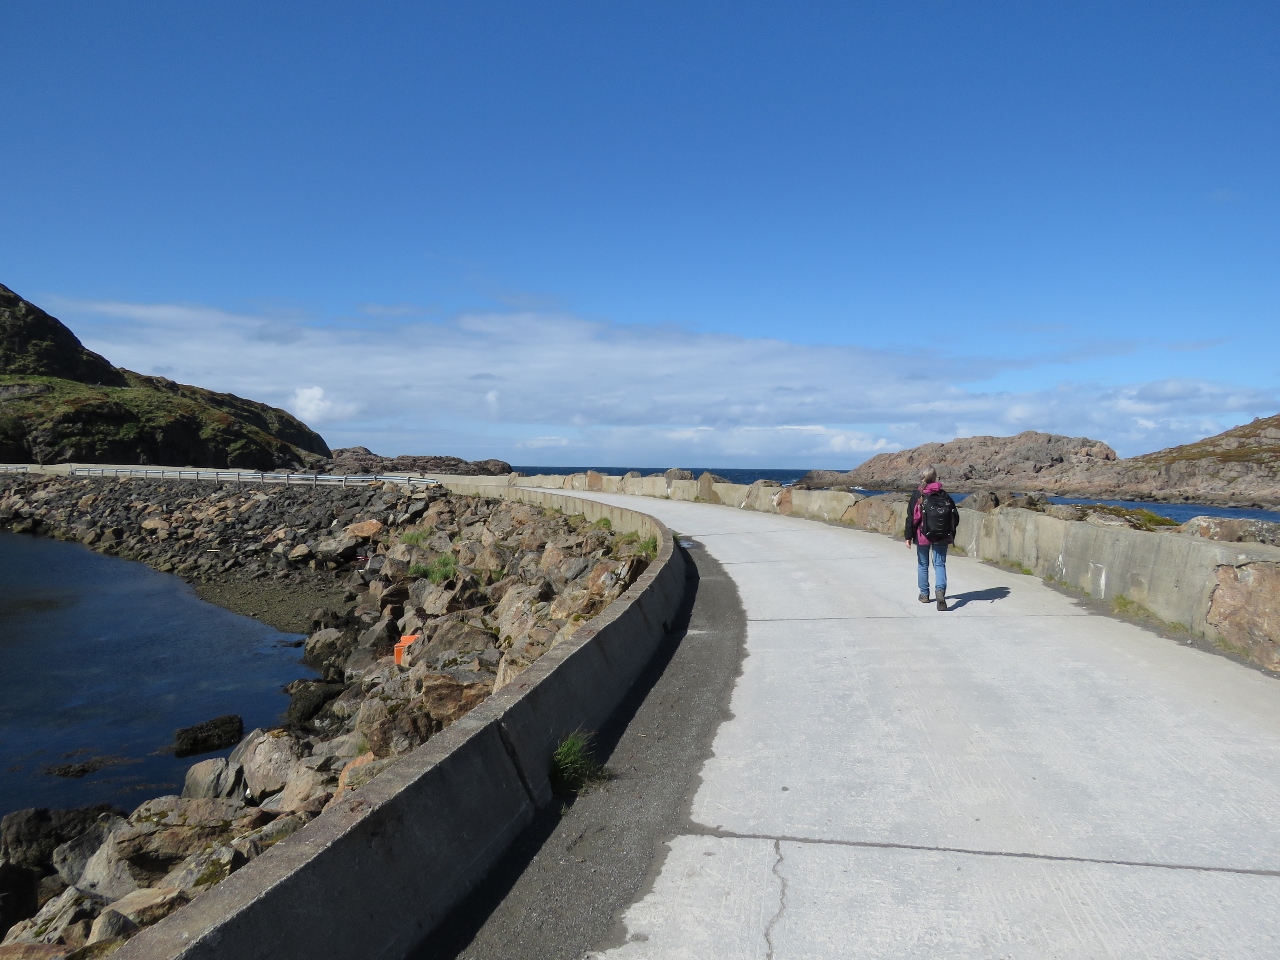 |
Road
Position: 15°1.21’E, 68°59.82’N
Nyksund is a sheltered harbour created with breakwaters between the islands of Nyksundsøya and Ungsmaløya for protection from the south and between Nyksundsøya and Langøya for protection from the north. Here Jennifer is walking the road along the breakwater from Langøya to Nyksundsøya.
|
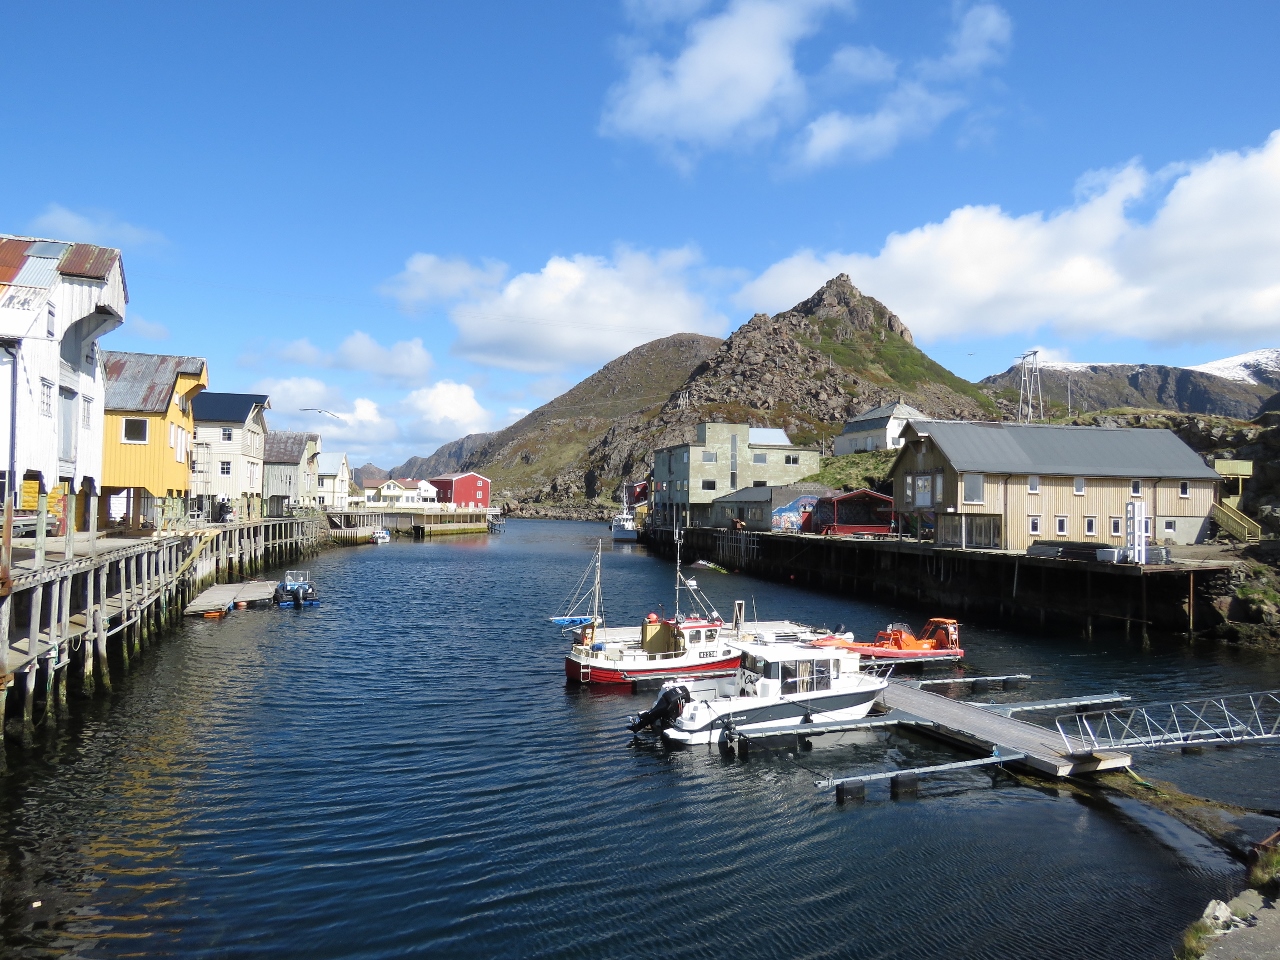 |
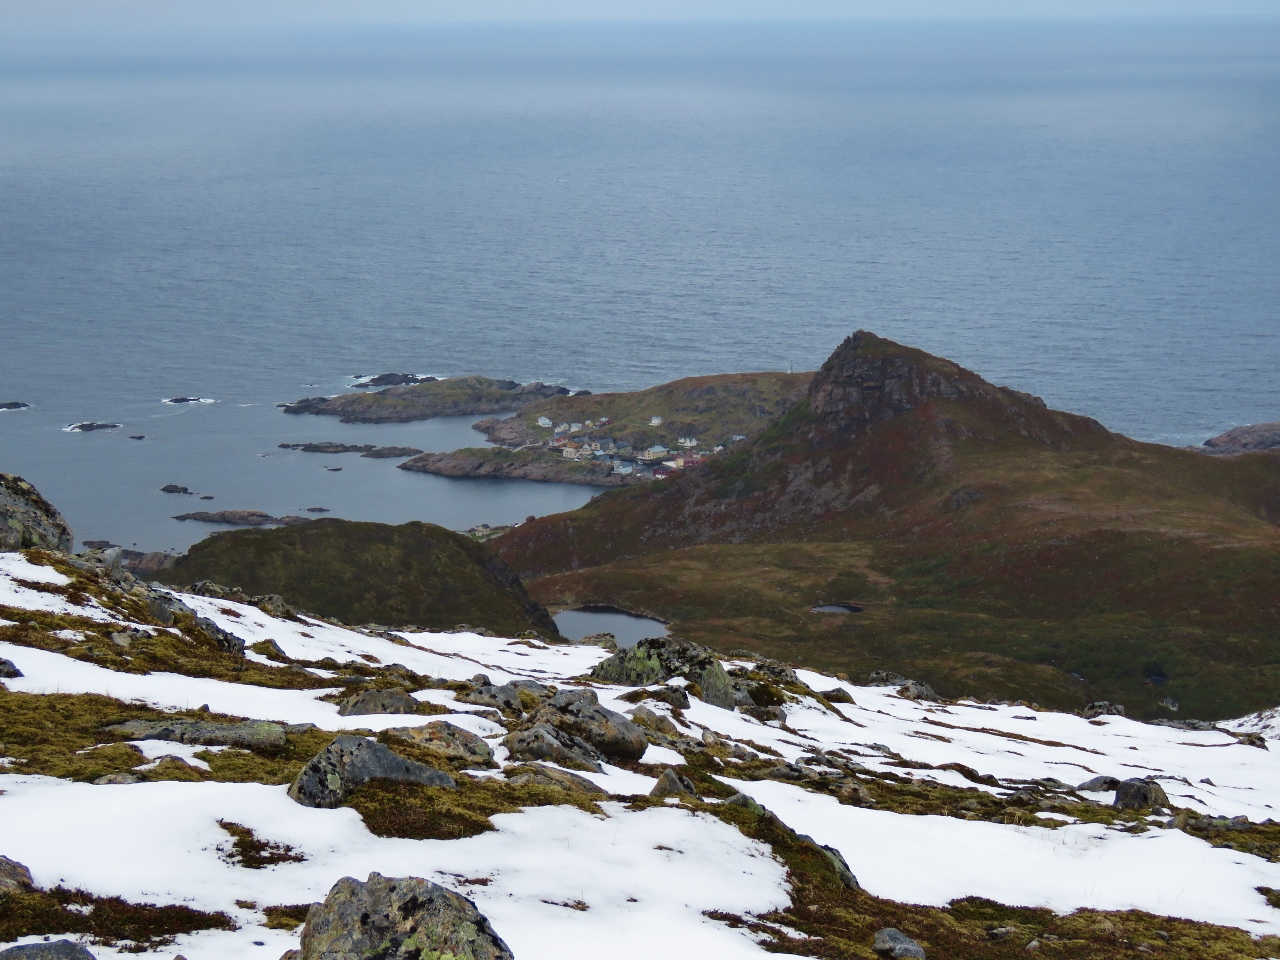
Nyksund
Position: 15°0.66’E, 68°59.67’N
The fishing village at Nyksund was already in decline in 1975 when a storm inflicted major damage and the last inhabitant left. Starting at the turn of the millennium, the abandoned town was reborn as an artist’s colony and the crumbling buildings and structures are slowly being restored. It’s a lovely town, perched on the edge of the wild Norwegian Sea. This is looking northeast across the protected harbour from the road across the breakwater from Nyksundsøya to Ungsmaløya.
|
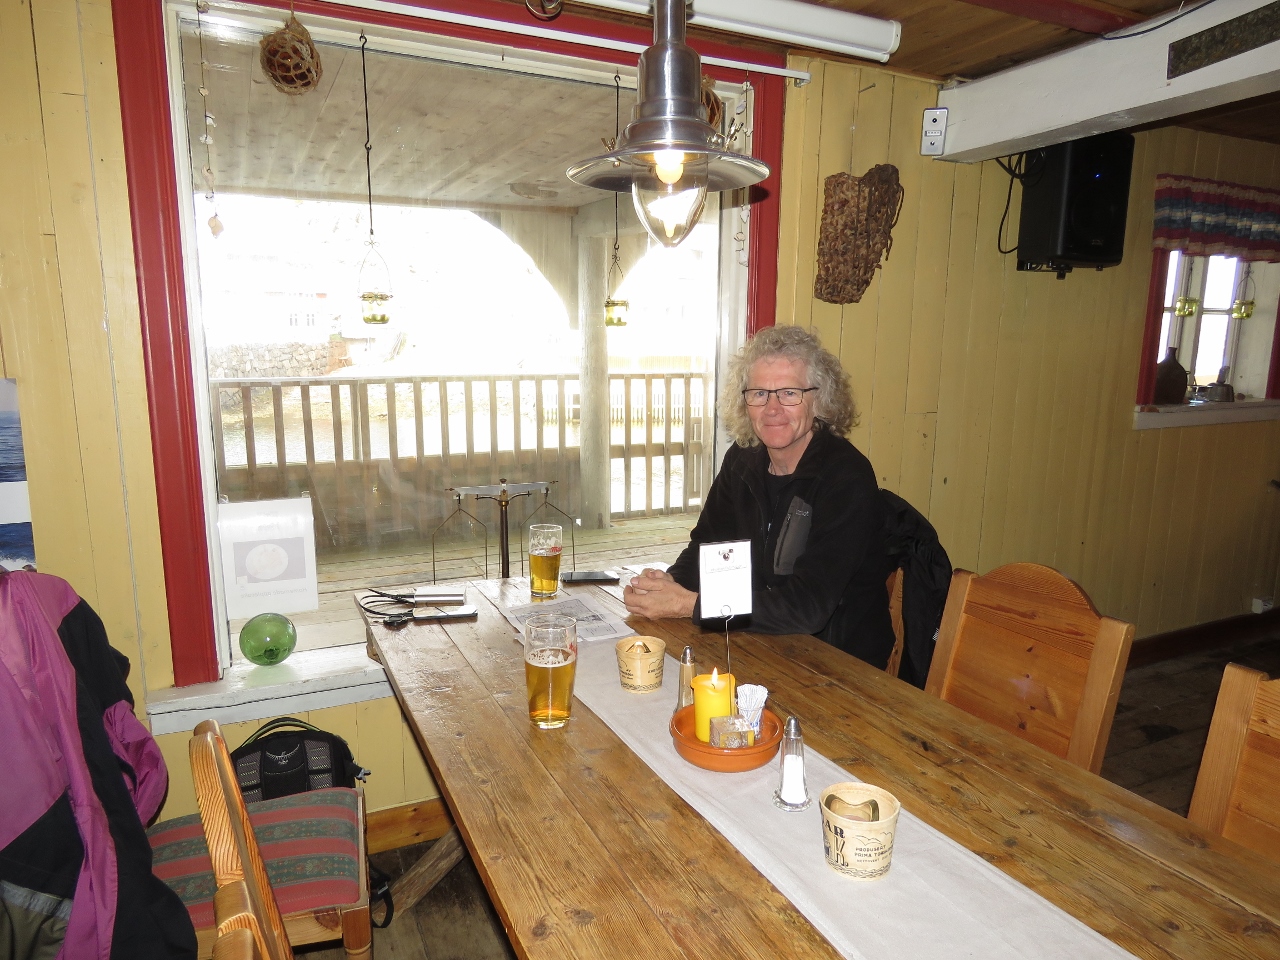 |
Holmvik Brygge
Position: 15°0.81’E, 68°59.71’N
After that hike, a cold beer never tasted so good. We had an excellent lunch at Holmvik Brygge.
|
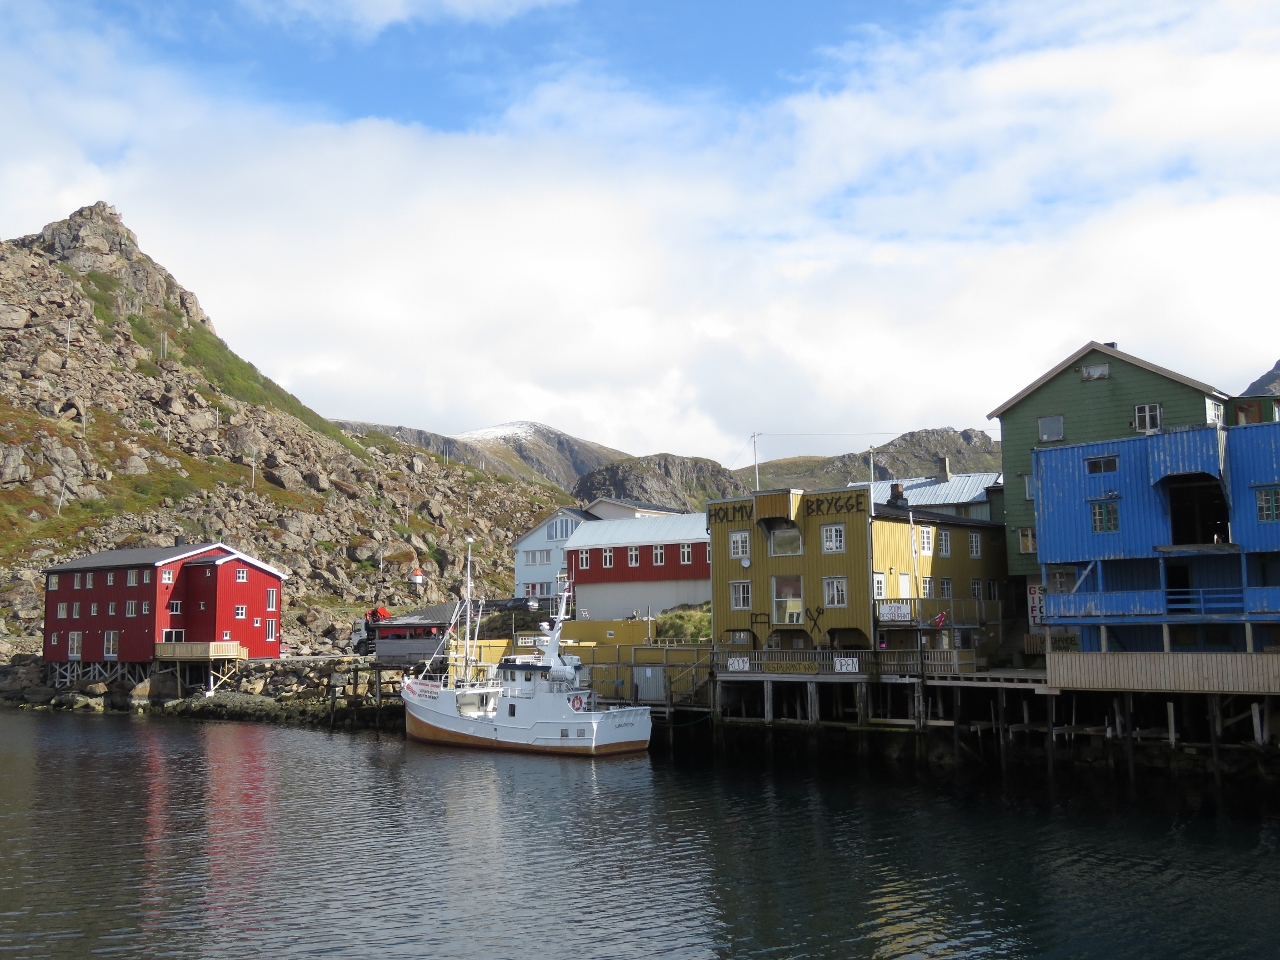 |
Ungsmoløya
Position: 15°0.79’E, 68°59.75’N
Looking across to the island of Ungsmoløya from Nyksundsøya. The yellow building is Holmvik Brygge, where we had lunch. It also is a guest house and offers guided trips in the area.
|
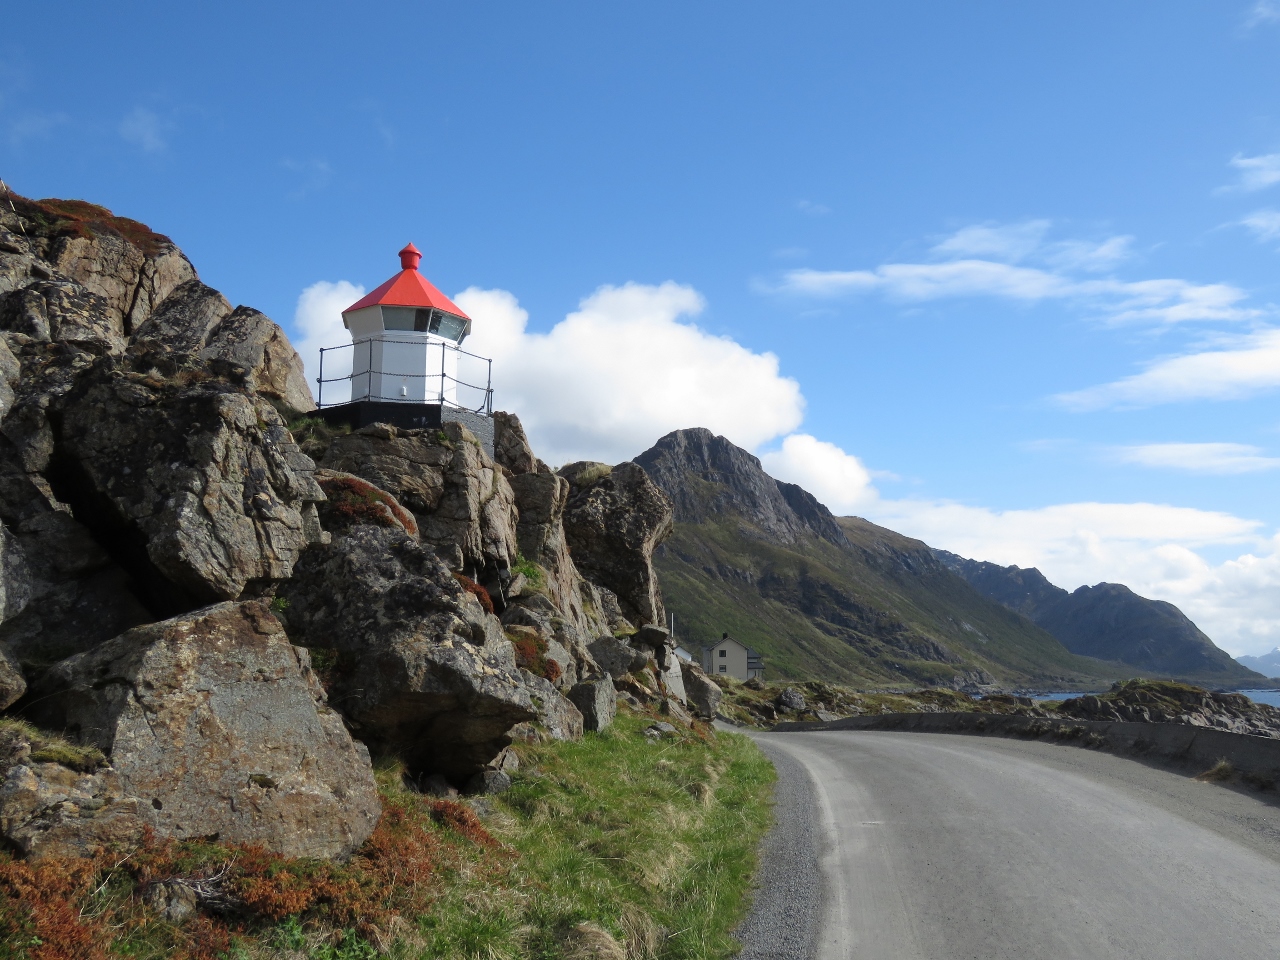 |
Lighthouse
Position: 15°1.10’E, 68°59.66’N
Walking under the Nyksund lighthouse as we return back to the trail.
|
 |
Coastal Route
Position: 15°3.10’E, 68°59.59’N
Back as the intersection with the high route. We’ll be taking the trail down to the lagoons at sea level and back along the coast to return. The radar station above Stø is just barely visible in the distance.
|
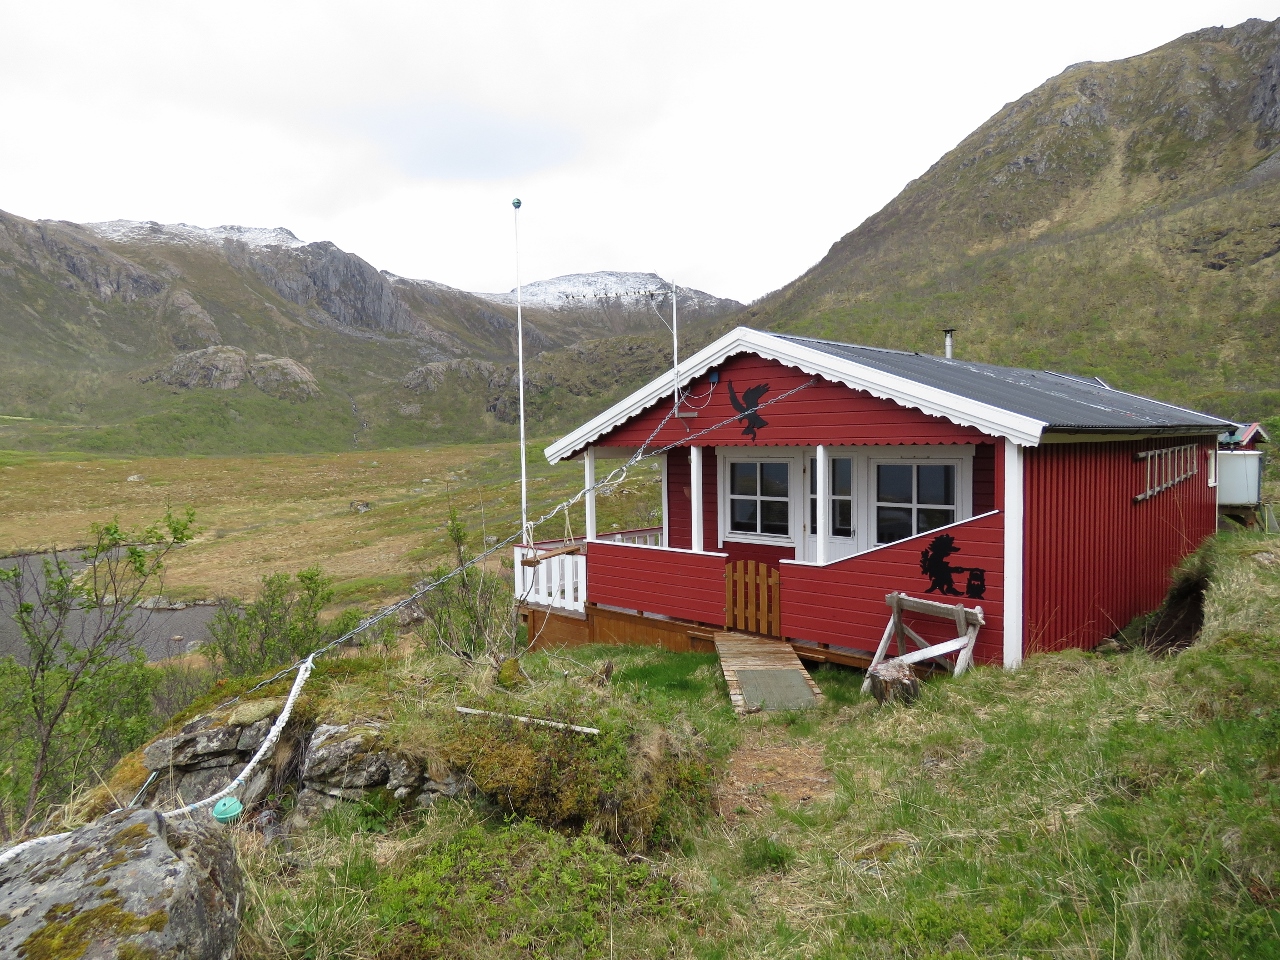 |
Chained Down
Position: 15°3.34’E, 68°59.87’N
This cabin near the lagoons is actually chained down (you can see heavy chain going from the roof down to the left), indicative of the strong winds the area must get.
|
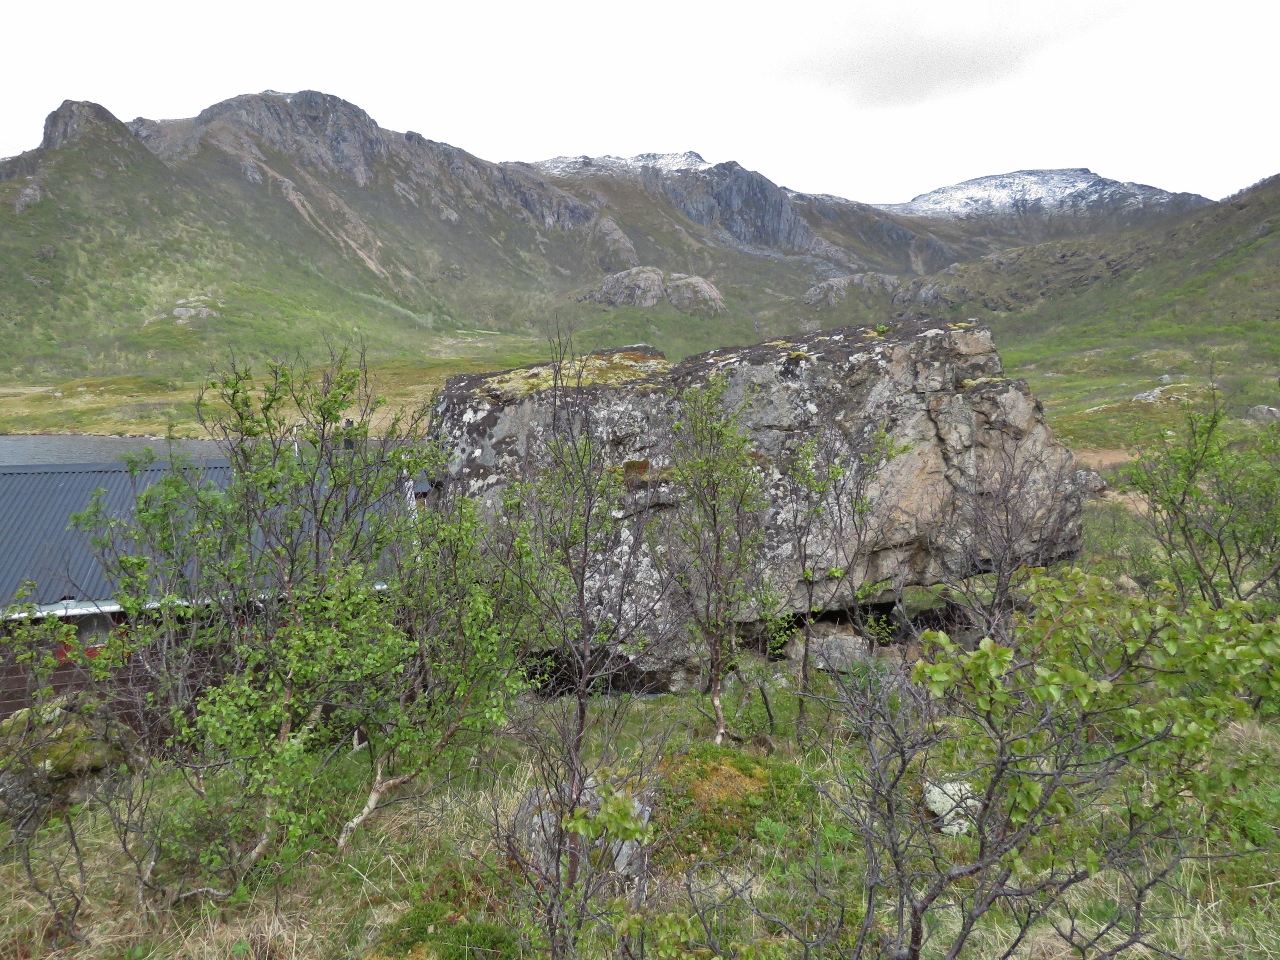 |
Fallen Rock
Position: 15°3.36’E, 68°59.89’N
A second cabin built next to a fallen rock almost as big as the cabin itself. If a rock that big fell once …
|
 |
Snow Melted
Position: 15°3.53’E, 68°59.99’N
Looking back up to the trail we took along the flank of Sørkulen. When we crossed earlier today the slope was covered with snow, but a few hours later it’s mostly gone.
|
 |
Trail Shelter
Position: 15°5.36’E, 69°0.53’N
National Trekking Association hut along the trail. It looked heavily used.
|
 |
Beach
Position: 15°5.71’E, 69°0.71’N
Looking across a nice sand beach near Stø. The radar station above town is visible at top right. We’re almost back.
|
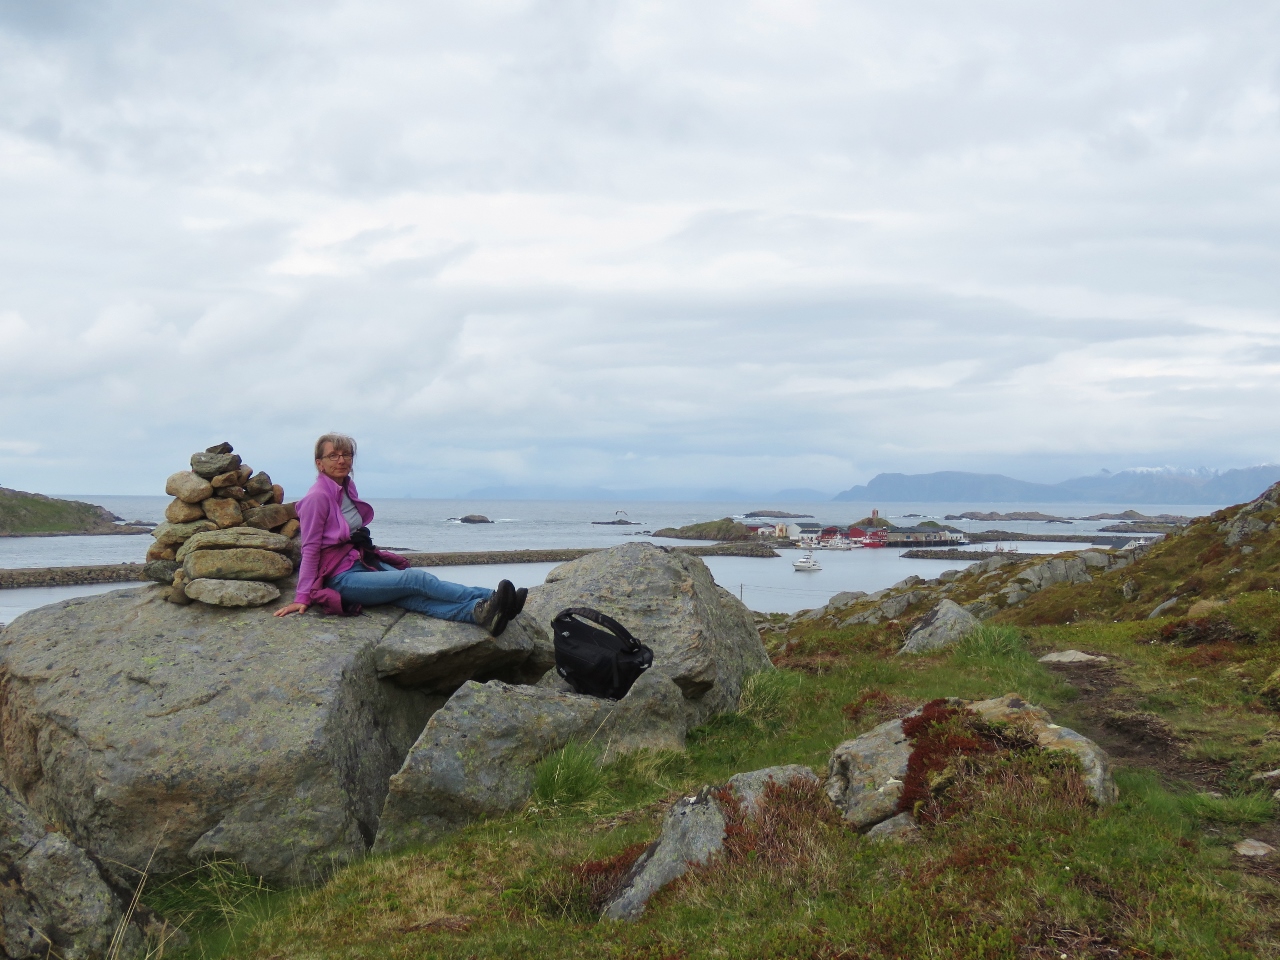 |
Cairn
Position: 15°6.22’E, 69°1.05’N
Cairn at the coastal route trailhead, with a view to Dirona moored at Stø.
|

|
Click the travel log icon on the left to see these locations on a map, with the complete log of our cruise.
On the map page, clicking on a camera or text icon will display a picture and/or log entry for that location, and clicking on the smaller icons along the route will display latitude, longitude and other navigation data for that location. And a live map of our current route and most recent log entries always is available at mvdirona.com/maps. |
What a spectacular hike! Magnificent scenery, but oh my it looked long and tiring. The blast of hail in a difficult spot must have been a bit unwelcome. Enjoyed the post very much.
The freshly fallen snow really added to the beauty of the scenery. It was a great hike and, in many ways, the weather made it more interesting.
Spectacular scenery, We use poles when we head for the hills, as they give you a bit more of a positive placement on uneven ground and take the strain off your back, elbows etc.
https://www.amazon.co.uk/TheFitLife-mountaineering-Collapsible-Alpenstocks-ultralight/dp/B00WTUVE2C/ref=sr_1_2?ie=UTF8&qid=1531940442&sr=8-2&keywords=trekking+poles+pair
Leki is a brand to look out for, very good gear.
Thanks for the recommendation Paul.