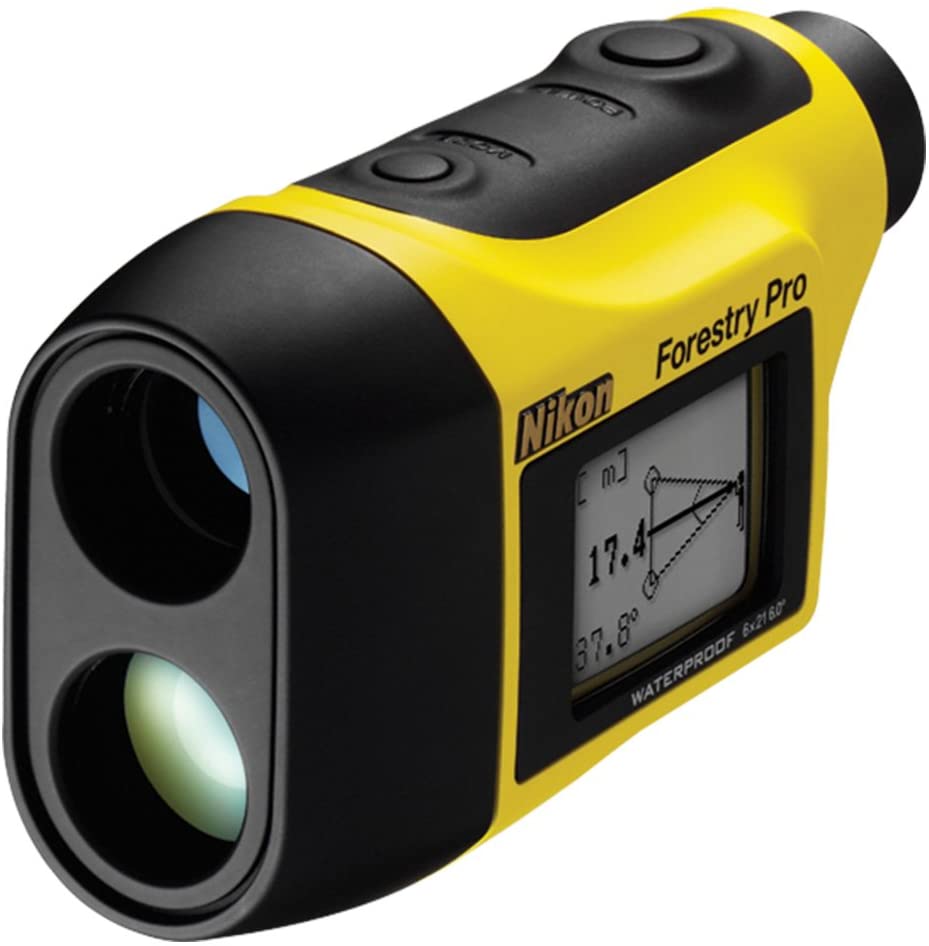
This installation of “Gear We Like” covers the Nikon Forestry Pro Laser Rangefinder. This tool allows us to quickly and accurately measure a bridge clearance and other vertical or horizontal distances. We first discovered a need for this device in East London, South Africa, where we stopped to ride out a storm en route from Richards Bay to Cape Town.
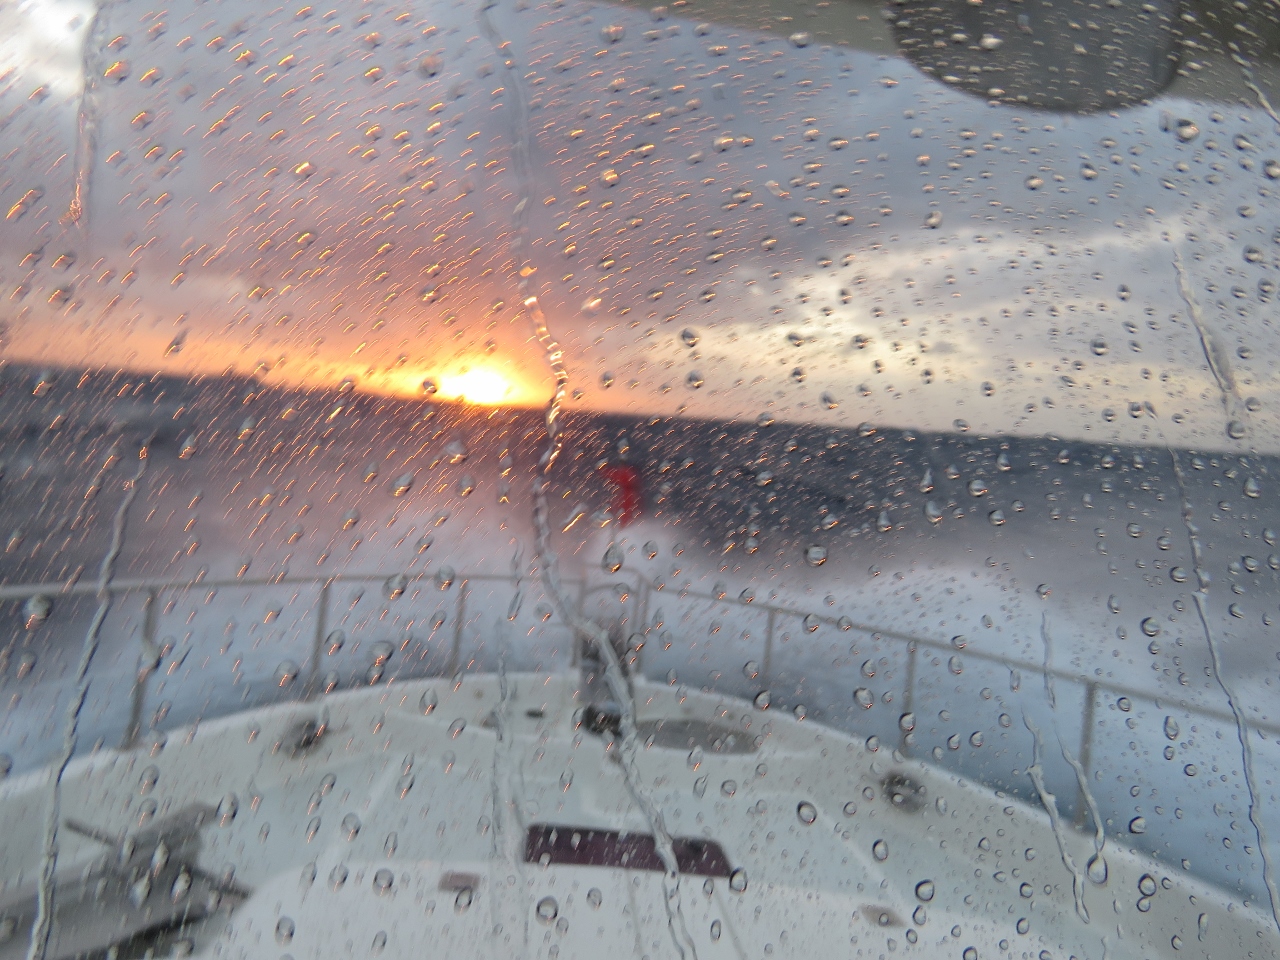
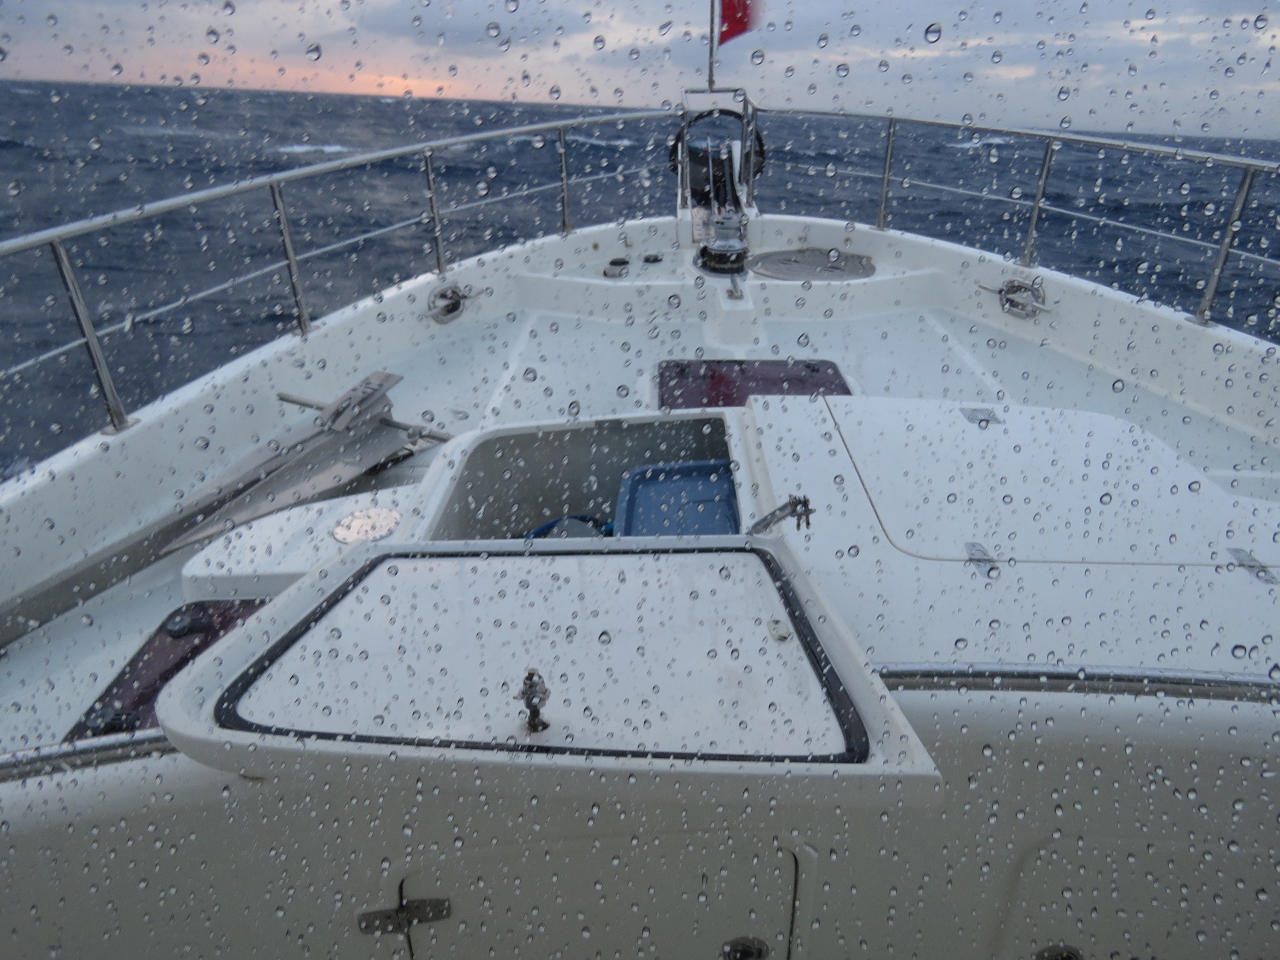
On this run we got some firsthand experience with the infamous Agulhas current, both good and bad. On the good side, we often were making over 11 knots in a 9.5-kt boat. On the bad side, as we neared East London the winds picked up from moderate to SW 25-30 kts in seconds and the waves stacked up immediately against the southbound Agulhas current. We’ve never seen seas develop so quickly and relatively moderate winds can yield positively gigantic seas.
The wind was right on the nose and we took the hardest green water hit ever to the forward windows. It hit so hard James ducked at the helm, and had so much force it bent the stainless steel latch that holds a forward hatch cover down and tore off the gas strut. It also bent the barrel bolt on the Portuguese bow door, and actually forced a small amount of water through hatch seals that never leak. James was able to close the torn-open forward hatch from the safety of the Portuguese bridge and we reached East London, and later Cape Town, with no further issues.
 |
 |
We ended up arriving into East London well after dark, but fortunately the harbor was relatively easy to enter at night. East London is mainly a commercial port, with a small section designated as a pleasure craft moorage at head. But buoys took up most of the allowable pleasure craft area so, with no other choice, we anchored overnight in the swing area off the dry dock. The next morning Harbor Control asked us to move, as a vessel was coming out of the dry dock and required the full channel.
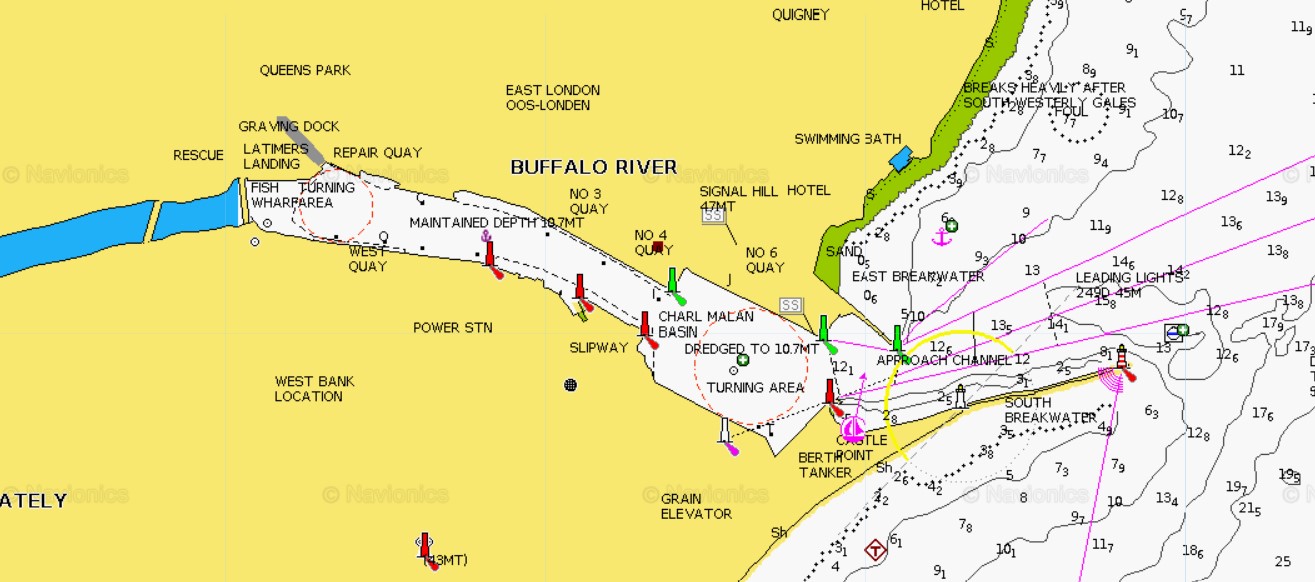
We didn’t have any good options at this point. No space was available for re-anchoring and Dirona was too large and heavy for the available pleasure craft moorings. The storm was now more intense and, after experiencing the wave force in lighter winds against the Agulhas current, departing was not an option either.
The only reasonable possibility was a small empty basin beyond the low railroad bridge at the head. But neither the bridge nor our charts showed the clearance, so we didn’t know if we could make it under. We decided to play it by eye and see if we could squeeze through. Dirona has a 30ft (9.1m) air draft and we slowly and carefully passed under near low tide with inches to spare. Beyond was a lovely bay where we rode out the storm and repaired our damage hatch cover, happy to be in a safe and comfortable moorage out of the way of port operations.
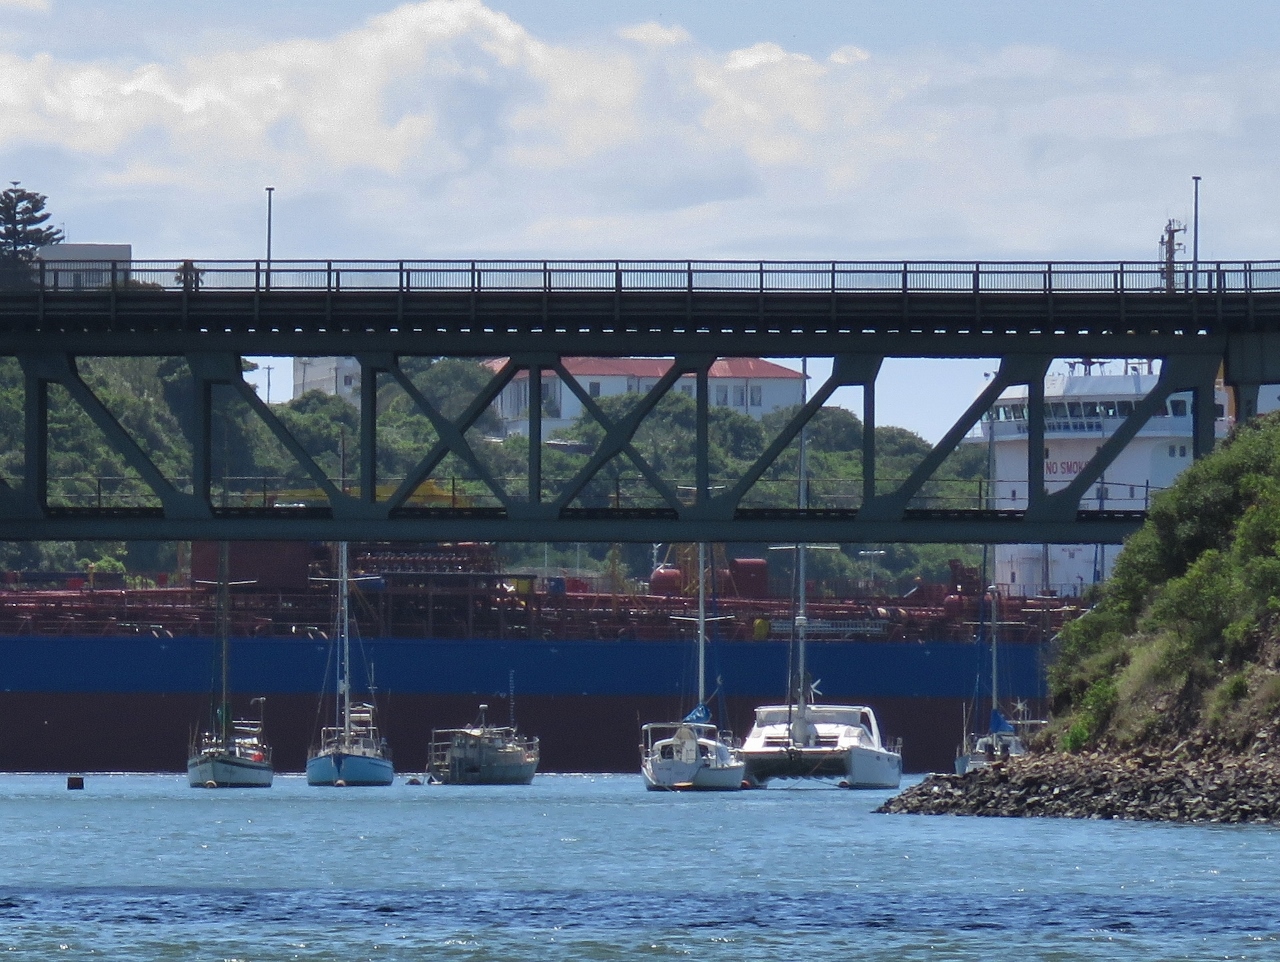
The two pictures below show the ship Moyra in the dry dock at left, viewed from our first East London anchorage. The right picture below is taken from our second anchorage, after we’d passed under the unmarked railroad bridge. The bridge is visible in the foreground, with the pleasure craft mooring area beyond. In the background the Moyra is visible, now out of the dry dock and right where we were initially anchored.
 |
 |
This was the first time we’d encountered a bridge near our air draft with no clearance marked on the bridge or the chart. The experience prompted us to find a solution for measuring clearance ourselves, as a mistake in judgment could be expensive. After some research, we ended up buying a Nikon Forestry Pro Laser Rangefinder and are very happy with it. The device is easy to use and accurate. Whenever we approach a low bridge, or have any doubt about clearance, we take a measurement.
In the picture below, we are passing under the closed Limfjords bridge near Aalborg, Denmark. As we approached, we learned the bridge does not open for pleasure craft during rush hour, so we’d have had to wait about 40 minutes. The wait wasn’t that appealing, so we asked the operator the exact clearance at the current tide. He reported 9.5m (31.2ft). We used rangefinder to confirm there was room for our just under 30-ft (9.1m) clearance requirement. We crept under slowly with Jennifer at the stern of the aft deck watching the clearance, and it looks like we had a foot and a half to spare.
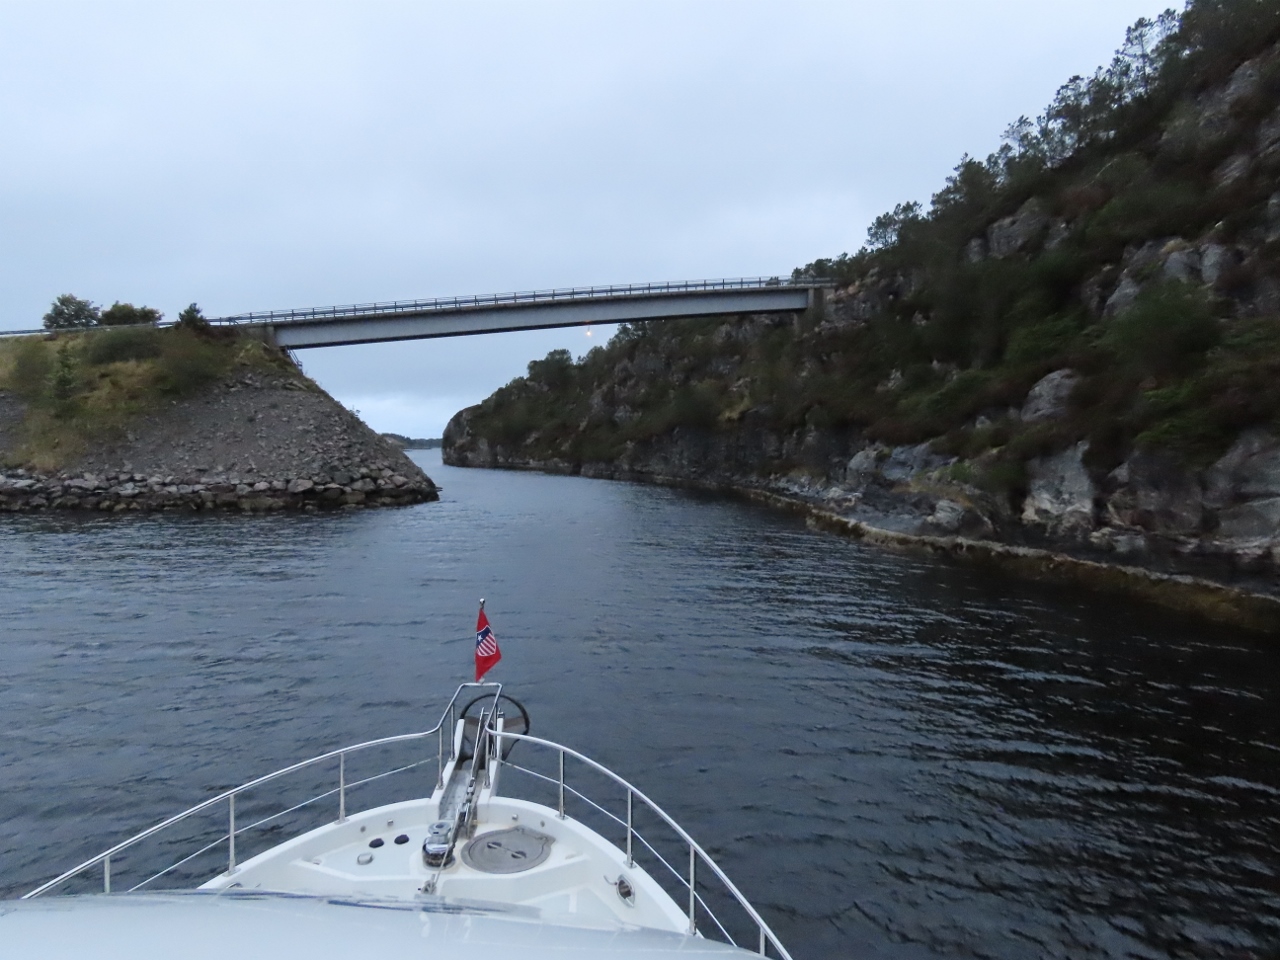
Even when the data indicates we have plenty of room, we often verify with the rangefinder. In the picture below, we are approaching the bridge across the narrows at Toskesundet between the islands of Toska and Flona in southern Norway. The charts indicate the clearance is 52.5 ft (16m), plenty for our 30-ft (9.1m) air draft, but it looked quite low and was not marked with the clearance as is common for Norwegian bridges. We used the rangefinder to confirm the charted clearance before passing under.
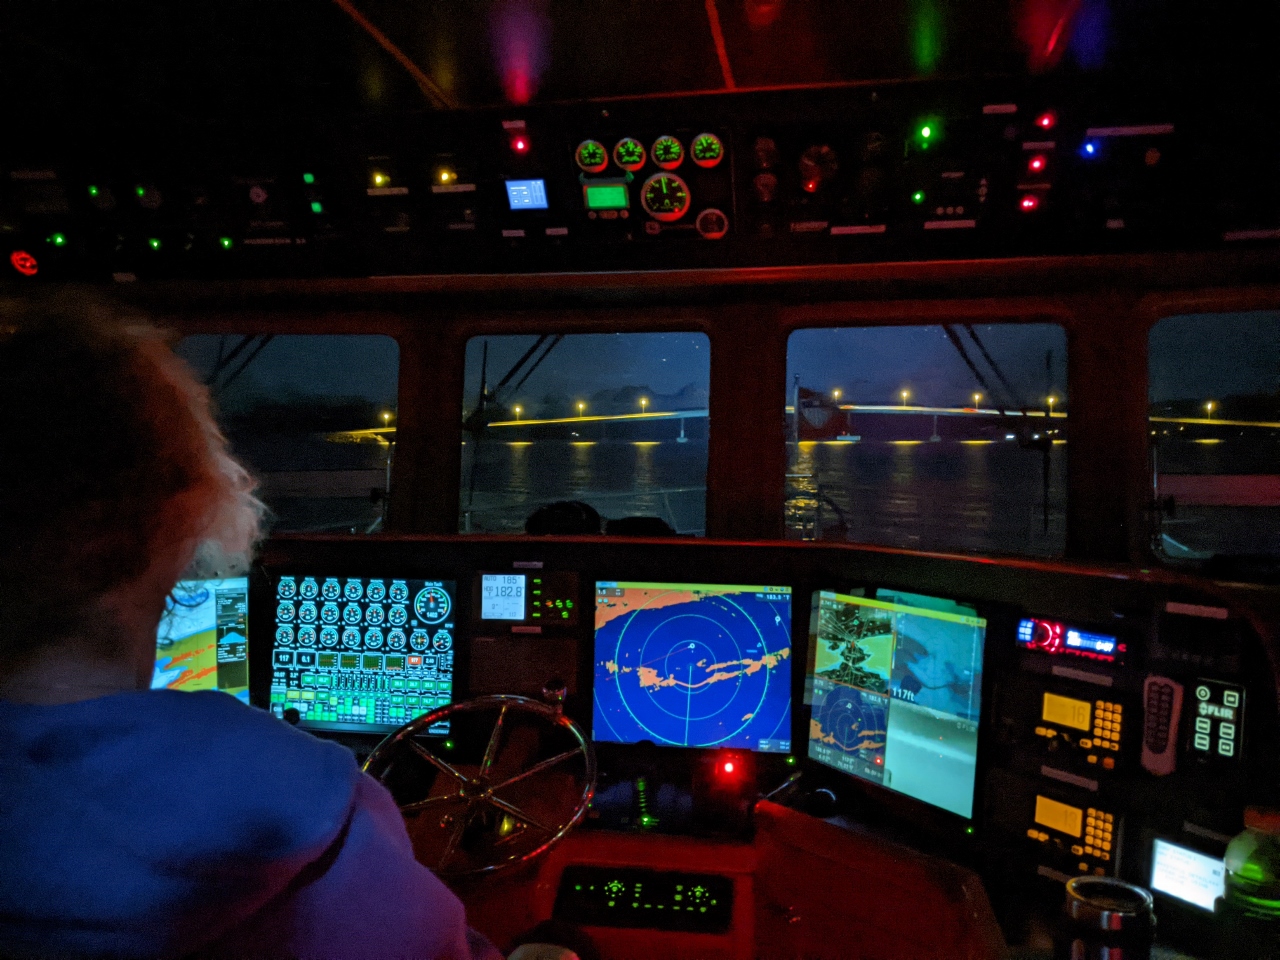
The rangefinder was also very useful during our winter cruise in Norway, where the limited daylight hours meant we navigated much of the time in the dark. Below we are approaching the Bolsoysundet Bridge in Romsdalsfjorden, one of literally hundreds of bridges in Norway. The bridge clearance is 52 ft (16m), plenty for our 30-ft (9.1m) air draft, but it looks a lot lower at night, so we verified it with the rangefinder.
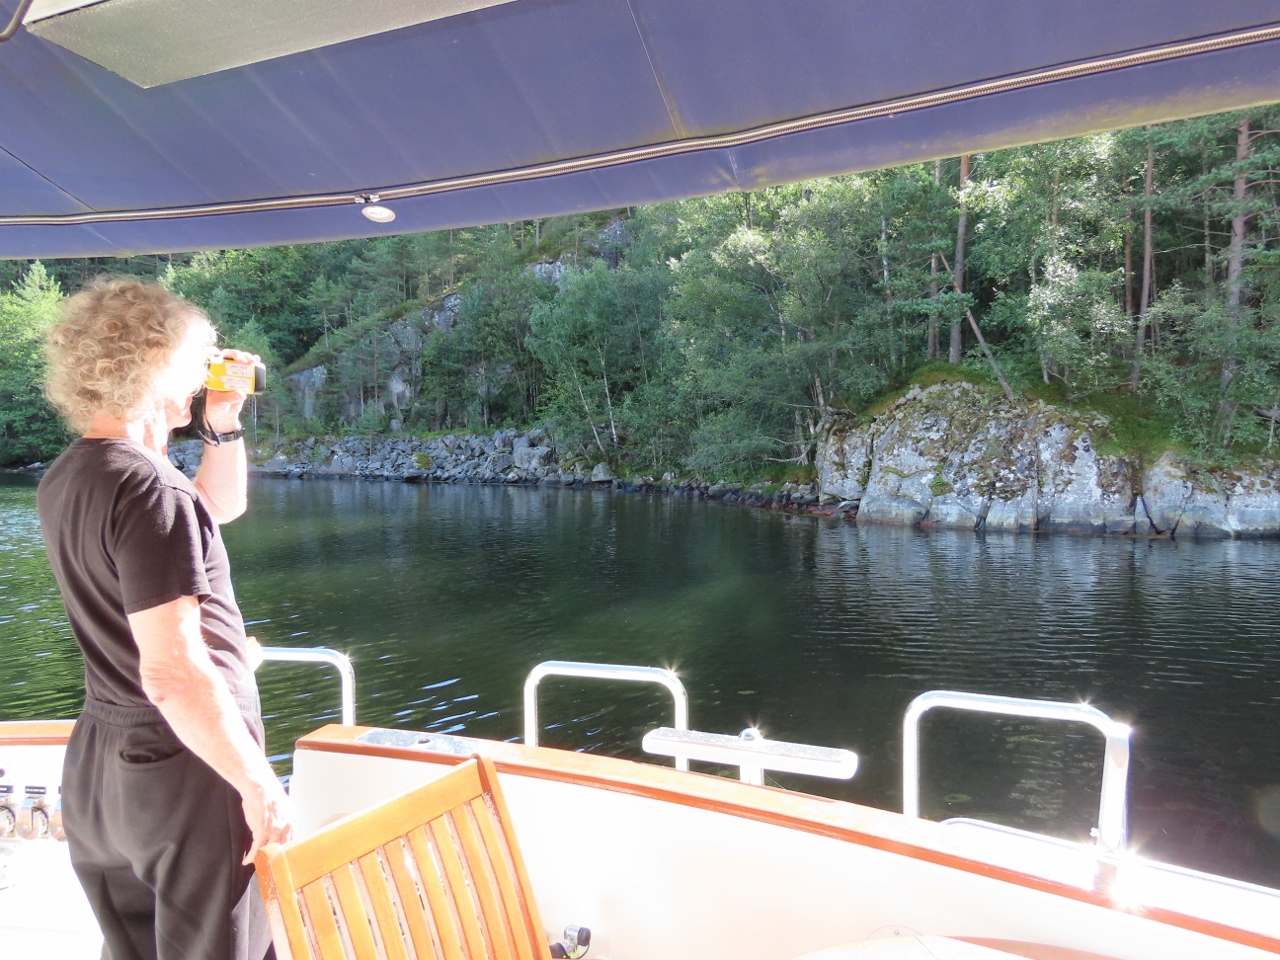
We’ve also use the rangefinder to measure distance behind us in a tight anchorage to ensure we have sufficient swing room. In the image below, we are measuring the distance from shore in the basin at Hattavagen in Erjforden, Norway. The anchorage was a little tighter than normal for us, but it was so beautiful and peaceful that we decided to anchor there. We measured carefully and did have enough swing room, but the shore looked awfully close when we pulled back. As an extra test, we verified the distance remaining with the rangefinder. The space remaining, 40 yards, was exactly what we expected, but it still looked close for conservative anchorers like us.
Is there any place in the world where “Reverse Depths” – i.e., clearance – are marked? That is, a bridge column is marked not with lines indicating water depth, but ones indicating distance from a bridge’s low point to the current water line regardless of tide.
Yes, it’s quite common in most parts of the world to have clearance on the bridge above the waterway and a few go as far as to have the air clearance marked off on each side so you can quickly read exact available clearance at the current tide levels. This latter approach is pretty close to your suggestion.
Nice, I wasn’t aware that they made rangefinders that could calculate height. We’ve used a cheap golf rangefinder to judge horizontal distances when anchoring, but measuring verticals for bridge clearances would definitely be handy.
Mostly it just gives a quick check on the charts but, in a few cases, it was the only data we had. We’ve love having it.