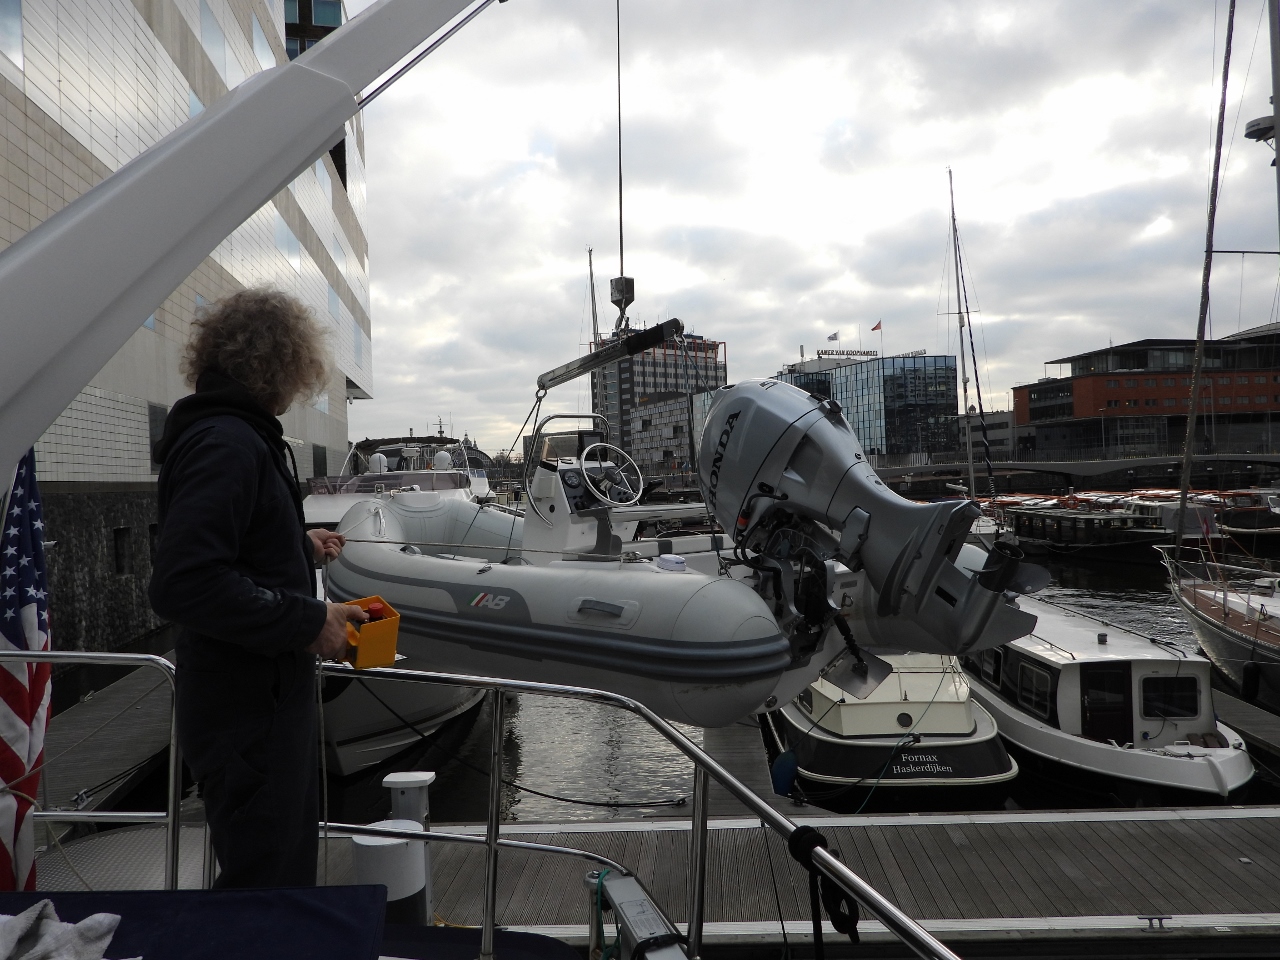
We’ve had three pendants fail on our Steelhead Marine crane over the last 9 years. The proportional switch proximity sensor is very fragile but there are other failure points as well. These pendants cost just under $1000 each, so we really needed a longer lasting and more economical solution. Steelhead does sell a remote-control for this crane, but it was sufficiently expensive that we decided to do what we did with the TV Lift: adapt a generic remote control system to drive the equipment.
The remote control we are using for the TV lift is working well, but the crane is more complex with eight different motions, and its remote also needs to be sealed against weather. We opted for a $550 Kar-Tech Proportional Mini GUIDER wireless remote that we brought back with us to Amsterdam on a recent trip to Seattle. This is the same remote control that is supplied by Steelhead Marine if the wireless pendant option is chosen. In this article we explain how just doing 12 crimped electrical connections is all that is needed to enable a wireless remote for an ES-Series Steelhead crane for $610.
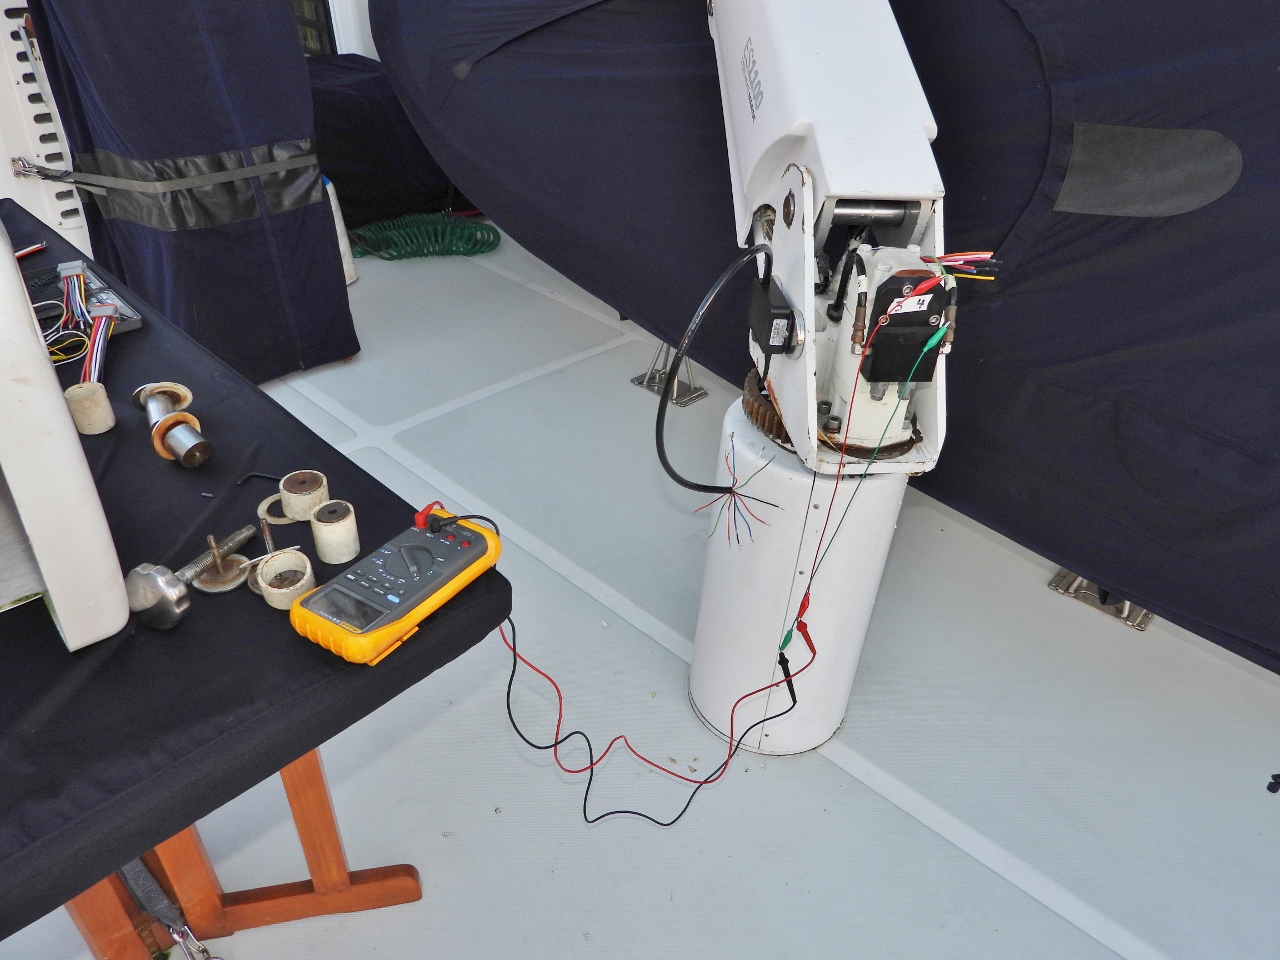
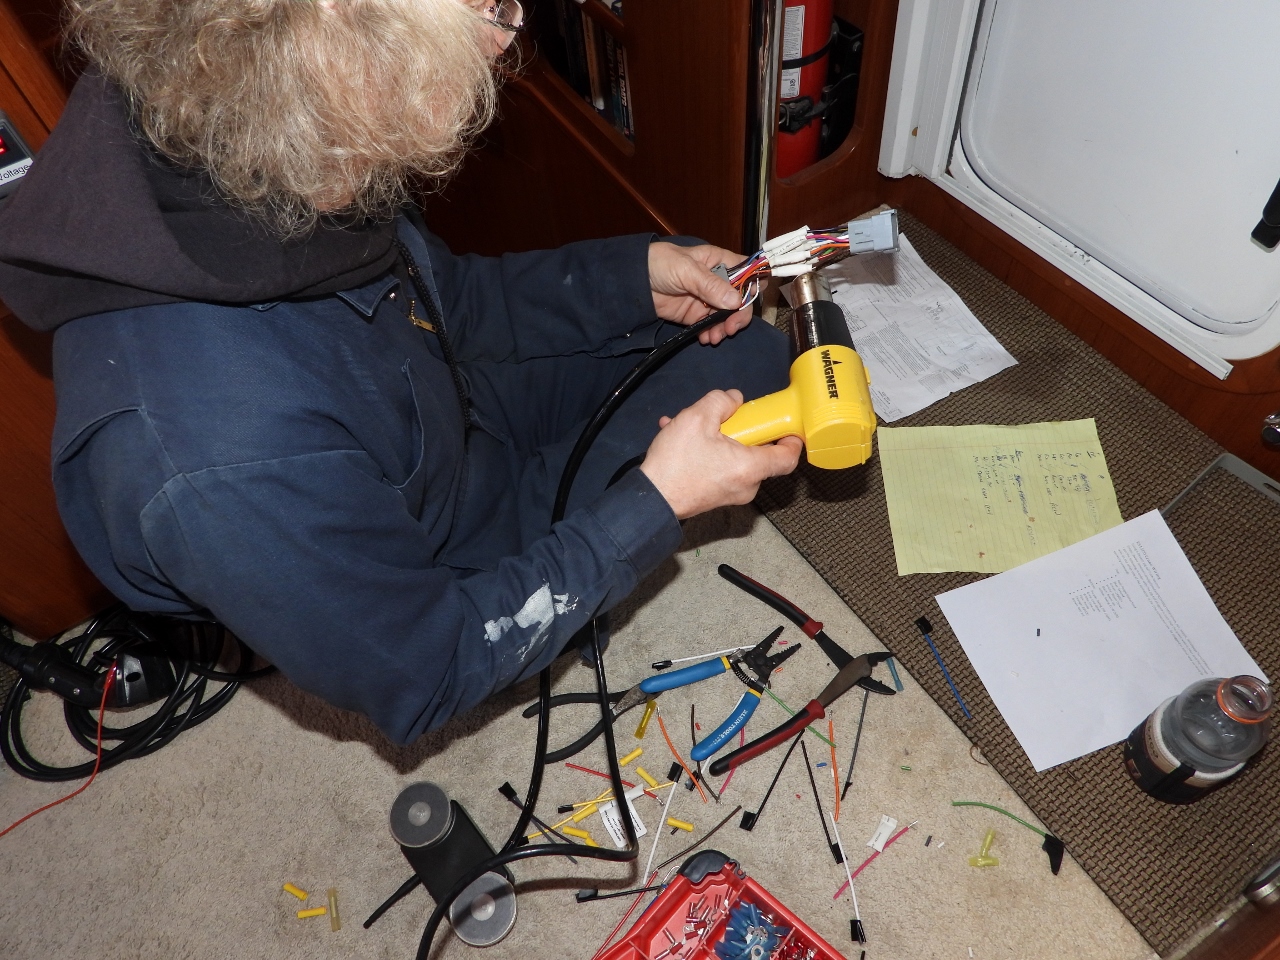
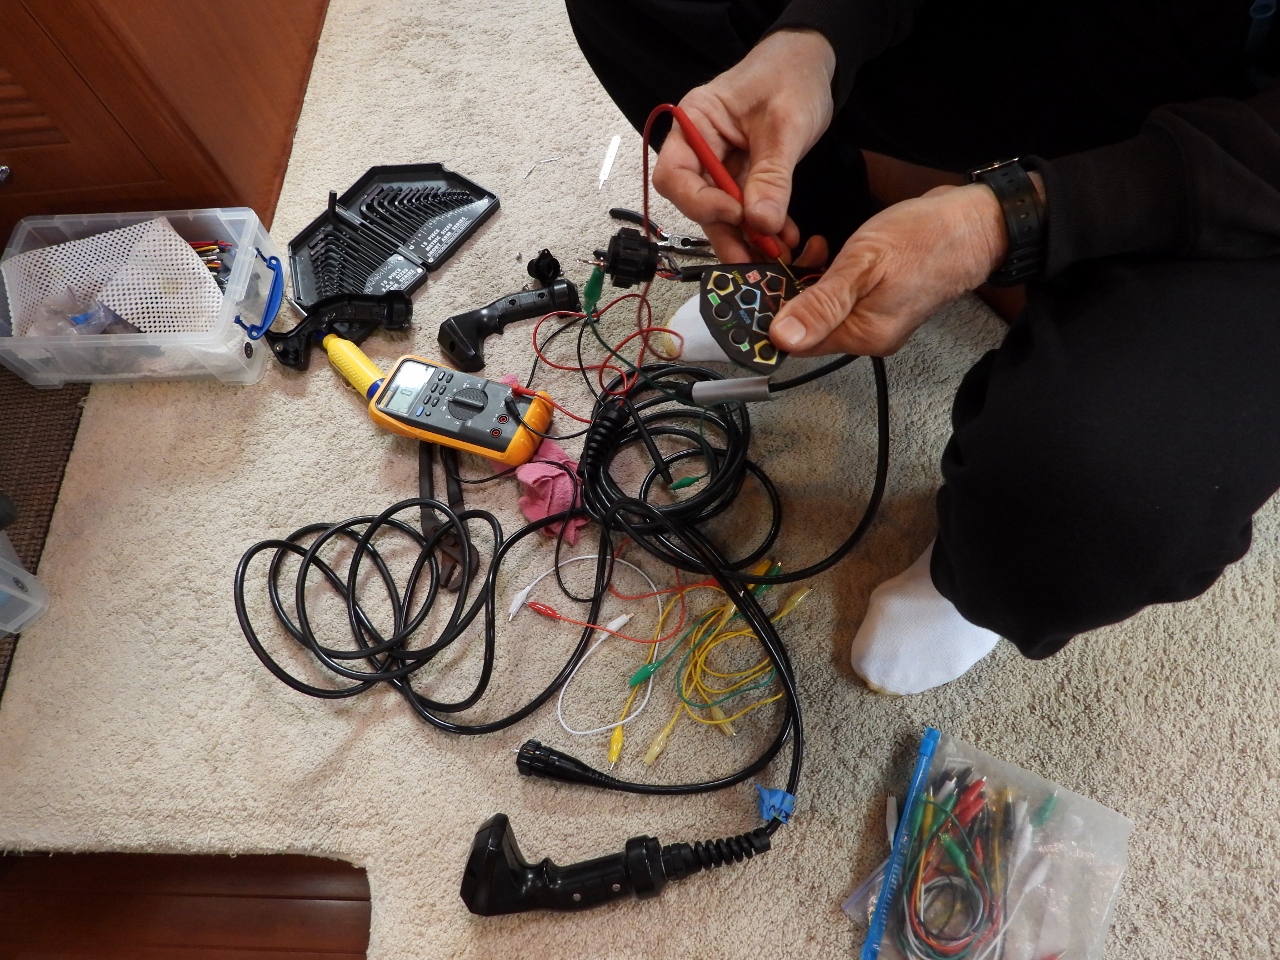
In the picture below we’re associating the remote with its base station and testing to make sure the assembly is working. Also visible to the left are the 12 pin Deutsch connector pig tails that we picked up from Amazon and will be eventually be using to install the base station for this remote control

We didn’t have a wiring diagram for the existing crane controls, so the next step was to determine the functionality of each of the twelve wires. We needed to find power, ground, proportional, pump, boom extend/retract, boom swing left/right, boom up/down and line extend/retract. Using a Deutsch pig tail plugged into the existing pendant control circuit, we probed for each functionality.
|
|
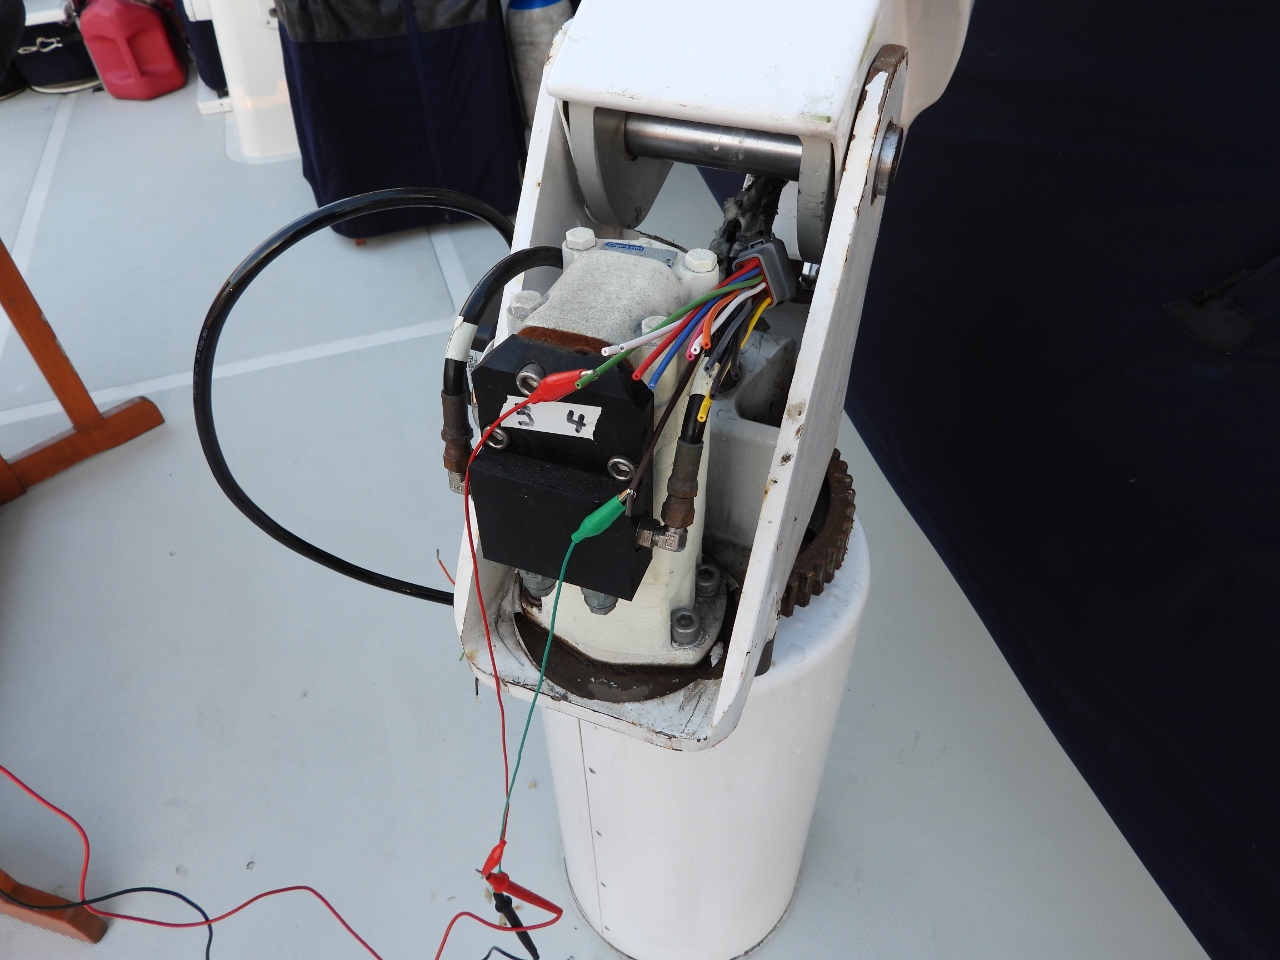
We next mounted the remote control base onto the davit and temporarily wired it in to ensure the remote worked using our findings. This last step was only required because none of wired pendants were currently working. Towards the end of the article we’ve included the color codes to allow easy installation of this remote control with the SteelHead Marine ES-Series cranes without this exploration.
|

|
In order to keep the existing pendants working, we planned to build a three-way harness where one end would connect to the wireless remote base, another to the davit control system and the third to the existing wired pendant control.
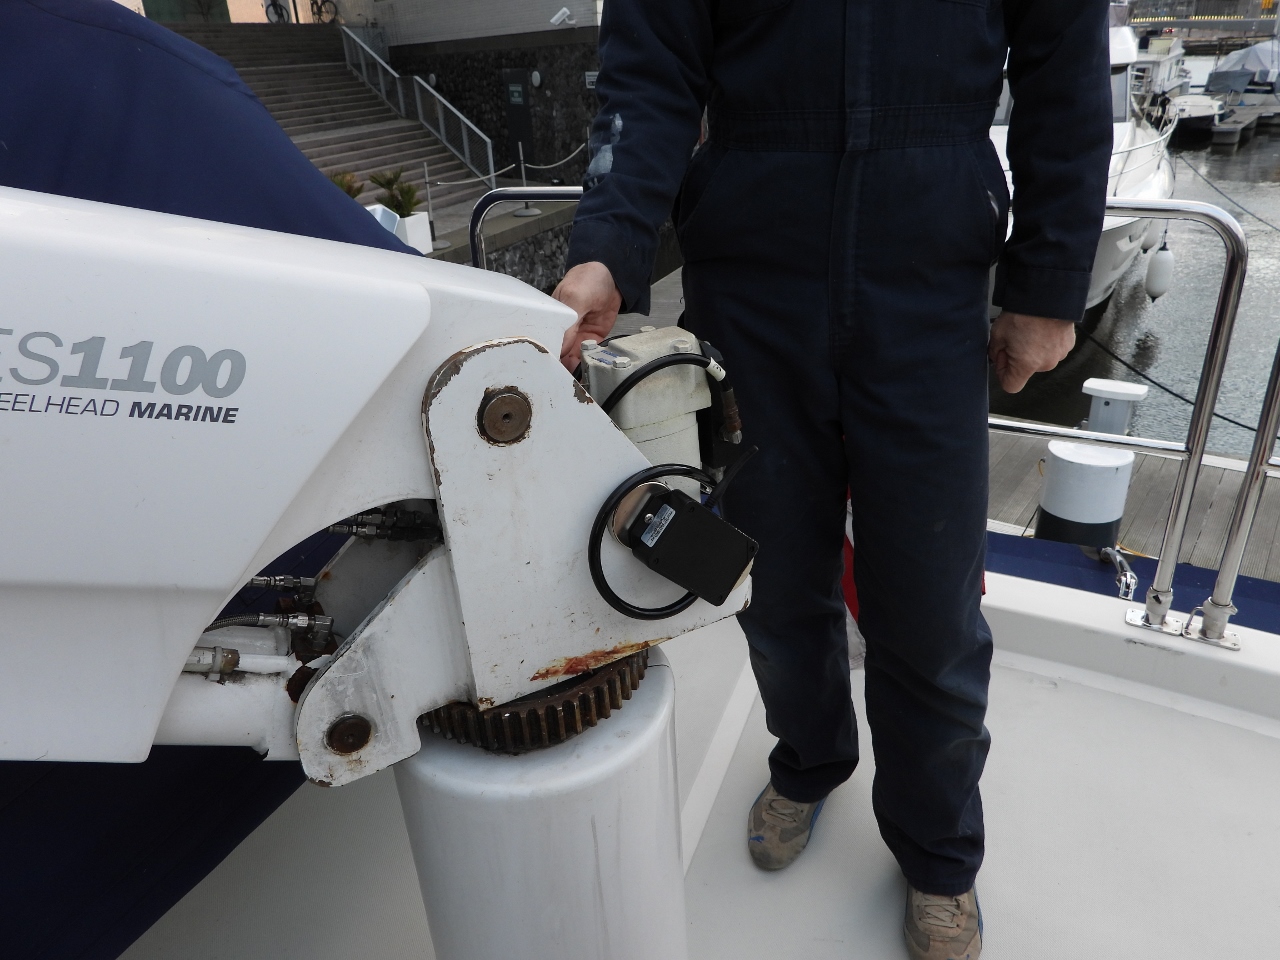
Below James is determining the wiring for the round pin-based connection on the side of the davit housing where the existing wired pendant attaches.

|

|
The next step is to build the three-way harness from two Deutsch pig tails. This allows the wired pig tail socket and the wireless remote base station to both plug into the crane harness allowing either to be used at any time.
|

|
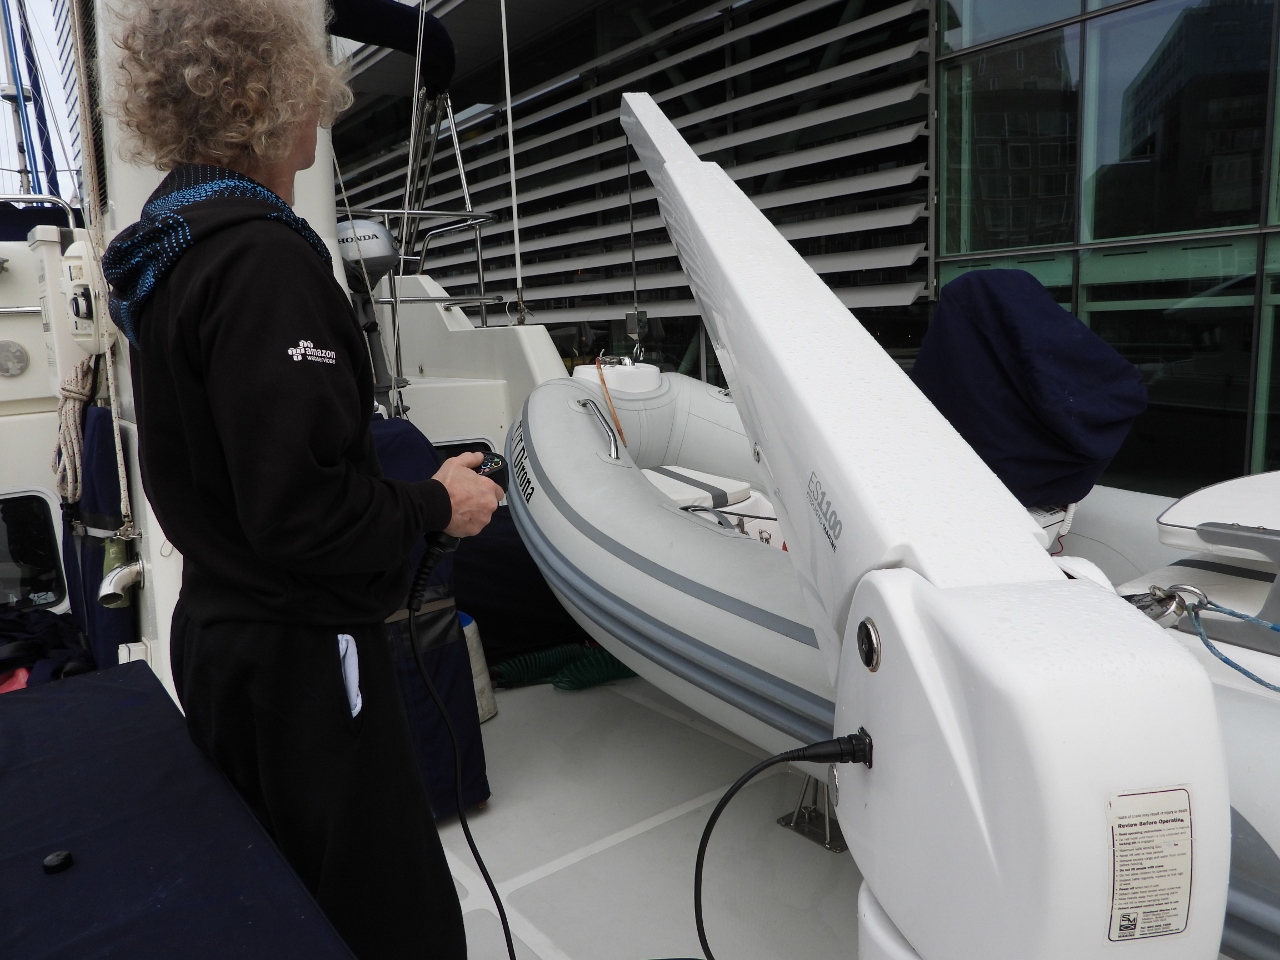
And we have davit remote! The only issue we encountered was the davit housing interfered with the mounting spot for the remote control base, so we moved it around to the other side, closest to where Jennifer is standing. We may move the base station down to the circular base where there is more space and less obstruction.

The new remote is a little clumsier to use than the wired remote but, overall, works very well. It’s wonderful to have a wireless remote, and even better to have a cost-effective backup to the delicate hard-wired pendants. We’d disabled proportional control on the hardwired pendants, because they always failed, so it was great to have proportional control back.

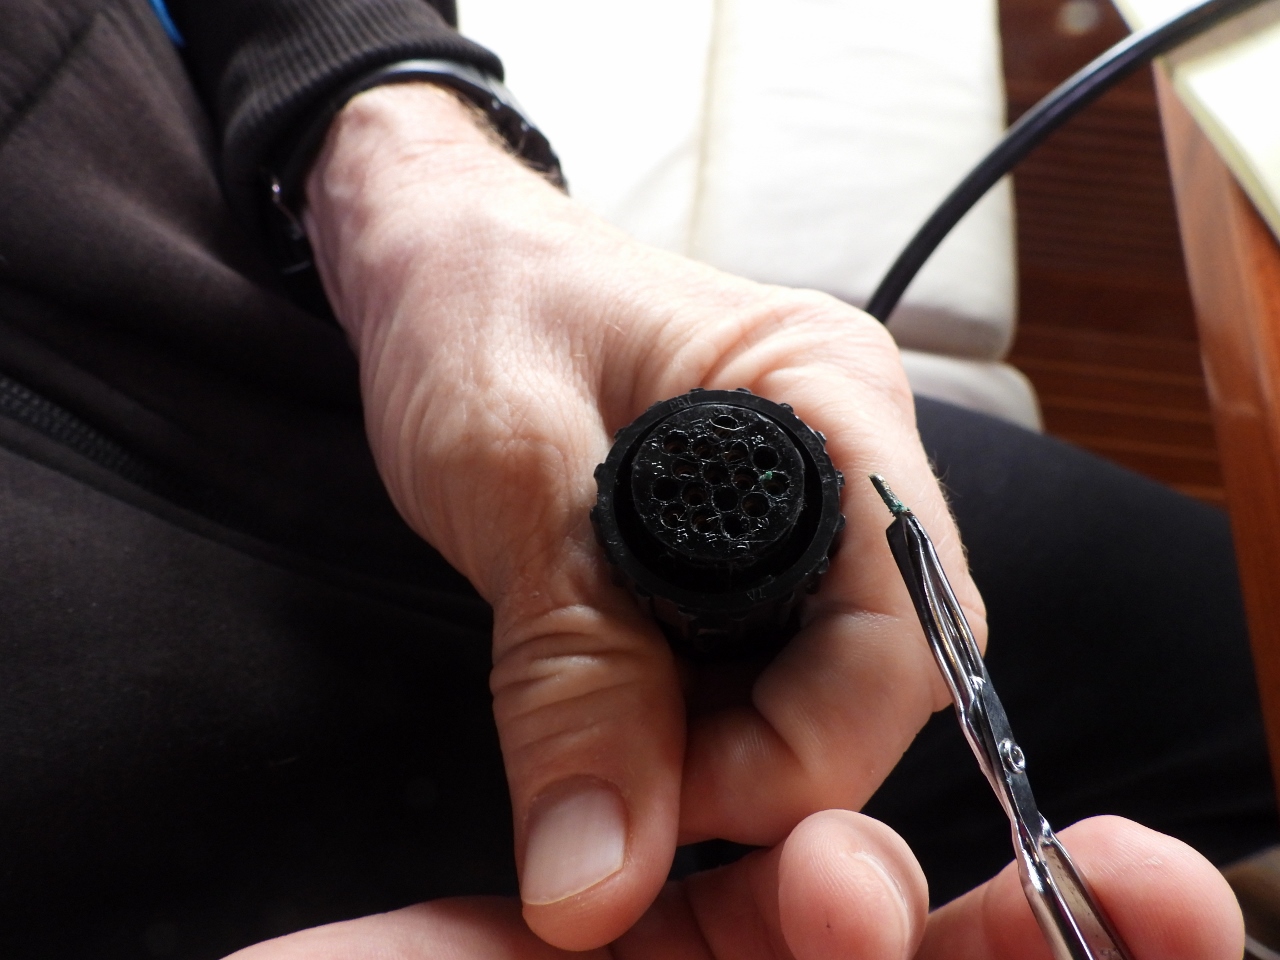
Spending some time understanding the crane wiring made the problem with one of the wired remotes very clear. We noticed there were only 11 pins in the crane socket but we know we need 12 for full operation. Looking at the socket below, you can see the power pin has corroded away. Unfortunately, the remnant of the pin was stuck in our new wired pendant. We used a needle to slowly work the pin to the top of the hole and a small pair of tweezers to remove it.

|
|
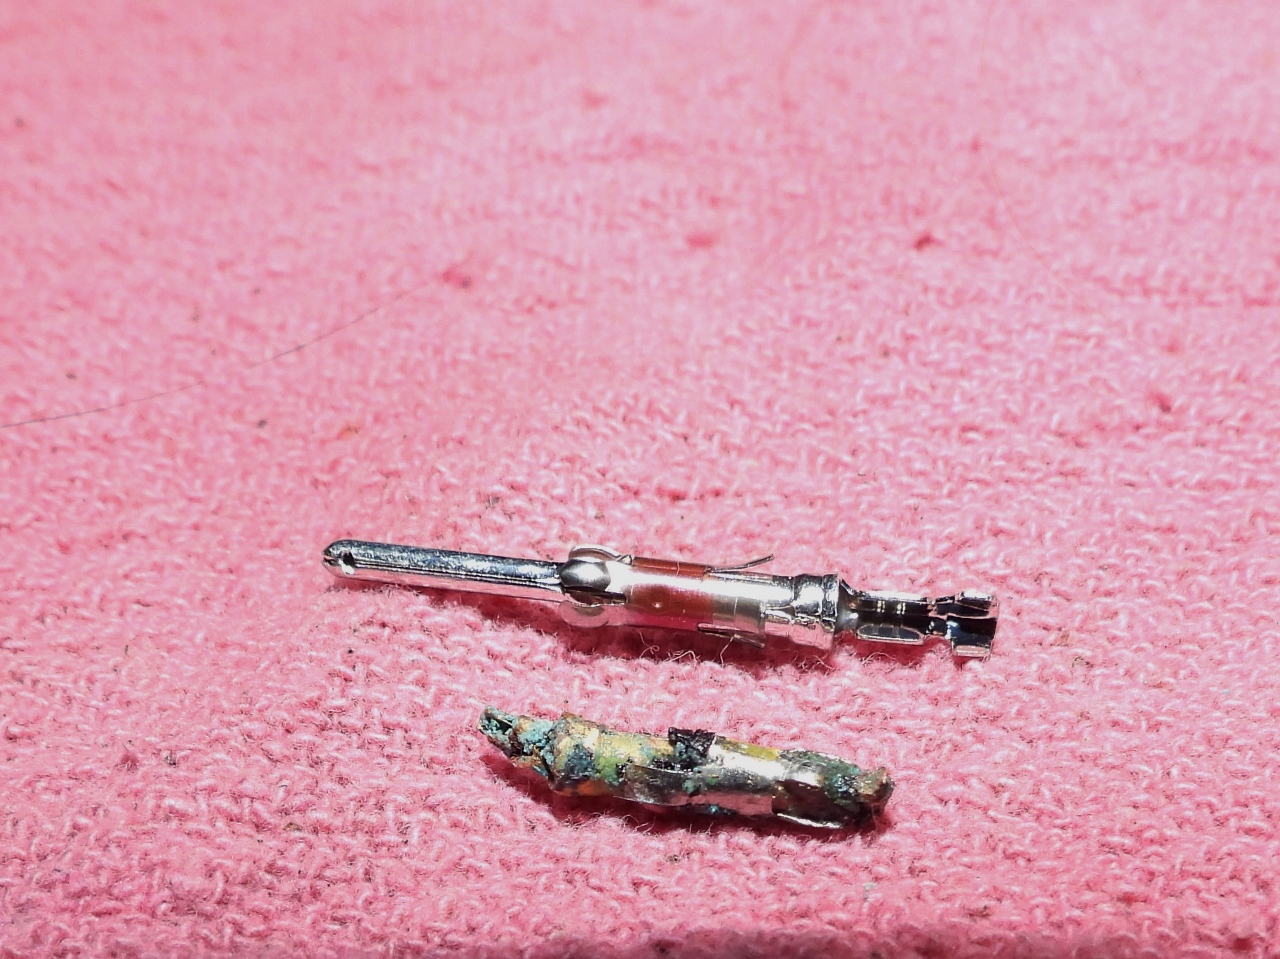
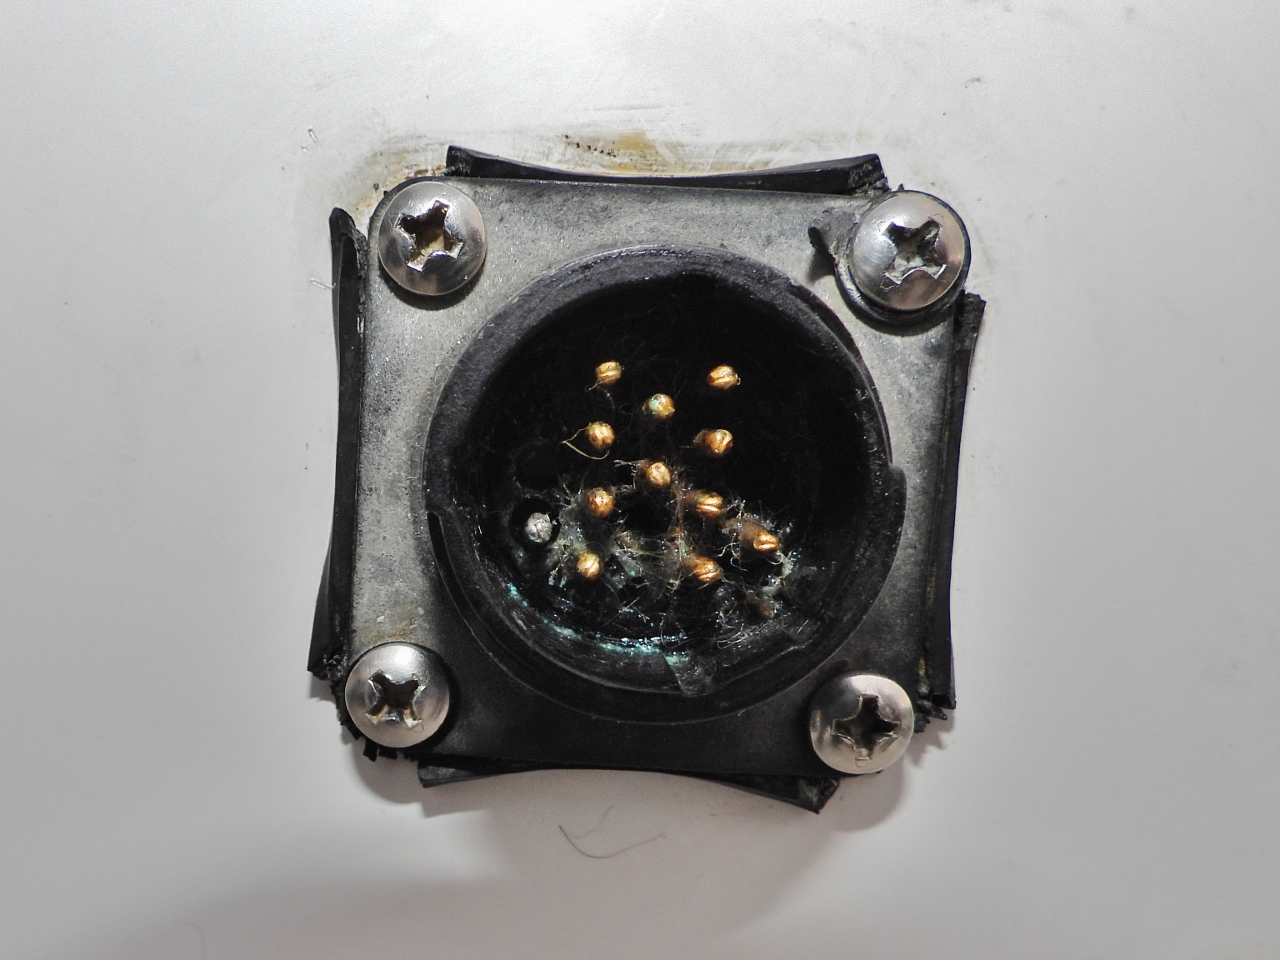
In the picture below, the corroded pin we removed from the pendant socket is at bottom and above is a new pin (TE Connectivity CPC Series 1) that we installed in the outlet. The second picture below shows the new pin in place (leftmost).
|
|
Once the pin was replaced in the outlet, and the rusted out pin was removed from the pendant, that pendant worked fine. Our second pendant was found to have a failed fuse, and the third has a broken wire somewhere between the pendant and the connector. If we had nothing else that worked, we probably could make this one work, so we’ll save it.
We now have two functioning wired pendants and a brand new wireless control, so we feel in pretty good shape for davit control.
Davit Wiring Color Codes
If you purchase 2 of the Deutsch pig tails from Amazon, then the following will allow you to quickly construct a Y connector allowing both the wired and wired remotes to be plugged in at the same time.
The following is in order with the plugged in such that the green wire is 24v+ and the orange wire on the other side of the connector is 24v- (the connector will plug in either way so the orientation is important):
- Existing crane 12 pin Deutsch connector (numbered 1 to 6 on top and 7 to 12 on bottom) showing original crane harness connector color followed by the crane function and then the Amazon Deutsch connector color (numbered 1 to 6 on top and 7 to 12 on bottom where 1 is over 12):
- Orange: Proportional (red)
- Lt Blue: Extend (blue)
- Red: 24VDC+ (green)
- White: Boom Down (white)
- Brown: Boom Up (black)
- Yellow: Rotate CCW (yellow)
- Purple: Rotate CW (purple)
- Grey: Winch down (grey)
- Tan: Winch up (white)
- Dk Blue: 24VDC- (pink)
- Pink: Pump on (Orange)
- Black: Retract (brown)
- Kar-Tech Mini Guider wireless base station colors on right, with crane function, followed by Amazon Deutsch connector color I used (numbered 1 to 6 on top and 7 to 12 on bottom where 1 is over 12):
- Blk/Wht: Proportion (red)
- Blu: Extend out (blue)
- Red: 24V+ (green)
- Grn/Blk: Boom down (white)
- Org/Blk: Boom up (black)
- Red/Blk: Swing CCW (yellow)
- Blu/Blk: Swing CW (purples)
- Grn: Line down (grey)
- Wht: Line up (white)
- Wht/Blk: Pump (pink)
- Black: 24V- (orange)
- Orange: Retract (brown)
You don’t need the data below to complete the installation of the wireless remote but, if you are trying to diagnose crane problems, it’s much easier knowing the pin-out of the external circular wired pendant connector:
- Red: 24+
- NC
- Blk: Retract
- Lt Blu: Extend
- Bwn: Boom up
- Wht: Boom Down
- NC
- NC
- Ong: Proportional
- Pnk: Pump
- Ylw: Rotate CCW
- Ppl: Rotate CW
- Tan: Winch up
- Gry: Winch down
- Drk Blu: Gound
- NC
Update 2019/11/23: The previous color code lists were updated to make them more clear. And we’ve posted clearer proportional control calibration instructions at Kar-Tech Mini Guider Proportional Calibration.
This is an excellent solution for those wishing to add wireless remote operation to the Steelhead Marine ES-series of crane. You will need these parts:
- Kar-Tech Proportional Guider System: $550
- 2x Deutsch Pigtails: $30
That’s all that needed to do this installation. The Kar-Tech remote base station is equipped with magnets that allow it to be stuck to the crane. You need to do 12 crimped wire connections using the above color code data and, once done, just plug it in and enjoy remote crane operation.
I’m a bit confused by the pink and orange colors on the Deutsch connectors that you have listed. Seems you switched pink and orange from each side of the male/female connectors which would seem to me to change pump and 24V-. What am I missing? BTW, great instructions. I’ve just had a pendent fail on a SM1500R, and was shocked by the price of a new one. Person I emailed with told me that they “do tend to sell a lot of these….” Yeah…. I can see why. I took mine apart, and the proportional magnet assy was toast.
The proportional assembly is a common failure point. If you disable the proportionality function (just off/on), you can continue to use that failed pendant. What I chose to do was use the failed pendant as backup by disabling proportionality and use the after market wireless controller with proportionality as primary.
I believe the color codes I provided in the diagram were what I used and where correct but it’s conceivable I made a mistake. Certainly the crane worked correctly and without interruption for years.
Sorry to belabor the point. You obviously know more than anyone else about this issue! I’m particularly interested in understanding where you used Dark Blue on the crane to Pink on the Deutsch connector, then (it appears) that Pink on the other side of the Deutsch connector goes to Pump on the Kar Tech Mini Guider. Also, from your list, Pink on the crane goes to Orange on the Deutsch connector, and on the other side of the Deutsch connector Orange goes to Black, which is 24V- on the Kar Tech Mini Guider. Might you have just missed a bit in your list above, or did you intentionally do this? Sorry for the follow up question… I just want to make sure I won’t “fry” something if I wire it exactly as described above.
Well, thank you James. It’s great that you published all of this, and I’m sure I can figure it out! You’ve most likely saved many people a LOT of time.
Thanks for the feedback Kevin.
Further feedback for you James. Your wiring list is spot on! It was my fault in working through the list and making an assumption. My bad. I’m glad you did all of this work and saved myself and most likely others a bunch of time! Thank you.
Hi James, I am have the same issues with my SM1500R which uses the same proportional pendant. The second pendant failed yesterday with the dinghy 2 feet off the water in a remote anchorage of northern B.C. . I managed to take it apart and play with the magnetic switch for the proportional controller and eventually get the dinghy into the water so I could tow it. Today I ordered another controller from Steelhead Marine and hope to pick it up at my next port. You mentioned you had a work around to bypass the proportional switch. Would you share that so I can try to get the crane back into storage position?
I am ordering the parts for the wireless station you assembled. It seems like a much better solution.
Best wishes,
Ross Clarkson
N6050, EbbnFlow
The wireless solution does seem more durable from my perspective but I did keep the wired remote as a backup. Generally Steelhead charges quite a bit for either part and having seen three wired remote failures over 10 years, they really aren’t that durable.
The work around for a failed pendant proximity sensor causing no proportional control is pretty easy: Unplug the wire feeding the proportional solenoid at the motor. It’s the bottom of the stack of hydraulic solenoids. Put a short pig tail between the motor control solenoid that you can plug into the proportional solenoid. Plug the proportional solenoid into the the pig tail (to the pump motor control solenoid) when you want to skip proportional and plug it back to the harness coming down from the crane when you want the proportional enabled. I ran disabled for 6 or 7 years and it works great.
Hi James
Thank you so much for such amazing instructions. Couldn’t do this without you. Quick question. Is there any reason I can not, or should not, install the receiver with the pump? Mine is directly below the crane in the engine room with great access. Worst case 16’ through 2 floors. I also plan to put a large shut off near pump on positive dc.
Thanks again!
Delos
MY Graceful Lady
Yes, It’ll electrically work just as well at the pump as it does at the crane top (or anywhere else). I would slightly prefer to have put ours down there for ease of access and weather reasons. However, I find the radio reception a problem under some conditions even with it installed up top. If I let the crane get between me and the base station, it doesn’t work. As long as nothing big and metallic is between the handheld unit and the base station, it works great. Before putting it down at the pump, make sure you have the reception you need. I suspect you might be happier with the base station up on deck even though space is a premium up there and weather conditions are unfavorable.
There is a 12 pin connector currently at the pump, would I be able to move my splitter up if I have poor reception, or will I have male – female issues with the 12 pin splitter? If you know. I imagine I can just test with jumpers first the way you show in photos.
Thanks so much, I’m just waiting for the 12 pins to arrive. I will comment with results.
Yes, absolutely. You can do that. It’s the same wires at the same locations at the lower plug as it is at the top. Electrically, that should be fine.
J and J, would you do the extended reach davit again? I know you sacrificed some capacity but being able to deploy more than just crane side I bet has been advantageous. We are exploring that now on our N60 build.
Yes, absolutely. Many of the applications we have of the crane require extra length: Over the years we have used it to launch to all three sides, we once launch to the other side of a dock we up against, we have used create a platform to was one side of the boat from (holding the tender), to lift me up the stack, and even to to install a deck crane on a N62. We love the reach and, were we to do it again, might even see if we could find a solution with an even longer reach. Ours can go out 19′.
James – very helpful. Thanks
Jim
ALBEDOS
Thanks James, good to hear. I was actually a bit surprised how simple the crane is electrically. Once you know the pinout, it’s easy to chase down issues or work around pendant failures.