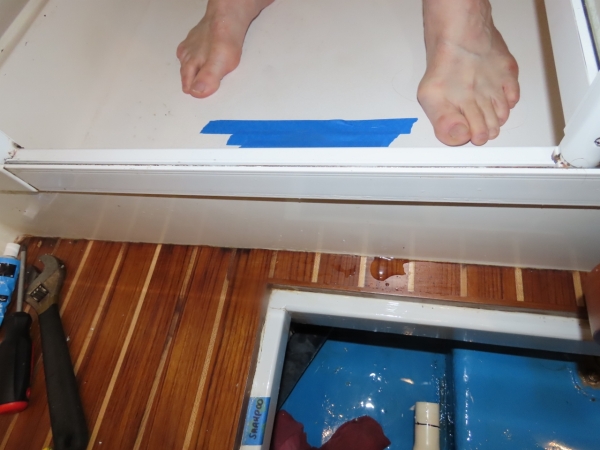
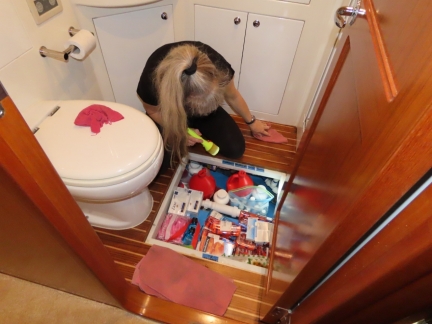
Saturday morning we lifted the floor covering in the master stateroom head to access stores and found the floor underneath soaked wall-to-wall. We opened up the storage area below and it also had a lot of water in it. The first task was to get everything out of the storage areas and all dried and cleaned. That didn’t take long, and we were then looking for the source of the leak.
Water can travel long distances and leaks can be challenging to find and correct. It took us most of the day to track down the leak and fix the problem.
 |
Water Leak
The shower drain area and the wood beams in front of the drain assembly were soaked, so it was pretty clear the water was coming in from above. We tested by running water in the shower, focusing on the door assembly and looking for leaks. That seemed by far the most likely, but in fairly aggressive testing, we were unable to reproduce the leak. The sealing around the drain assembly was central to the wet area and, after the shower door assembly, seemed like the most likely cause.
|
 |
Drain Assembly
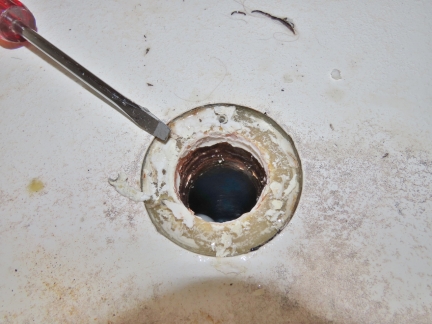
We removed the drain assembly by taking apart the pipes below and then applying rotating force on the drain to crack the 3M 5200 free. We then removed the drain assembly, removed all the old caulking, and wire brushed the area where the caulking is going to be applied until it was clean. Once all the parts were clean and residue-free, we reassembled the drain assembly and sealed it with white silicone caulking. We find the silicone sealer is far easier to service than 5200, and has a very similar lifetime to 5200 so we use it wherever we need a seal but not a strong mechanical bond.
We then cleaned up the drain piping, something we do every 3 to 4 years. The piping builds up a heavy slime inside due to insufficient drain angle and over the course of years, the effective open area of the pipe slowly constricts down. So we took this opportunity to clean everything up. Then we assembled it all again with all possible leaks rectified.
But we don’t know for sure that this was the source of the leak. The shower door wasn’t leaking, the drain might have been, but is fixed now. To avoid facing this mess again, we kept looking for possible leaks. There is a locker underneath the shower seat and it’s another possible water ingress point. |
 |
Shower Seat Locker
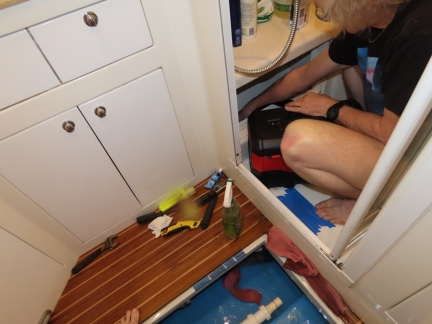
It’s a long way from the leak, but we wanted to be thorough, so we opened up and unloaded the under seat shower locker. The locker had an inch of water in it. We cleaned the locker and all the goods stored in it and then vacuumed the locker out for inspection. We found it well-sealed on all seams except a particularly difficult to access seam that hadn’t been caulked. It looked quite possible that this seam would leak, so we decided to test it.
For testing purposes, we planned to fill the locker with a few inches of water to provoke a leak if there is one from this location. You can see we have taped over the drain since it’s freshly sealed with white silicone caulking and won’t be cured for 24 hours. The tape will ensure no water gets into the drain as we work in the locker. |
 |
Water Seepage
Once we had a filled the shower under-seat locker with a couple of inches of water, we saw drips down below around the beam supporting the shower but we also saw water coming up from between the shower base and the teak and holly floors. With the locker filled up 3 or 4 inches, the water was actually starting to flow up through the floor even though there was obvious seam there. This finding isn’t great news but, as we think it through, it’s better news than a leaking shower door from a repair complexity perspective.
|
 |
Silicone Sealing
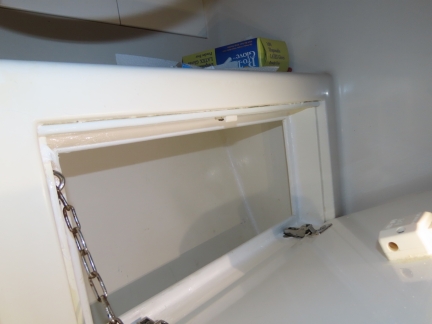
The locker underneath the shower seat has no drain, so it’s particularily important that water not get into it. The approach taken by the boat manufacture is to have a two-inch dam on the inside of the door with a half-inch lip so that water that gets past the locker door will flow in and pool in the damn area but not make it down to the locker and eventually just run out of the door and back into the shower. This looks like a fairly effective approach. What’s happened over time is the sealant has aged and cracked and there was a very small water ingress path from the dam to the locker itself. Not much gets let in, but it’s enough to build up over weeks and eventually flood the storage areas down below.
To rectify this problem we used a Dremel with sharp pointed rotary cutting tool to remove the caulking all around the dam. This both removed the old caulking but also opened up the seam to allow a thicker, more durable sealant bead. We resealed the door area, but also did the inside of the locker. Strictly speaking water shouldn’t get into the locker area so it’s less important that it not get out. But, since it really makes a big mess if water does get in, we sealed up all seams inside the locker to ensure that if water gets it to the locker, it’ll stay there preventing mess elsewhere and making it easier to see the problem inside the locker.
At this points we have two lines of defense. First the locker door has a sealed-up water dam to exclude water from entering the locker. Then we have a sealed-up locker preventing water from getting any further if it does get past the dam. We added one additional level of defense by putting a weather strip along the top of the locker door to minimize the water that reaches the dam and further reduce the chance of leak.
|
With three levels of defense, we’re pretty confident we’ll not see problems here for another 10 years or so. This example shows how difficult water leaks can be to trace. The path the water took is long and circuitous in this case. Water on the shower seat leaked past the locker door to the dam, a small amount leaked through a crack in the dam to the locker below. The locker below was missing a caulk line at one seam so it leaked into the under-floor area. From there the water flowed along the under floor wood work from one side of the shower door to the other. From there is seeped out of the floor to shower enclosure interface to soak the floor under the floor covering, and ran down into the storage area below the floor. From there it flowed into the storage area at the engine room door which also needed to be emptied and cleaned. And from there if ran to the to the under-step area just inside the engine room which needed to be opened and cleaned. And finally it reached the bilge in front of the engine, then ran down below and along the keel to the central bilge behind the engine.


James, please keep it coming! I greatly enjoy your maintenance videos. Especially the probing questions by your chief videographer;)
How/where to you store your bicycles?
Looking forward to the Gen rear oil seal replacement vid.
It’s bit of a disappointment but we have two big jobs waiting for us on the generator. The first is a valve seat recession on cylinder #3 exhaust requiring the head be removed and replaced. Our plan is to change the cylinder head and let it continue to spray oil for 50 hours or so to make sure that fully addresses the closing valve lash problem. Assuming that our diagnosis is correct, the parts we ordered are sufficient to fully address valve problem, and it is running well, then we’ll go after the rear main oil seal.
The first job requires the removal and replacement of the top half of the engine and the second job requires jacking up the engine and generator to get clearance to remove the generator section splitting the unit into two parts. This will allow access to the flywheel and, once it’s off, the rear main oil seal. We’ll need to find time for two big jobs and the valve problems is fairly urgent since the generator is essentially down until this work is completed.
James
What silicone caulk do you use as a 5200 alternative?
When you need a good strong, mechanical seal, 5200 is an excellent choice. Where there are fasteners in use providing a good mechanical connection and all that is needed is sealing, silicone seal is a good choice. It’s flexible, ages well, seals well, and is easier to remove than 5200. We use: https://www.amazon.com/gp/product/B000AP3OUI/.
Dear James,
Are you sure the leak is on the drain side. I have traced a leak to the supply side of my pressure fittings. This leak was slow but constant and was building up over time. I checked the fitting several times before I noticed a drip. The leak was at the back of the fitting and after the drip was almost undetectable.
Rgs
Robert
Ps great to see you with fresh supplies and from Gigha.
Yes, we are sure we have this one tamed. It’s 100% dried out and it’s been a week now. We not had pressure side leaks but one tell tale that you have a pressure side leak is pump cycling. We’ve left taps dripping outside the boat and found them due to pump cycling over night. The issue in this case is a small amount of shower water making its way into the shower seat locker and then from the locker soaking all the woodwork and flowing from there to the other side of the shower door and then out onto the floor. We sealed up the locker and it’s now all dry. We chose to both seal the leak in the water dam at the door but also weather strip to reduce the water that gets into there. And, we also sealed up the locker so that any leaks in the future build up in there rather than leaking into the floor area.
It seems to me that it would be useful to have many small & cheap wireless and battery-powered water detectors scattered around a vessel like this. Does a product like that not exist?
That’s a pretty good suggestion and, yes, there are many of these available in market (https://www.amazon.com/s?k=water+detector). Thanks for the suggestion Dave.
That’s interesting my 47 has a drain hole in that location that drains into the bilge. I wonder when they stopped that practice? As it always gets a little water or moisture in there.
I could imagine two schools of thought on this issue: 1) work hard to keep water from getting into the cabinet but put a drain in it so it does drain if flooded, or 2) work hard to keep water from getting into the cabinet and seal up the cabinet so it can’t get further and is easier to detect. We chose the second approach but good arguments can be made for both. The key issue is to ensure that water can’t get into the cabinet. What we did was seal up the dam making water ingress more difficult and, as an extra level of defense, put a weather strip across the top and upper sides of the cabinet.