We have an Inca TV Lift on Dirona and we’re generally very happy with it. The lift is powerful, so it doesn’t get stuck when friction on the slide surfaces increases over time, as it invariably does. It’s built from heavy parts, so it keeps working even in the high vibration environment of a boat. Generally it’s a well-engineered piece of equipment, but where it excels is in support.
We have had two issues over the ten-year life of the system and both times we got really top quality advice and didn’t have to wait long to get it. However, the system isn’t perfect and when there is a fault it can be truly challenging to work through it. Much of the difficulty comes not from the design of the system or the parts employed but the way the system is integrated into the boat.
It’s hard to complain when you buy a system that is supposed to make the TV disappear and it does what it’s supposed to do: disappear into the wood work. The problem isn’t that it can disappear, but that when it faults, it’s never all the way up and, if it’s not up, it’s at least partly inside the cabinetry at which point it’s completely non-serviceable. Where the system comes up short is in designing for service since, eventually, even the best gear will need some service.
The built-in characteristic of the system that we like is what makes certain failure modes just about impossible to service. The first fault mode is a great example. While we were in Florida in 2017, we lowered the TV one night. It went 90% of the way down, jammed up, made noise, and then stopped:
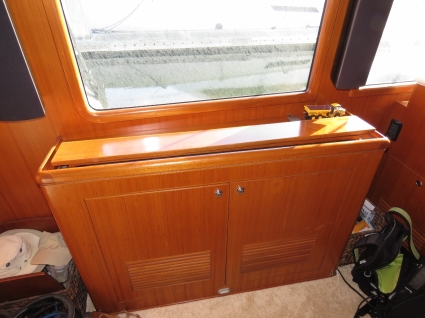
Through the front doors we could just see the lift motor control cable caught up in the lift gears:

|

|
We replaced the fuse in the control box and attempted to power the TV up, but the fuse popped into a direct short. The way the TV comes apart for service is the system is first wound to the top of the travel, at which point the TV can be removed. This exposes the screws that attach the TV enclosure to the lift mechanism. Once the TV and the enclosure are lifted off, the motor/transmission lift assembly can be accessed for service. However, if the system needs service, it probably won’t wind up. And, if you can’t lift the assembly, it’s not possible to remove the TV. Without the TV out, the enclosure can’t be removed. And, as long as it’s in place, the rest of the system can’t be accessed when in the recessed position.
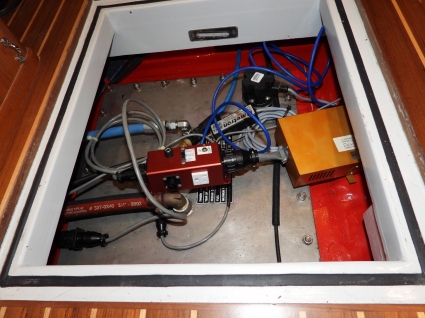
This one was going to take considerably more work to solve. We were lucky to even have access to the control box. When the boat was delivered, the control box (red box on left below) was mounted behind the TV, inaccessible unless the TV was up. Seeing a disaster in the making, we bought an extension cable and moved the control box under the floor in front of the TV cabinet. This meant we can now solve control system problems even if the TV was in the lowered position. This was a massive step forward and one the TV lift manufacturer probably should require from their installers. Fortunately we spotted this problem in time.
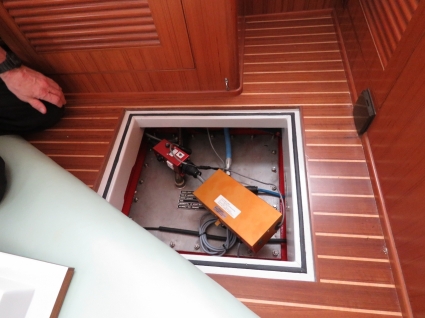
So what happens if the system fails in the down mode? As mentioned earlier, the TV is mounted to a teak enclosure that in turn is screwed onto the motor/transmission lift assembly inside the cabinet. From talking the TV lift manufacturer, if the lift gets jammed in the down position there is no non-destructive recovery. The lift motor and transmission assembly would need to be cut out and replaced. That alone is bad news, but the worse news is that there’s no way to access the motor and transmission assembly without first removing the TV and the teak enclosure. And this can’t be done without breaking the TV to get access to the bolts that attach the enclosure to the motor/transmission lift assembly.
Unfortunately we hadn’t anticipated this problem and it was exactly the problem we faced in Florida. We came very close to breaking up the TV, which would have allowed the problem to be dealt with fairly quickly. But the TV model that we use is no longer available from the manufacturer, the thought of trying to find another that fit the TV enclosure was thoroughly unappealing, and it just seemed so wasteful to destroy a perfectly good flat screen TV.
We got lucky, if you can call spending an entire day servicing a TV lift “lucky”. In fact, it was slightly worse. It was longer than a normal work day just to get the system apart. Once apart, it was quick to fix and put back together, but the full job was a day and a half of difficult work.
What we did was fabricate small tools that would allow us to work around the still in-place TV. With two of us on the job, we were able to work through the gap between the top of the TV enclosure and the cabinet to get the enclosure separated from the gear and motor assembly.

|

|
The two of us were then able to lift the several-hundred-pounds of case and TV up and support them on a stack of Really Useful Boxes (those suckers are strong!).
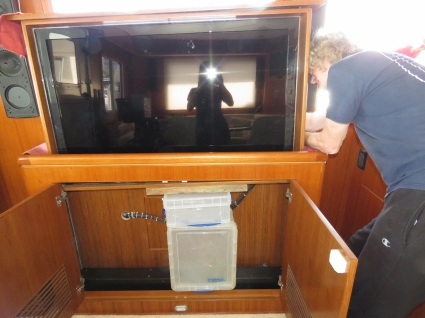
Detaching the TV and the enclosure gave us direct access to the motor/transmission assembly below. We decided it would be easier to do if we first removed the TV and enclosure but, now that the assembly was the top of the travel, this actually very easy to do.

|

|
We then were able to get the cable out of the gears, at which point the lift worked again. The motor hadn’t burned out, it was just electrically shorting where the gears had cut into the cable. We repaired the damage, reassembled the system to avoid this problem in the future, and it was full fully-functional again.
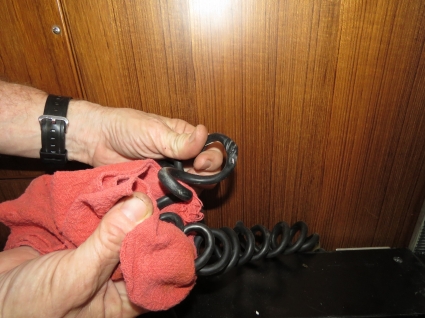
One important lesson we learned in this very painful operation was that we needed to assume the system was going to fail down and we wanted a way out that didn’t involve a crow bar and damage to the TV or the enclosure.
Our solution was to make the TV box top panel removable. The way we did that is by using only two screws that were only into the top a couple of threads. This is plenty secure but can still be popped off from above easily to remove the TV even when it is down.
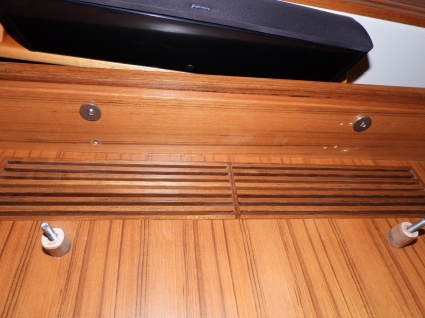
Another part of our service solution is to only attach the enclosure to the motor/transmission assembly by the outer four machine screws. These outer screws can be accessed with a very long extension from above once the TV top panel is off. The other 4 screws are directly under the TV and inaccessible without breaking up the TV. The system is very secure with 4 ¼” machine screws so there is little given up and what you get is a system that can be serviced in a couple of hours instead of a couple of days.
Shortly after we returned back to Amsterdam from a recent trip to the US, the TV lift developed a new problem. It would wind down normally, but would barely wind up. The motor barely had the power to wind the assembly up and, each time I tried it, it wound more slowly in the up direction.
I should have phoned the manufacture that night but I put that call off until Monday since I would be able to tear the system down fairly quickly with the serviceability tricks we had discovered above.
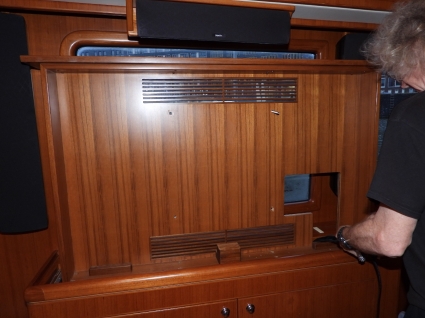
We removed the TV cables by working through the service panel at the back. We then removed the 4 machine screws that hold the TV in place and lift it off. Only minutes had been consumed so far.
But it’s never that easy. It turns out the motor/transmission can’t be taken out without first lifting out the entire assembly. It’s only held in by 12 to 15 wood screws, so that isn’t much of a problem at all. But the assembly couldn’t be lifted out because the opening isn’t big enough for it to slide out. It would have been easy to make the opening larger and just use a larger top but when the box was fabricated, the woodworkers didn’t realize this.
Having an insufficiently large opening means the limit switch assembly, the top limit, and the bottom limit have to be removed. This would be easy if they were held on by hex head bolts but they used Phillips-head screws and there is only 1/4″ of clearance to the back wall. The good news is that, with the correct screws, it’ll be easy to reassemble, but it took two hours to get apart. I hate when machinery is built-in. Nordhavn, the manufacturer of our boat, does an amazing job of looking forward to service and its rare we find anything that’s truly “built-in”. But they missed the mark here.
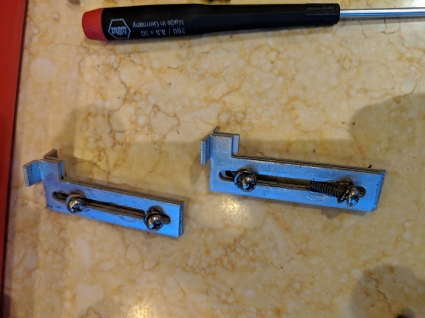
Once the limit switch assembly was removed, it was easy to remove the entire assembly and even easier to get the motor/transmission unit out of the larger assembly.
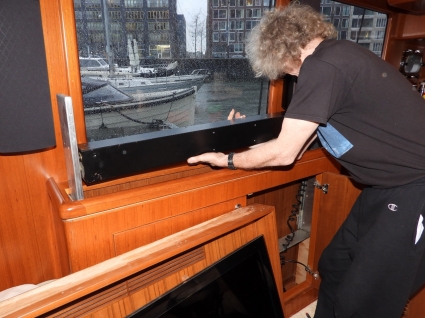
With the motor/transmission assembly out, I tested it again and it continued to wind up very slowly and run down perfectly. I went to open up the motor/transmission assembly and found that it was in a welded steel box and the only way to access the mechanicals was to slide the assembly out the end. But since the gears protrude beyond the case, this can’t be done without first removing the gears. And, as you can see in the picture below, the gears are welded to the shafts on assembly. The motor/transmission assembly has no field-serviceable parts.
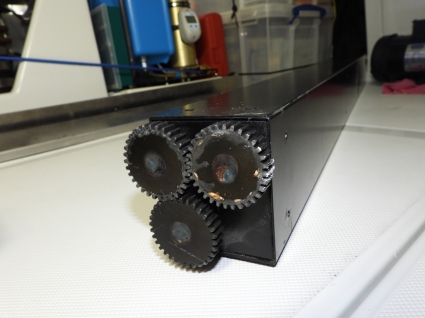
Non-serviceable is annoying, since getting parts to places distant from the manufacturer is often far more difficult than replacing the parts. But, there is little to be done. We needed to replace the assembly and wouldn’t be able to do anything about that until the manufacture opens Monday morning.
I called them and, rather than selling me the part, they asked me to try removing the remote control system and retest it. The good news is it worked. The bad news is that it would take a couple of hours to reassemble the system and I’d need to replace the remote control system.
Unfortunately, a good part of the work In front of me was self-inflicted. I had misdiagnosed the problem as a motor transmission assembly when, in fact, it was a control system problem. What was happening was the control system was powering the motor both up and down at the same time which seemed a lot like a failing motor gear/box in that the system ground very slowly and chattered heavily.
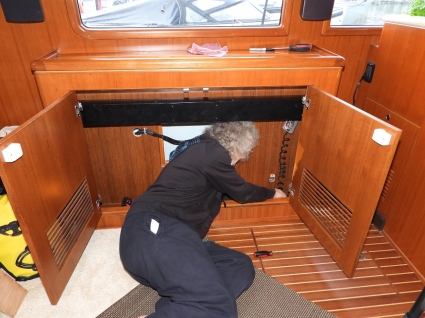
I put the system back together and tested it to ensure it was working properly again and just needed a new remote control. In the picture below, I am reinstalling the bottom limit and you can see the limit switch assembly hanging off the motor/transmission unit on the right side prior to reinstall. These all need to be detached for clearance before the lift could be removed or replaced in the cabinet.
As I said earlier, I’m largely fairly impressed with the robustness of the TV lift assembly but that doesn’t include the remote control. The remote control was expensive and failed the first time in just over a year. The remote control system has been quite unsatisfactory.
The remote control is gold box shown at the right in the picture below, and it can be separated from the rest of the TV lift (red box at left):
The first time the remote stopped working, I took apart the gold box and found it was basically a three-component system: 1) transformer/power supply, 2) control logic board, and 3) remote control board. The remote control circuit board had “tester” written across it in grease pencil so I suspected it was the culprit:
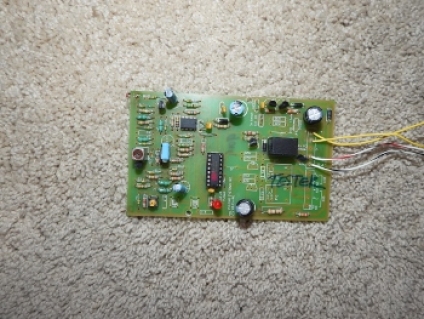
I replaced the remote control circuit board with a simple $15 remote from Amazon. This inexpensive consumer remote has driven the system well for the last eight years. In this design I replaced just the original wireless control board.
This latest fault, where the motor was slow to wind up, was caused by the control logic board, shown below encased in epoxy. I was still using the other two components (power supply and control logic board) of the original gold box. This time the fault was the control logic board:
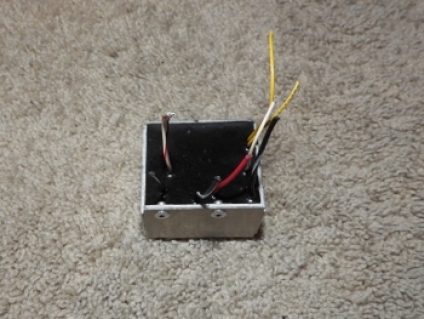
At this point, both the major components in the gold box have failed, other than the power supply, so I decided to get rid of the gold box entirely and run the system through the manual switch. The manual switch works fine, but it would be nice to be able to run it without getting up to run the switch at the cabinet.
So I decided to adapt my still-functioning consumer remote to remotely operate the system through the manual control circuit. This worked surprisingly well, but I needed a power supply for the remote control and there is no 12 to 24V anywhere near. The thought of having to pull another wire was unexciting but I realized that NMEA2000 components all run on 12V and the remote control requires next to no current so I could easily make it into a NMEA2000 component. The final design is below:
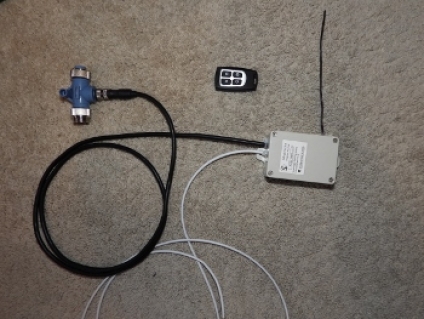
The TV lift is back to working again and it wouldn’t have even been time-consuming to repair if I had not first misdiagnosed the problem as a motor/transmission issue and taken the system fully apart. The remote that has failed twice now has been discarded entirely. The rest of the system looks well-engineered and is running well and my remote-control drive system is getting the job done.
The only real weaknesses I can see in the Inca TV Lift system is that the remote control system is failure-prone and some additional thought and/or advice to installers could help make the system much more serviceable. But the TV lift system itself appears very nicely designed and heavily built and Inca support is impressively good. It’s nice to have the system back running but, I have to admit, I hope I don’t have to open it again for another decade or so.

