We passed through the four-lock Muirtown flight at the start of our second day in the Caledonian Canal, then cruised the scenic waterway alongside, but above, the River Ness en route to Dochgarroch. Our total travel distance was five miles in three hours for an average speed of just over 1.5kts. The locks take up some of the time, and the the maximum speed limit on the canal is 5 knots, but we were’t inclined to go any faster anyway and enjoyed the easy pace.
Another difference between the Crinan and the Caledonian Canals is that the interior locks along the Crinan Canal are operated manually by the boat crew, which kept us pretty busy during the transit, whereas the locks on the Caledonian Canal are all operated by canal staff. We found the transit through the Caledonian Canal overall more relaxing as we had less work to do, and fewer locks per mile to transit. The manually-operated locks on the Crinan Canal are really part of the adventure on the first pass through, but once you’ve done the adventure it starts to look like a lot of manual work.
Below are trip highlights from October 15th, 2017 in the Caledonian Canal, Scotland. Click any image for a larger view, or click the position to view the location on a map. And a live map of our current route and most recent log entries always is available at http://mvdirona.com/maps
 |
Glen Tarsan
Position: -4 14.84, 57 29.02
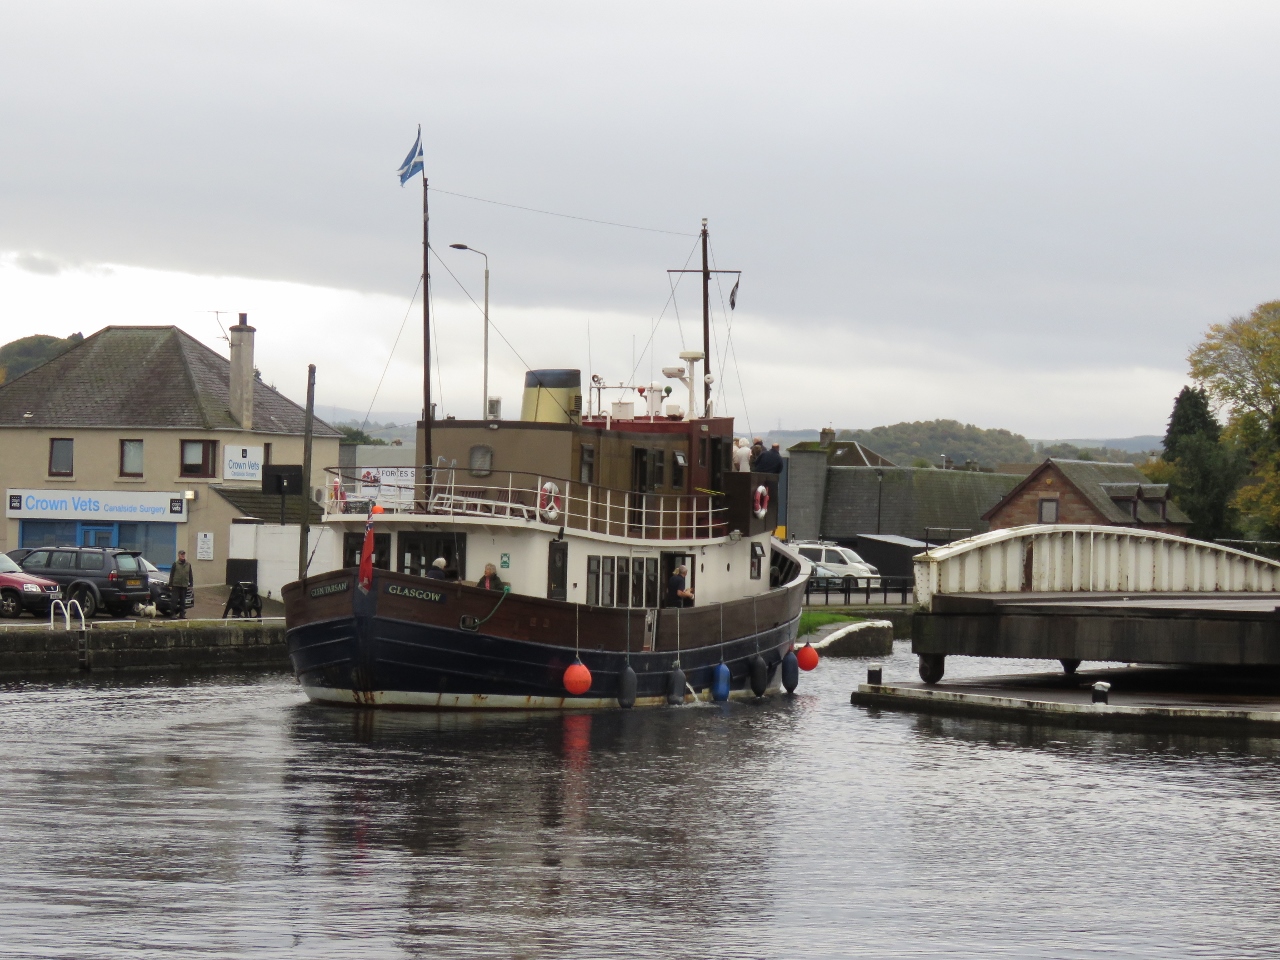
Following the Glen Tarsan through the Muirtown Road Swing Bridge. The locks and bridges along the Caledonian Canal were operating from 8:30am to 5:30pm when we passed through. But several of the bridges had restricted opening times to avoid backing up the local traffic. The first opening of the day for the Muirtown Road Swing Bridge was 10am—it’s a busy road, and traffic backed up immediately.
|
 |
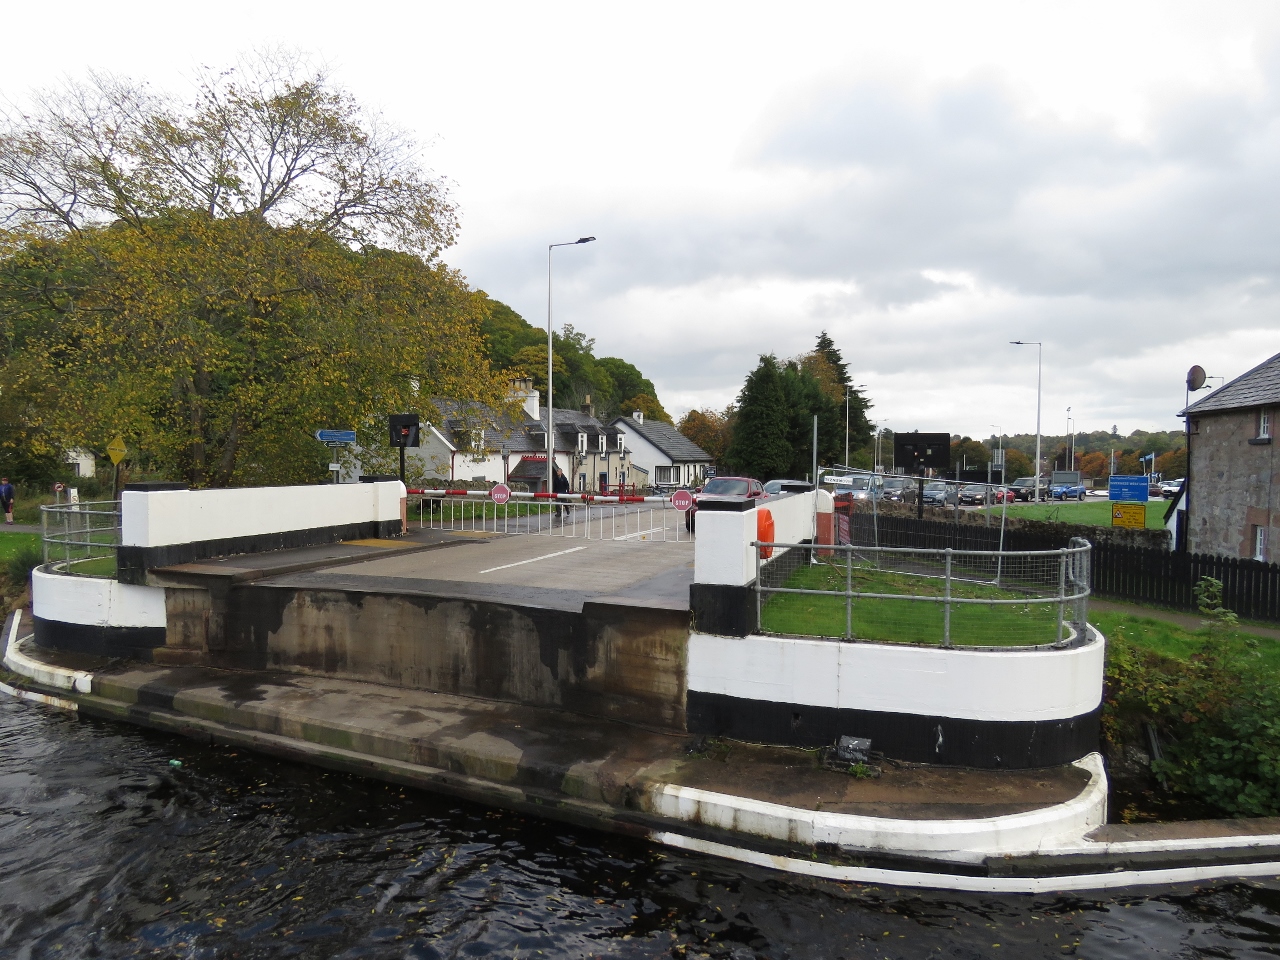
Muirtown Road Swing Bridge
Position: -4 14.86, 57 28.94
Passing through the Muirtown Road Swing Bridge. We bicycled over this bridge a week earlier.
|
|
|
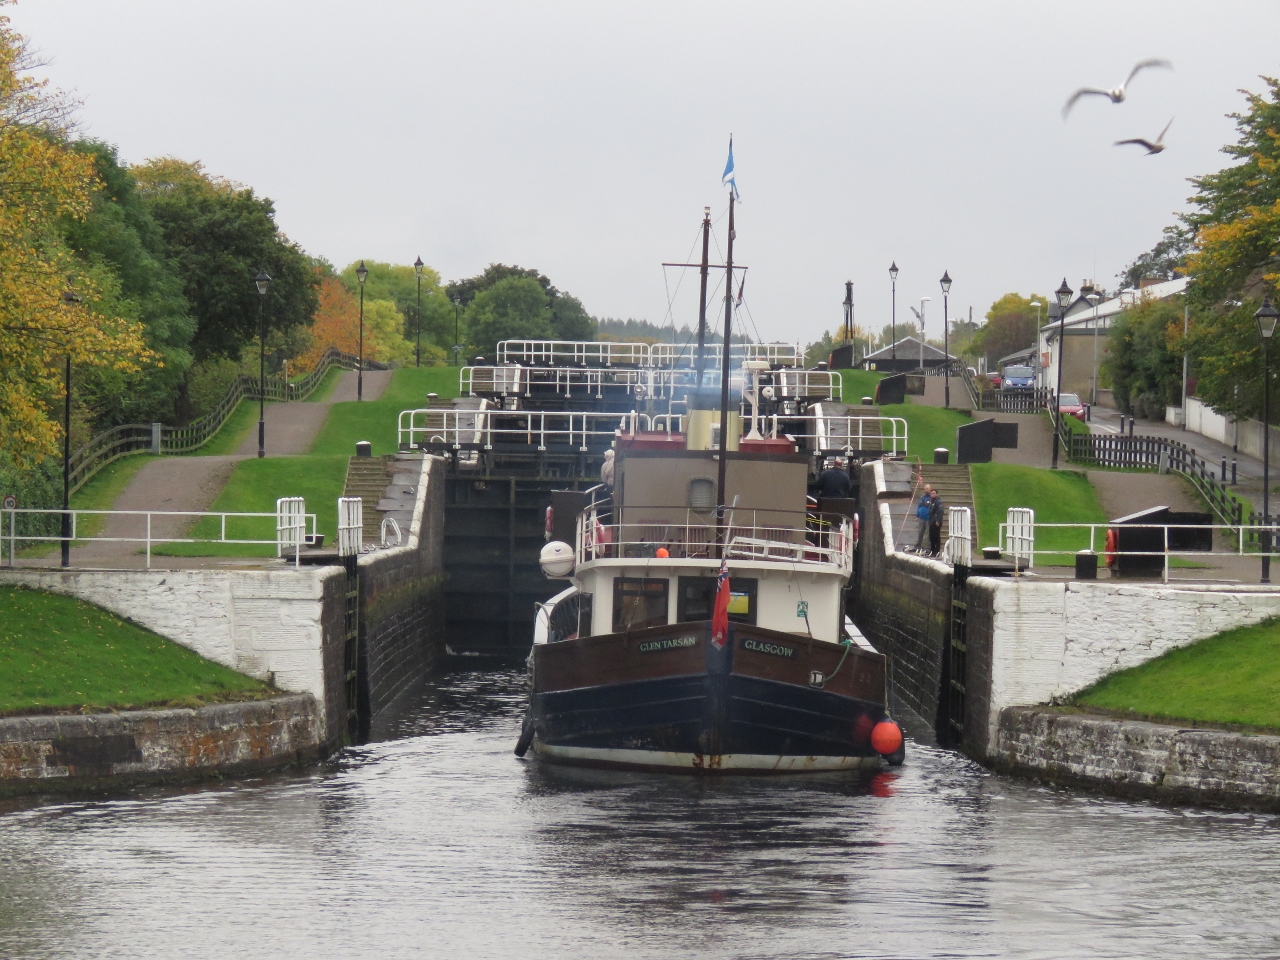
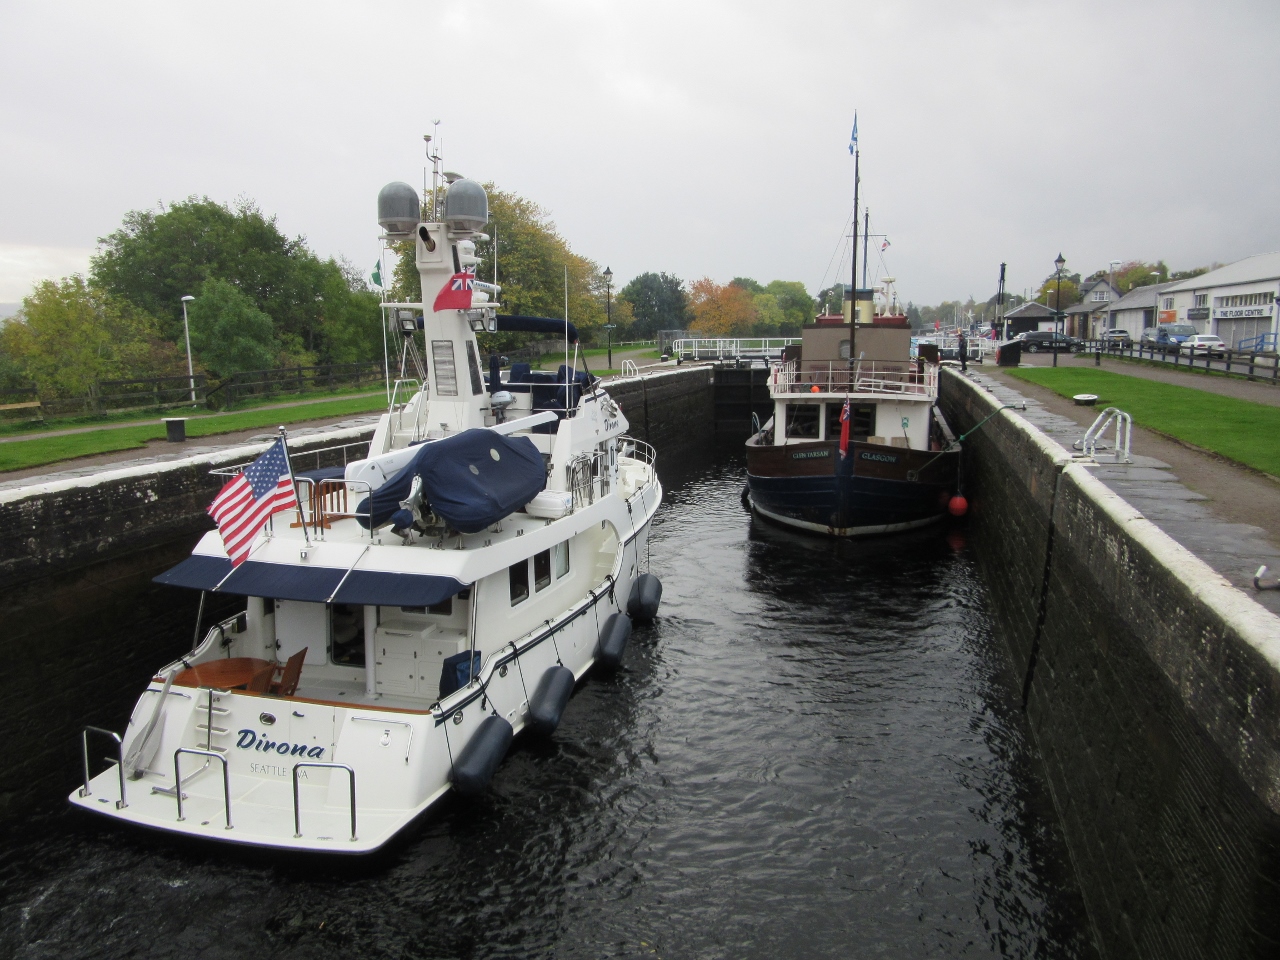
Muirtown Flight
Position: -4 14.86, 57 28.94
The Glen Tarsan entering the first of the four locks in the Muirtown Flight that will take us up a total of 32 feet (9.8m). We’ll be tucking in behind on the port side.
|
 |
Gates Closing
Position: -4 14.89, 57 28.89
The gates closing behind us in the first lock.
|
 |
Lock Filling
Position: -4 14.90, 57 28.89
Tucked in behind the Glen Tarsan. You can see turbulence in the water as the visible Glen Tarsan motors slightly forward to stay tight against the wall as the lock fills.
|
 |
Enjoying the Ride
Position: -4 14.90, 57 28.89
Enjoying the ride as we ascend in the first lock of the Muirtown Flight (Neil White photo).
|
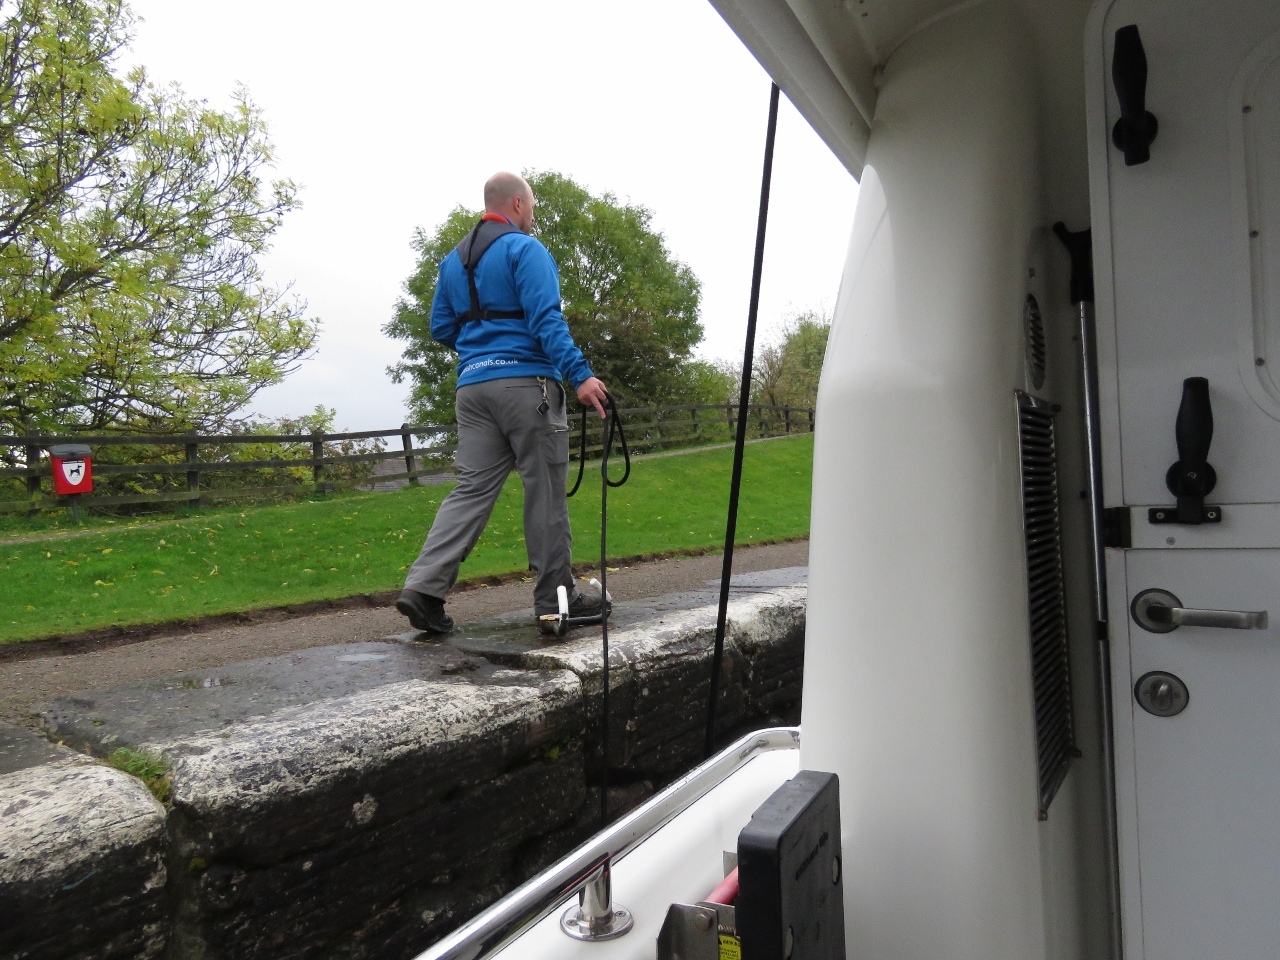 |
Walking Line
Position: -4 14.91, 57 28.88
The canal staff walked our stern line between flights so we didn’t have to toss it up each time.
|
 |
Last Lock
Position: -4 14.96, 57 28.81
Dirona and the Glen Tarsan ascending in the fourth and final lock of the Muirtown flight (Neil White photo).
|
 |
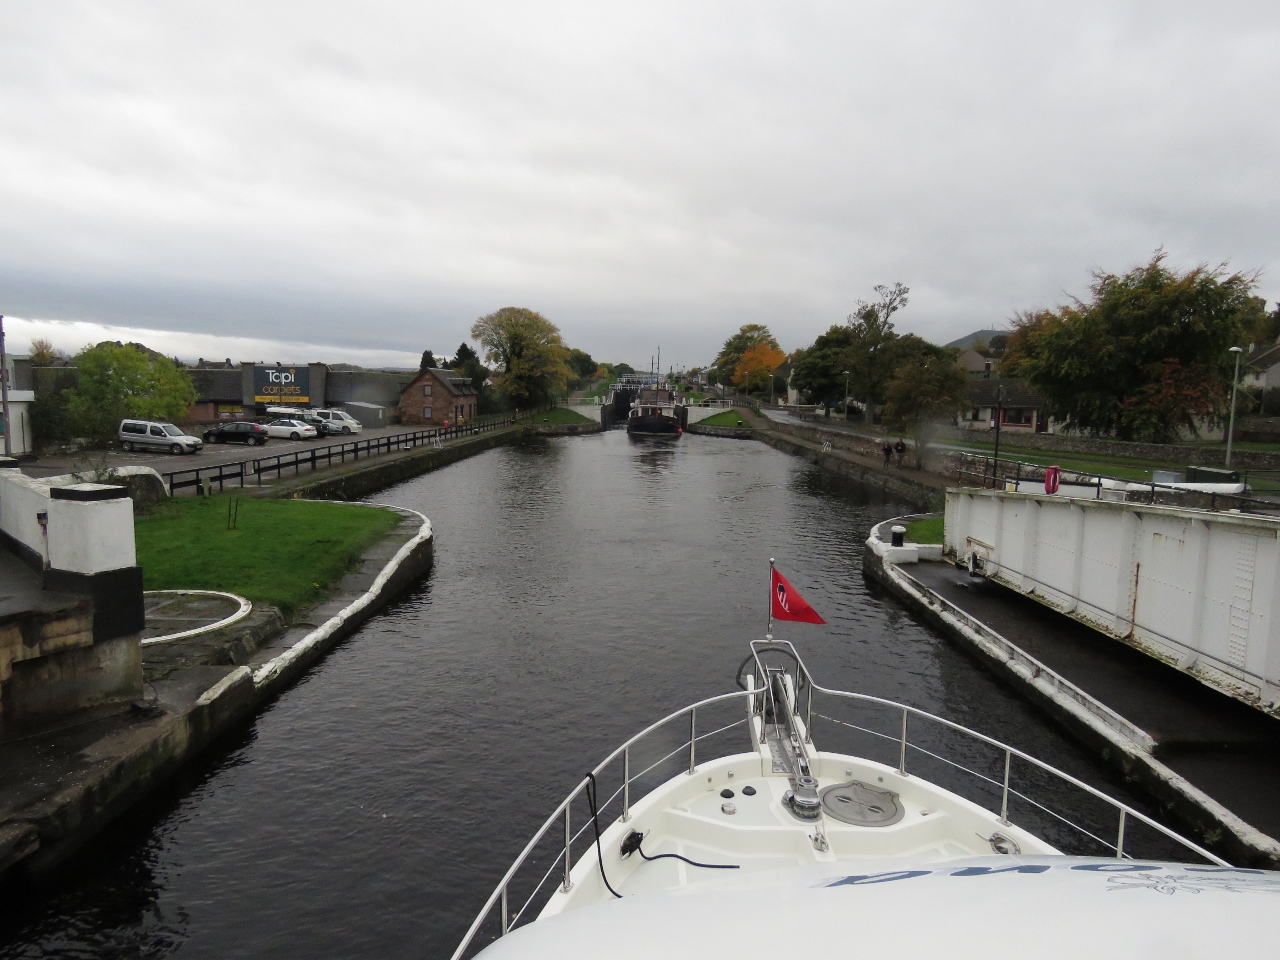
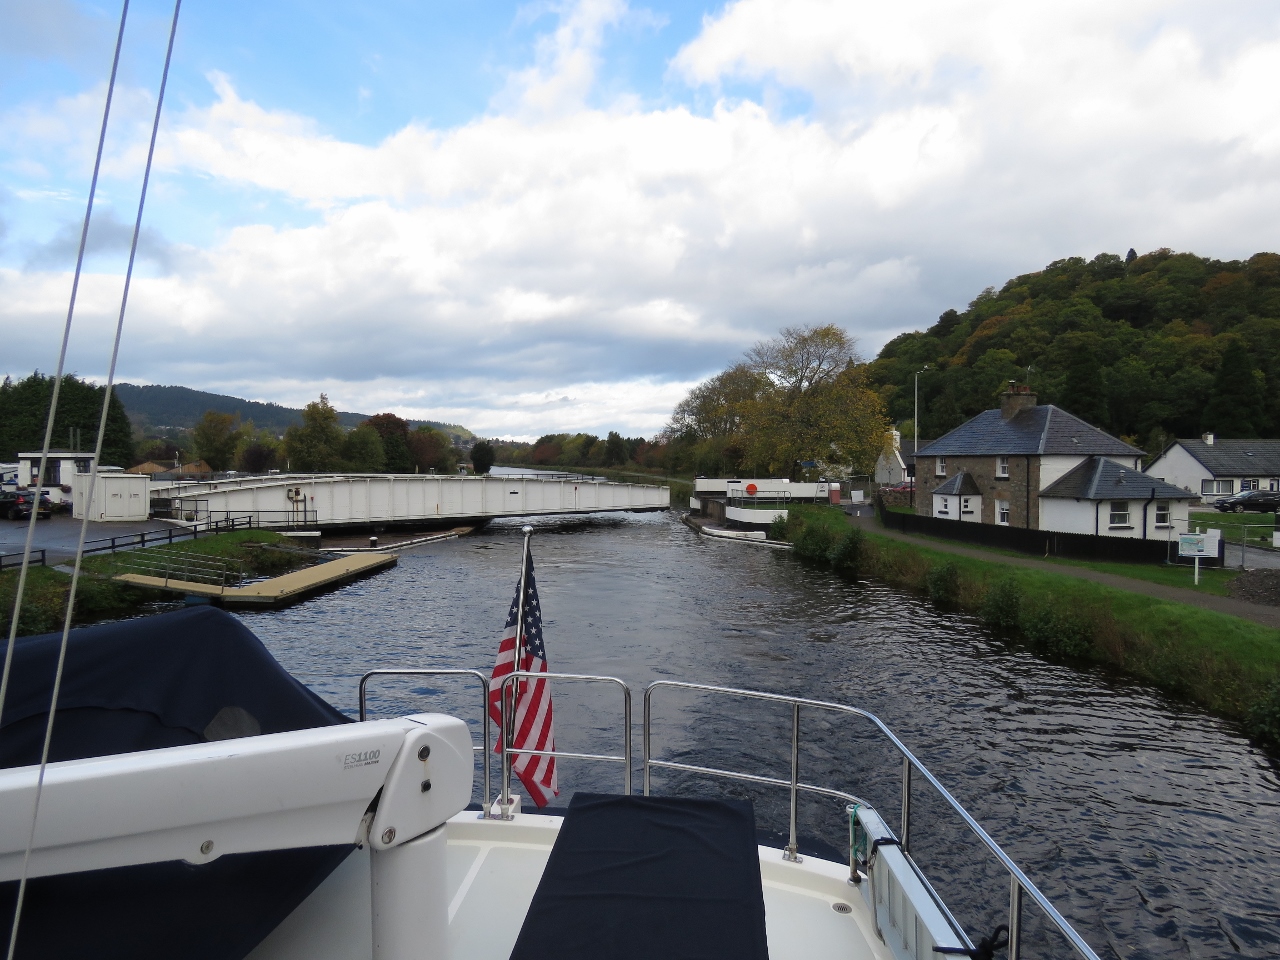
Traffic
Position: -4 14.64, 57 27.88
The Tomnahurick Swing Bridge is about a half-mile past the Muirtown Flight. The canal operators open the bridge for the minimal amount possible and you can see why. Traffic is backed up a long way beyond the bridge.
|
 |
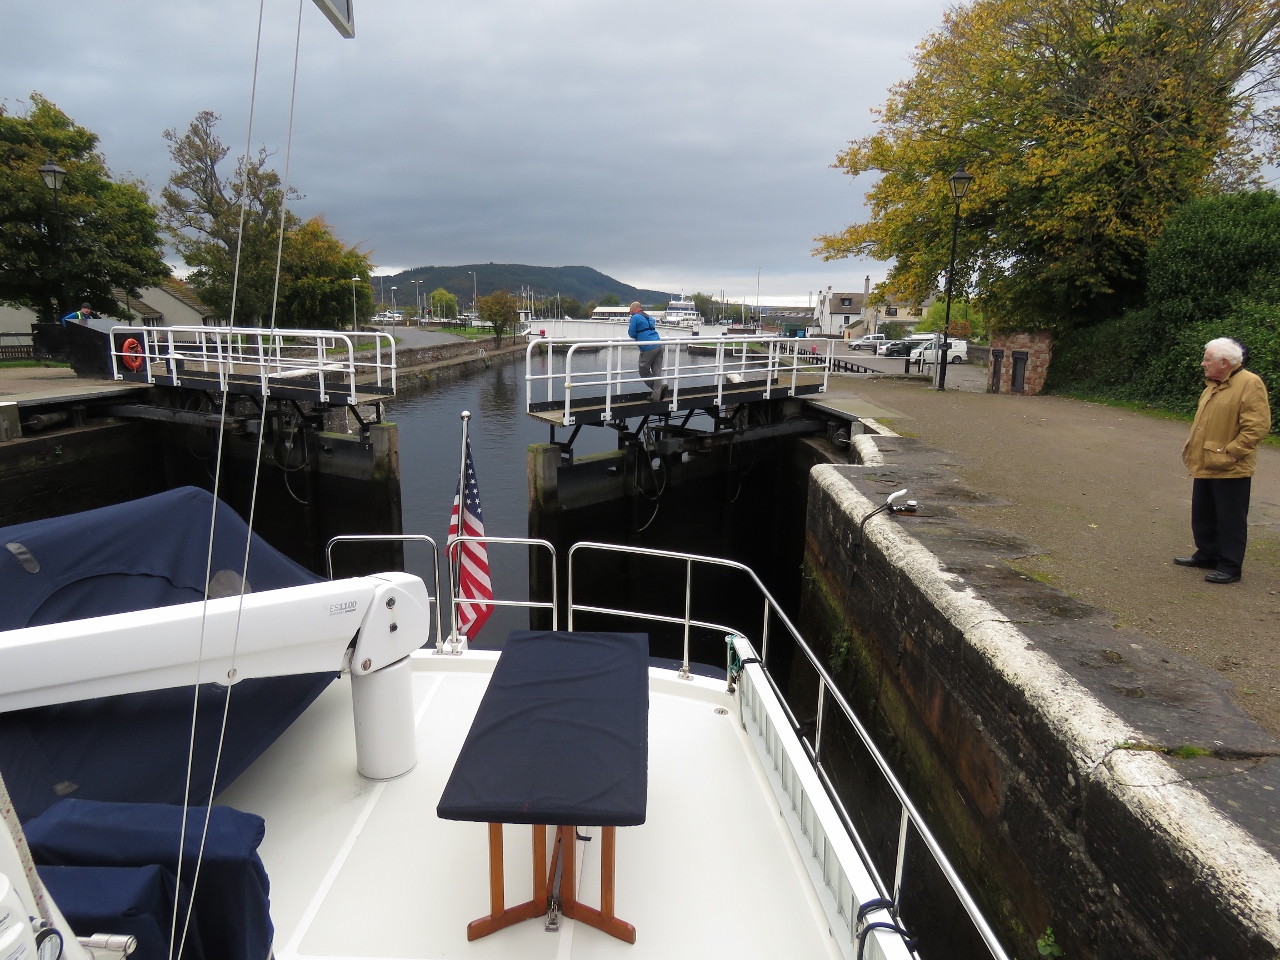
Bridge Closing
Position: -4 14.62, 57 27.82
The Tomnahurick Swing Bridge closing behind us.
|
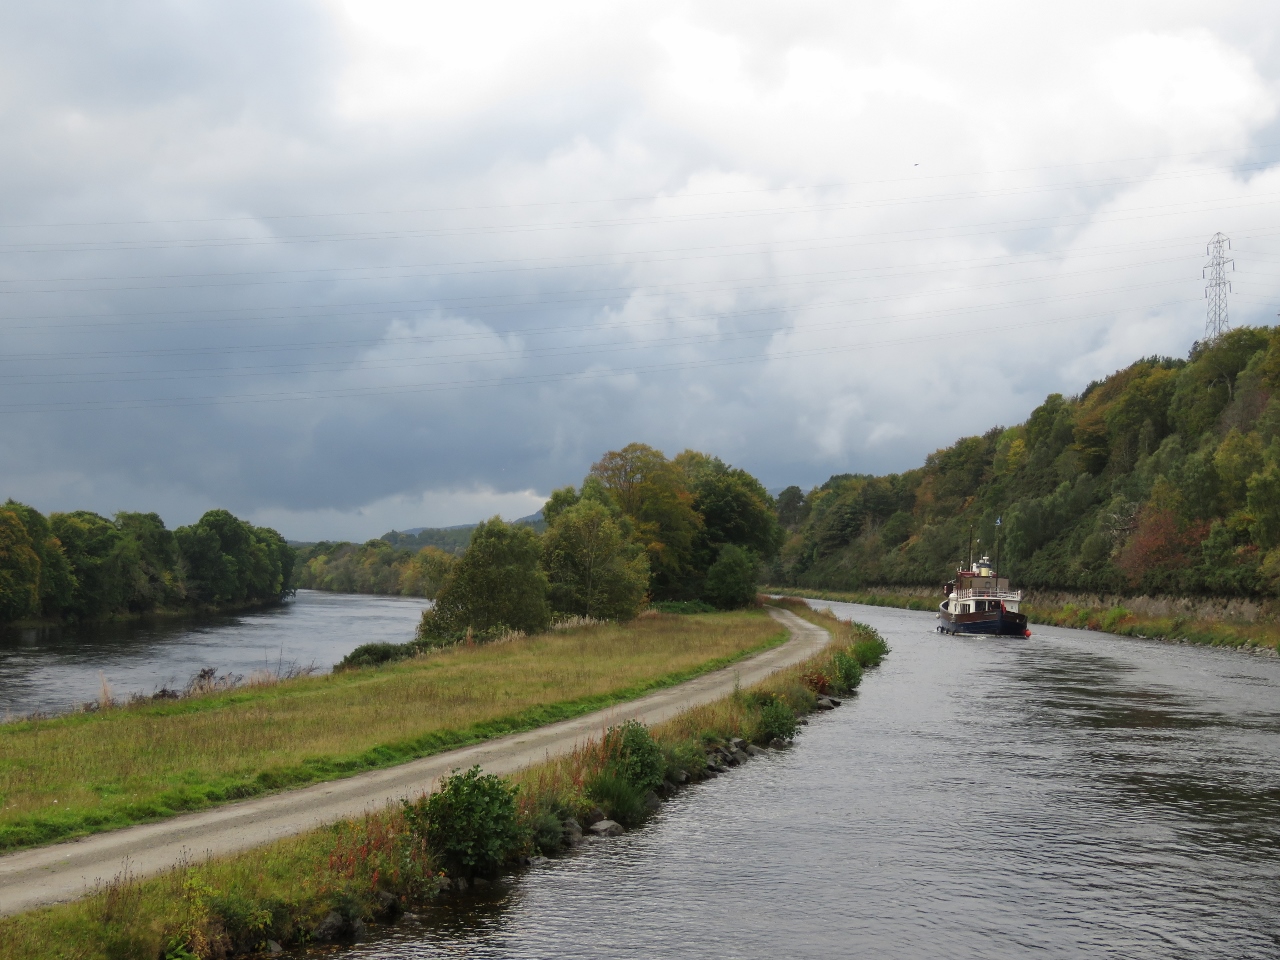 |
River Ness
Position: -4 15.28, 57 27.51
We particularly enjoyed the section of the canal beyond the Tomnahurick Swing Bridge, with the trees showing fall colors and the River Ness visible below to our left.
|
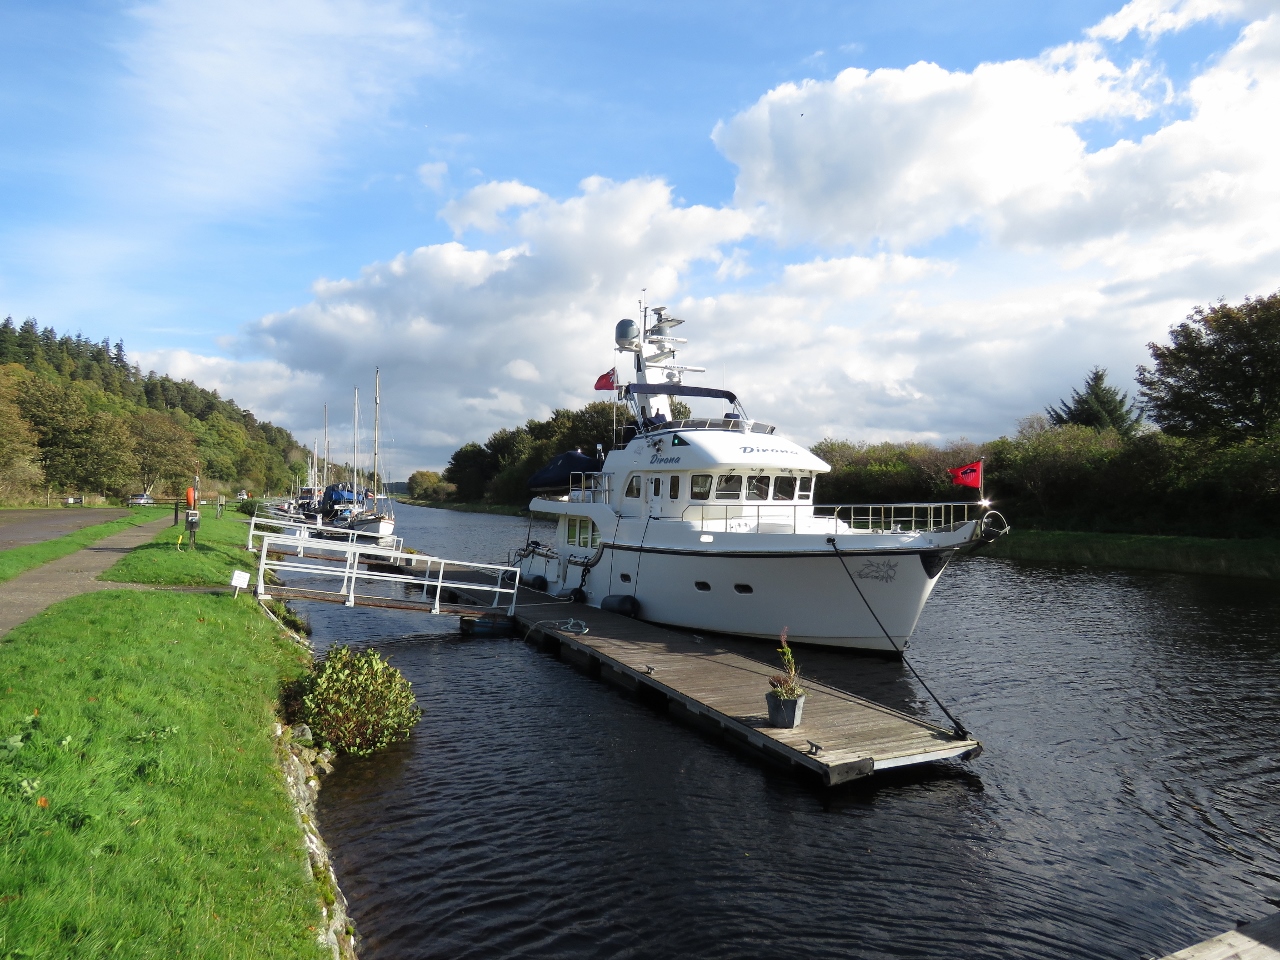 |
Dochgarroch
Position: -4 18.04, 57 26.03
Moored for the night in a lovely berth at Dochgarroch.
|
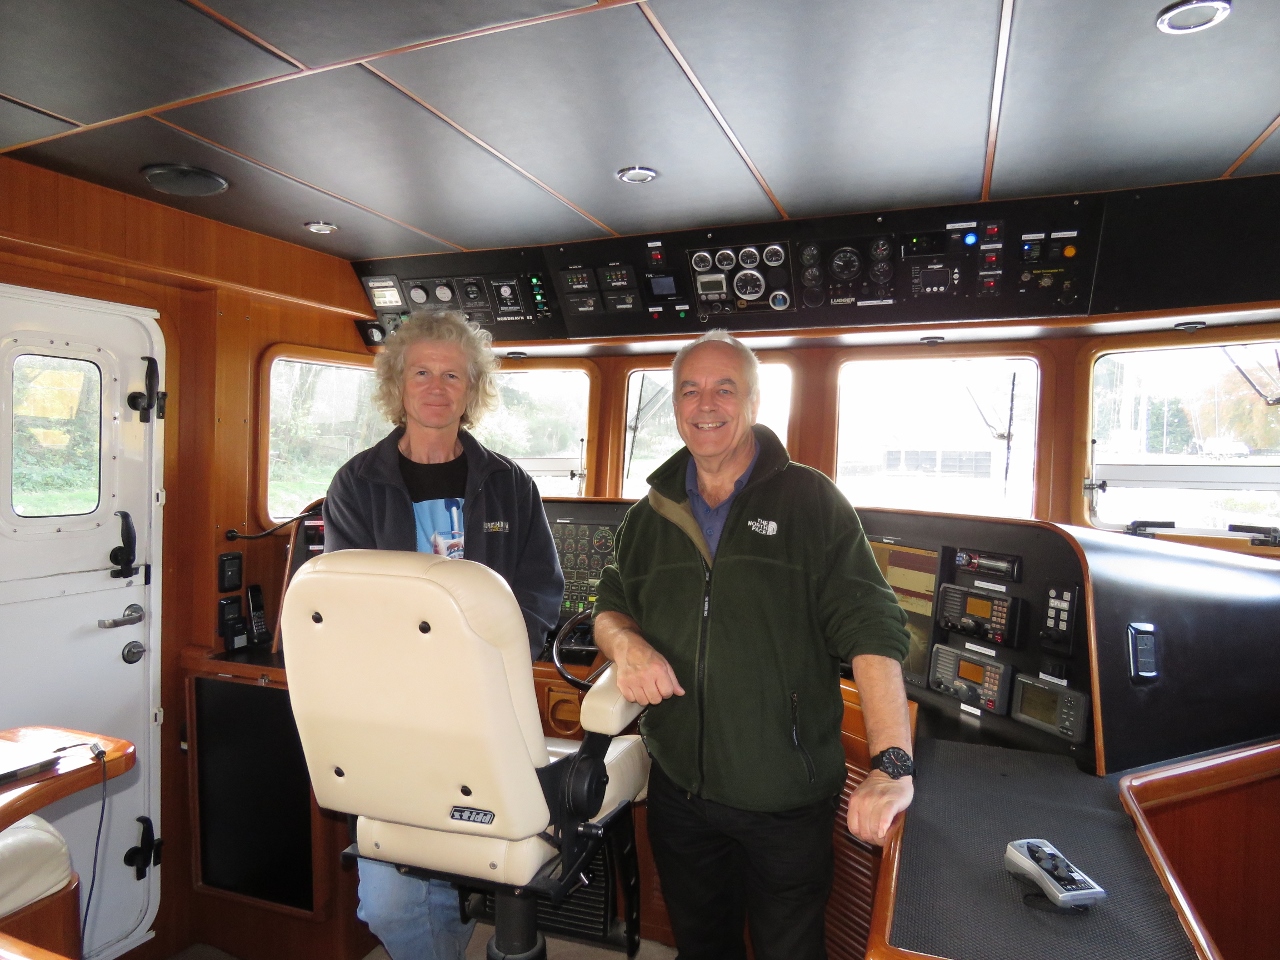 |
Martin Reed
Position: -4 18.04, 57 26.03
Martin Reed has been following our progress through Scotland. Martin had just missed us at our previous stop, but we weren’t far away so he drove down to meet us and tour Dirona at Dochgarroch.
|
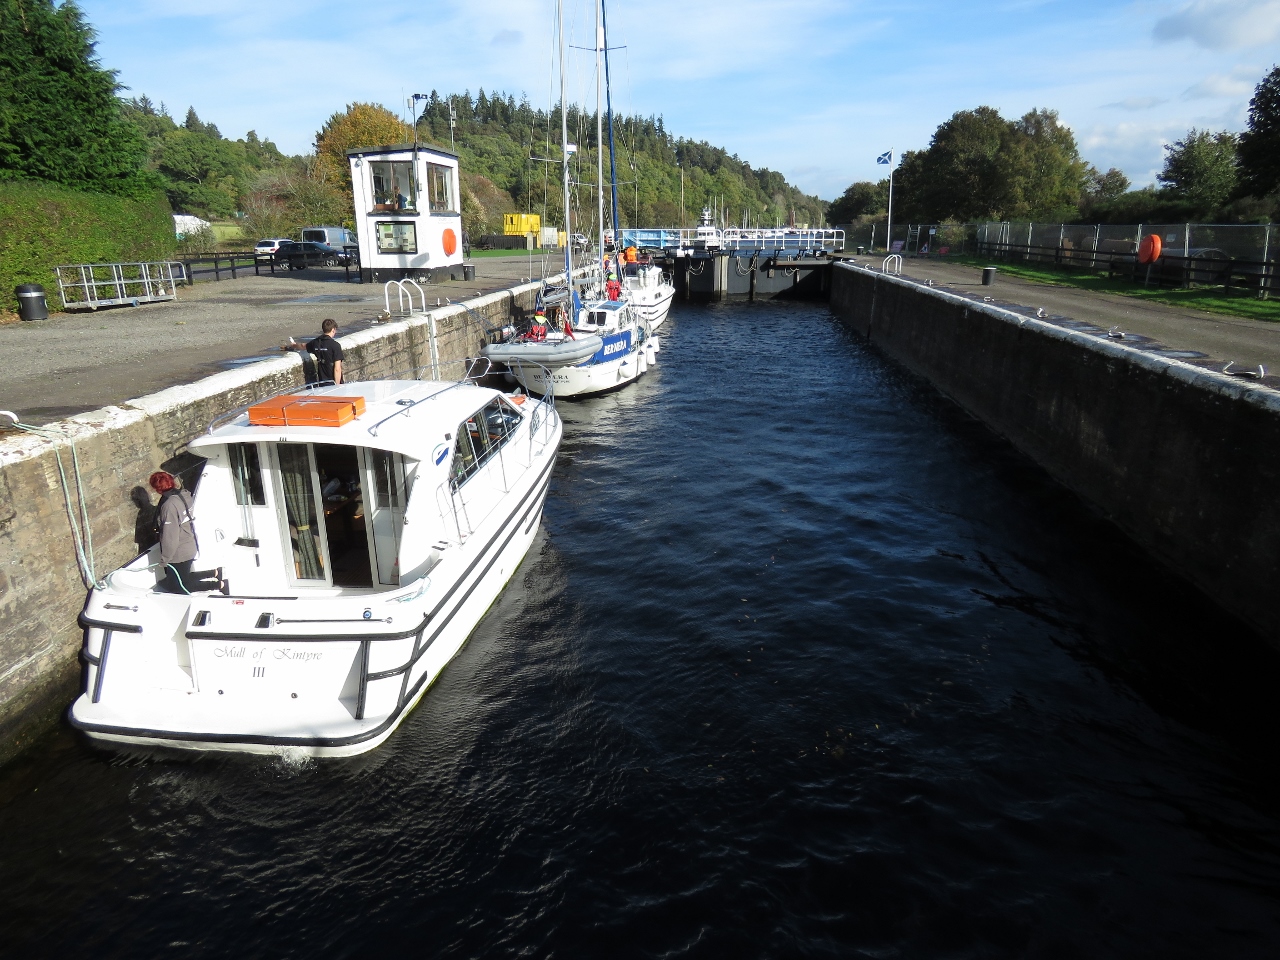 |
Dochgarroch Lock
Position: -4 18.18, 57 25.98
Shortly after arriving, we went for a walk around and watched some boats passing northbound through the Dochgarroch Lock. The front and rear boats are charters—we were surprised how many still were on the canal this late in the year.
|
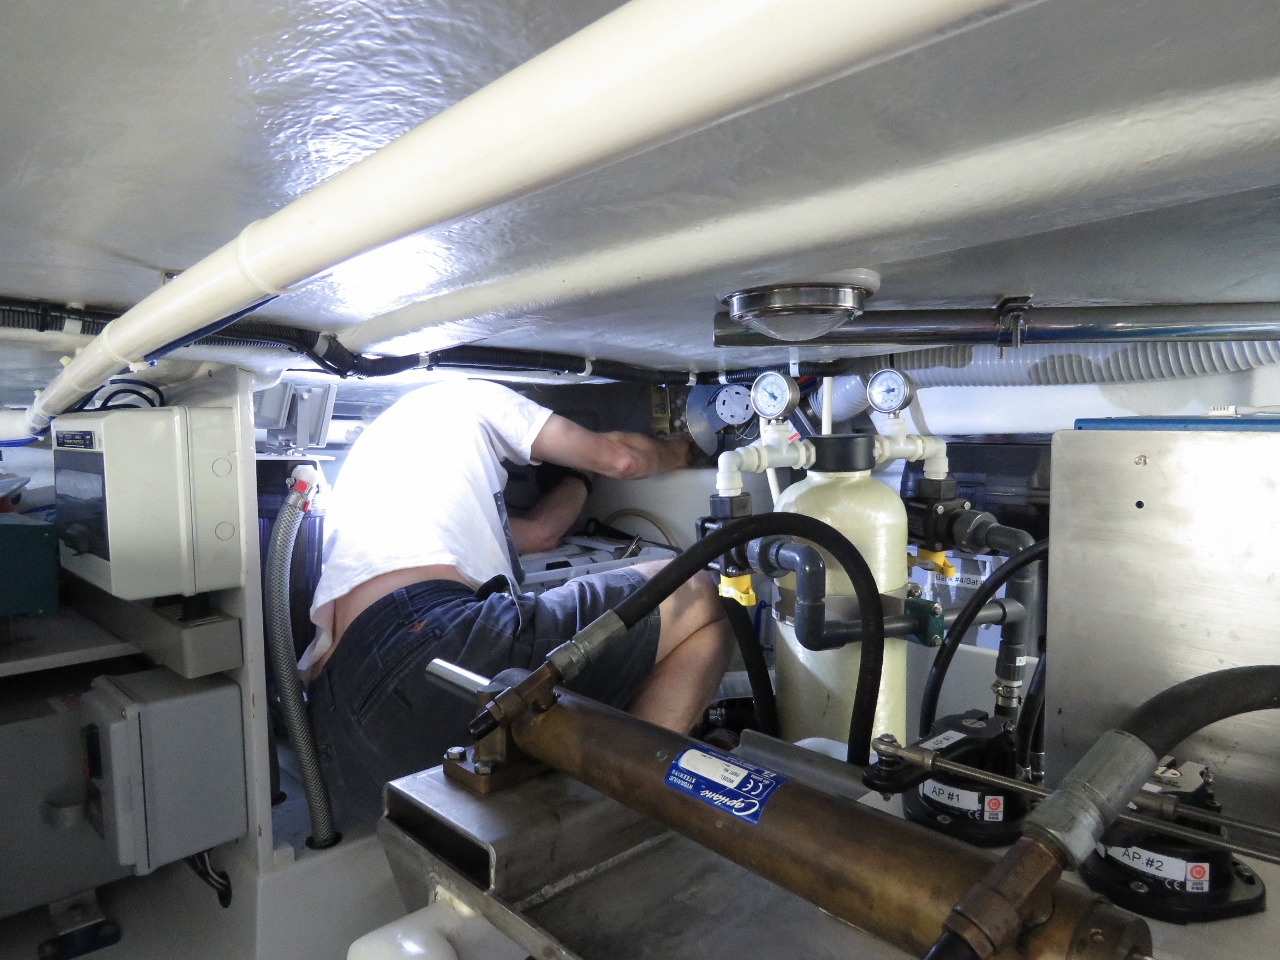 |
Glendinning
Position: -4 18.04, 57 26.03
Our Glendinning shore power cable retractor was jamming up, so James squeezed into the aft starboard corner of the lazarette to take a look. A kink in the power cable stuck against the cable guide when powering out and bent the guide on a sharp angle to the cable route, causing the cable to jam up. We can’t complain too much since it’s been nearly eight years and it was an easy fix to take the senstive parts off, bend the guide straight again, and re-attach everything.
|
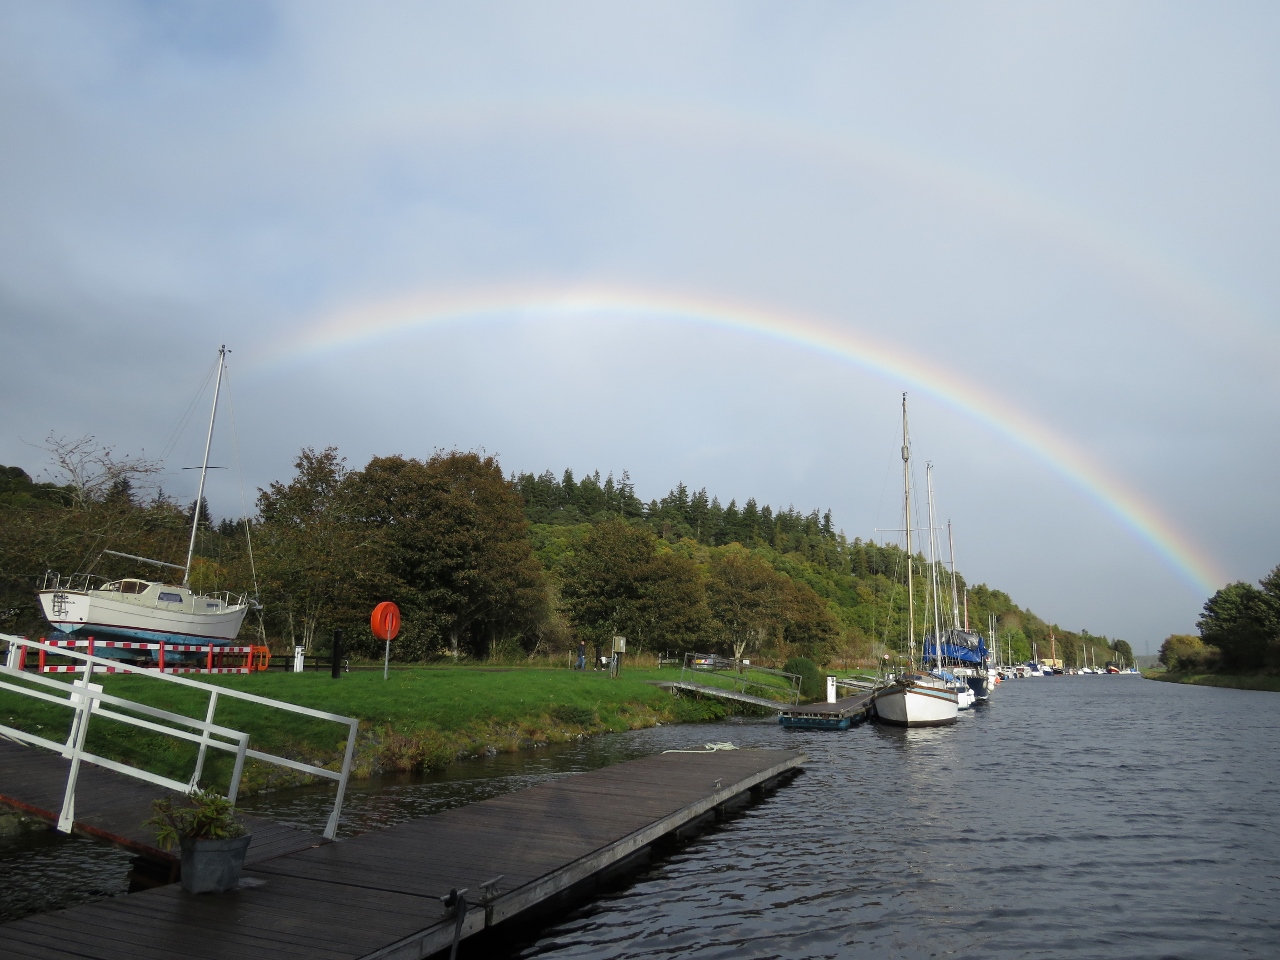 |
Rainbow
Position: -4 18.04, 57 26.03
Rainbow viewed from our berth at Dochgarroch.
|
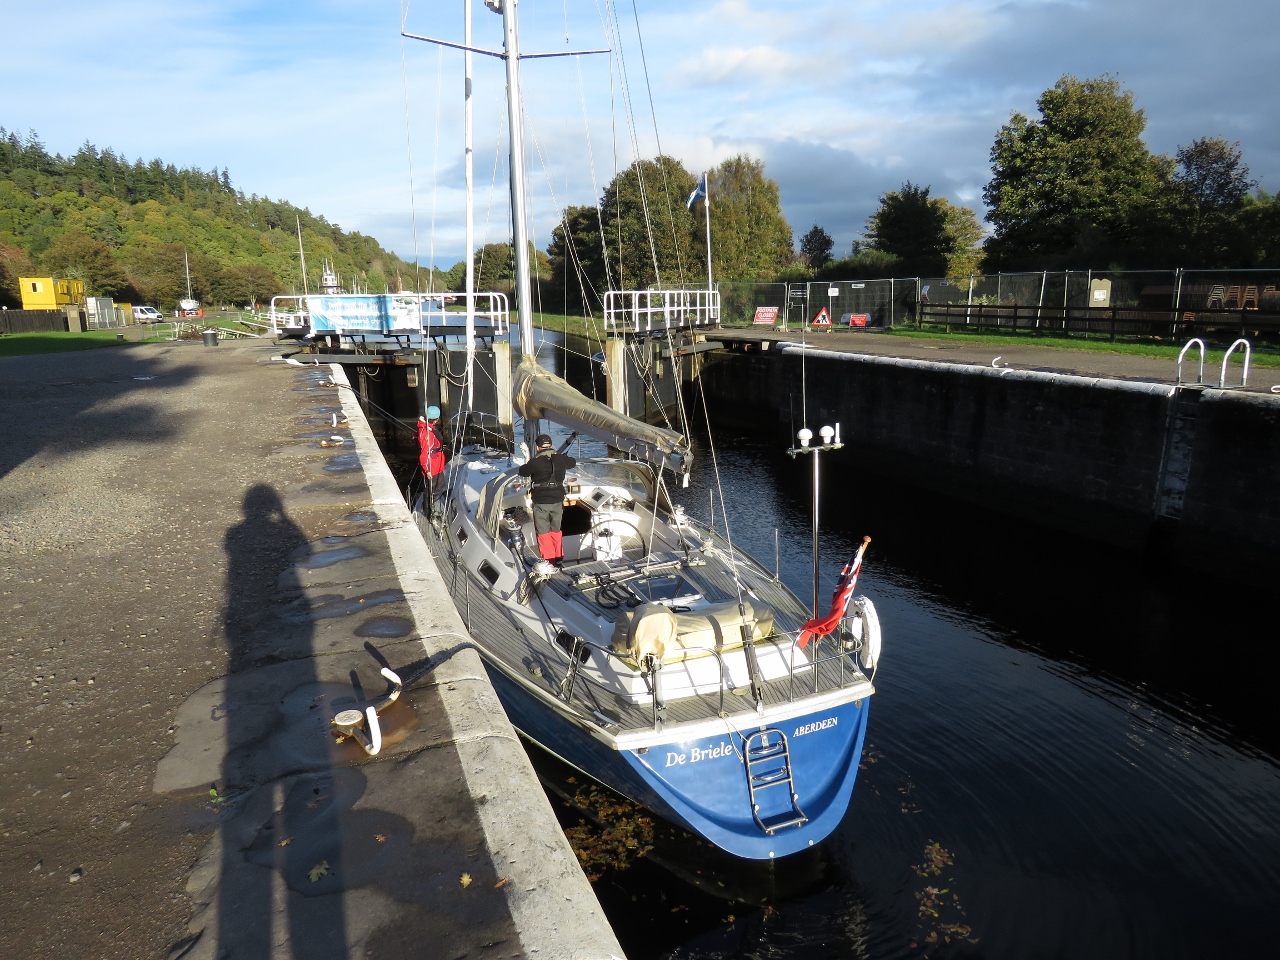 |
De Briele
Position: -4 18.15, 57 25.98
After lunch, we took a longer walk around the area and watched some more boats locking through. This is De Briele of Aberdeen, likely heading home after a summer cruise on the west coast of Scotland.
|
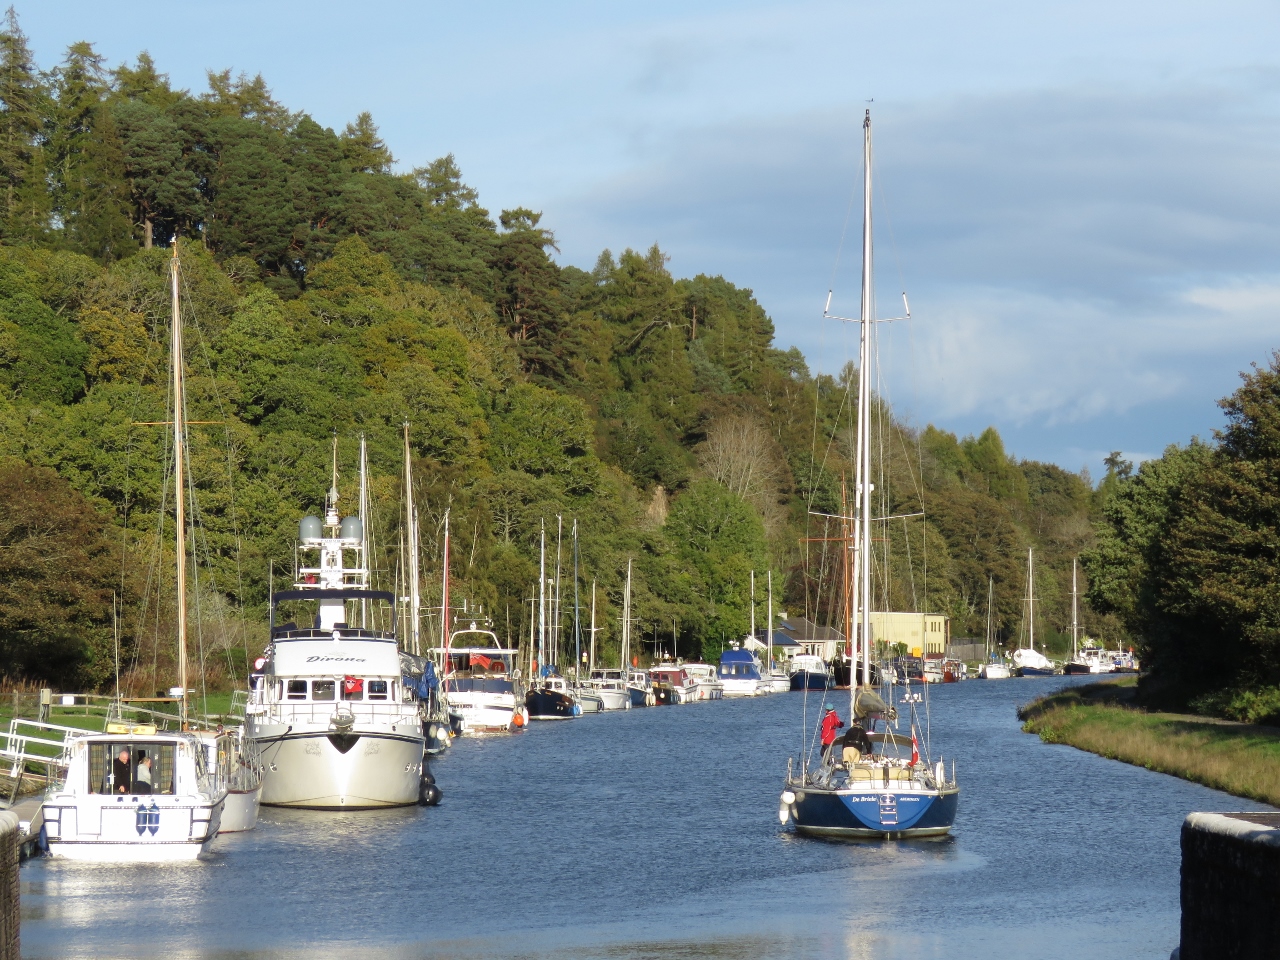 |
Wintering
Position: -4 18.17, 57 25.97
De Briele passing alongside Dirona and the Dochgarroch pontoons after locking through. Dochgarroch has a lot of dock space, but most of it is taken by wintering boats. The Caledonian Canal is a popular place to winter a vessel.
|
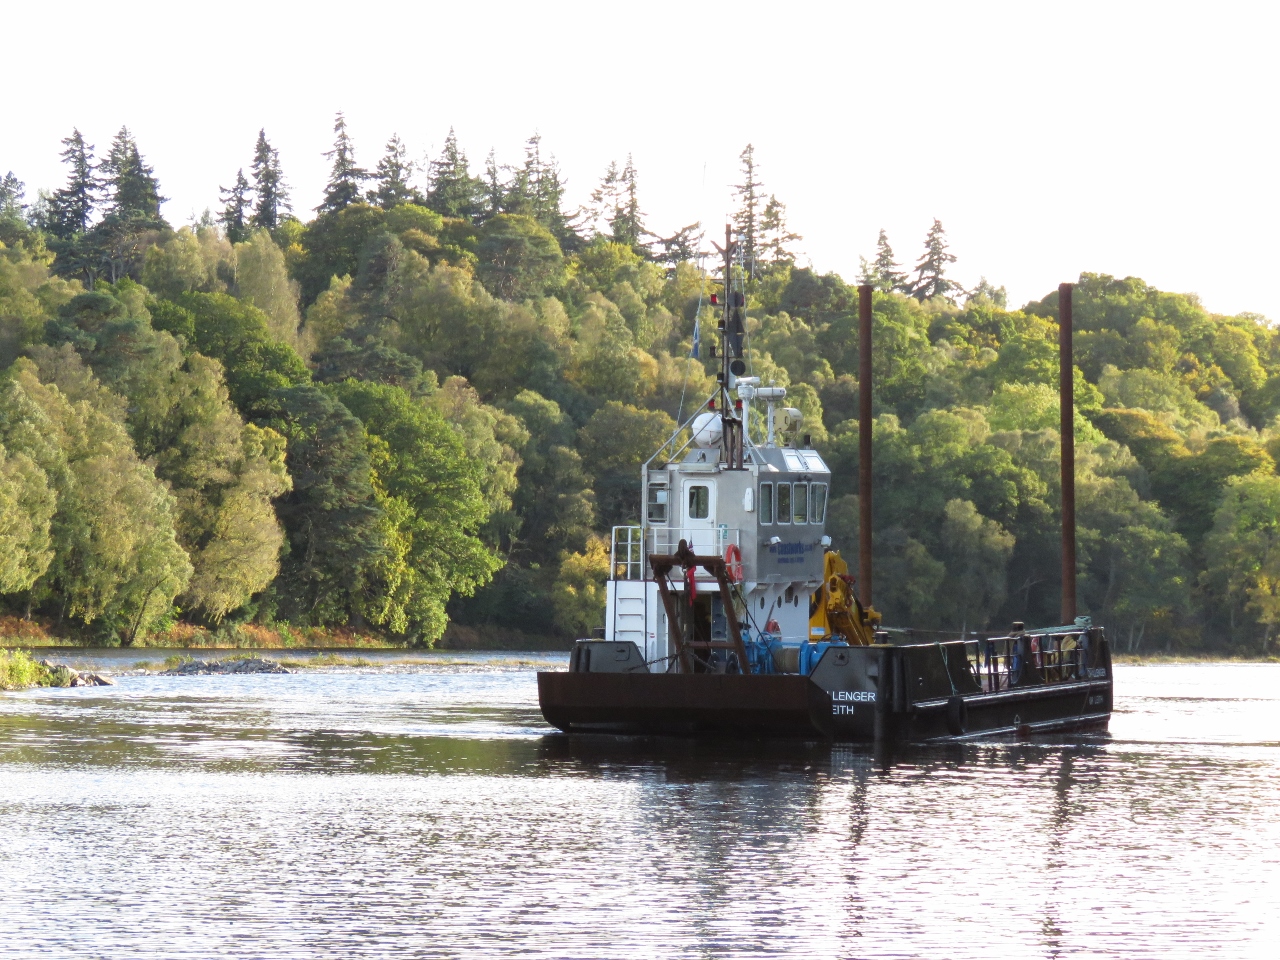 |
Challenger of Leith
Position: -4 18.49, 57 25.79
The Challenger of Leith dredging the channel just north of Dochgarroch.
|
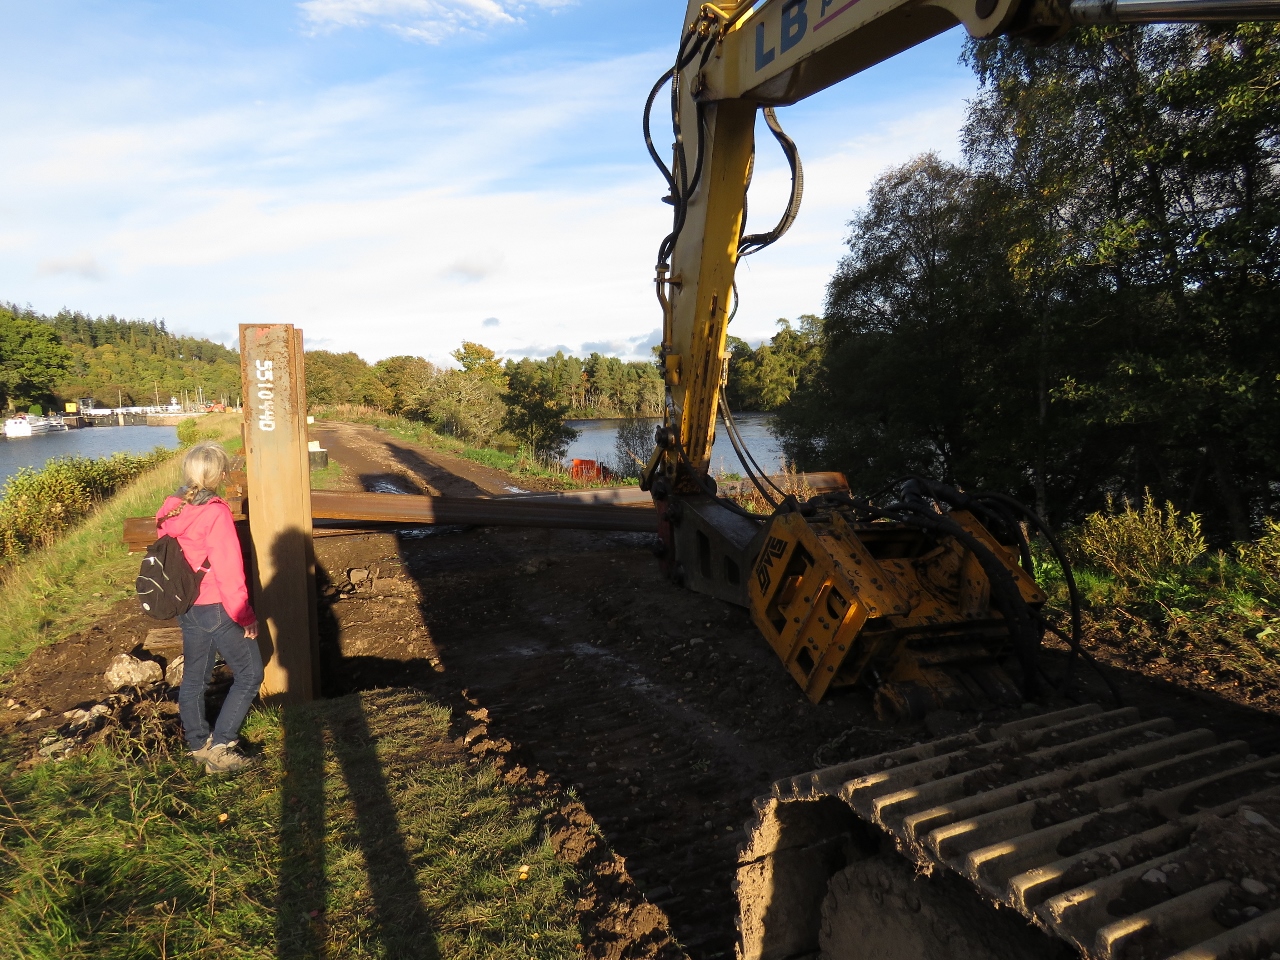 |
Construction
Position: -4 18.32, 57 25.89
On the south side of the canal a major construction project was underway to reinforce the shore. They were pounding beams about 15ft high into the canal shore.
|
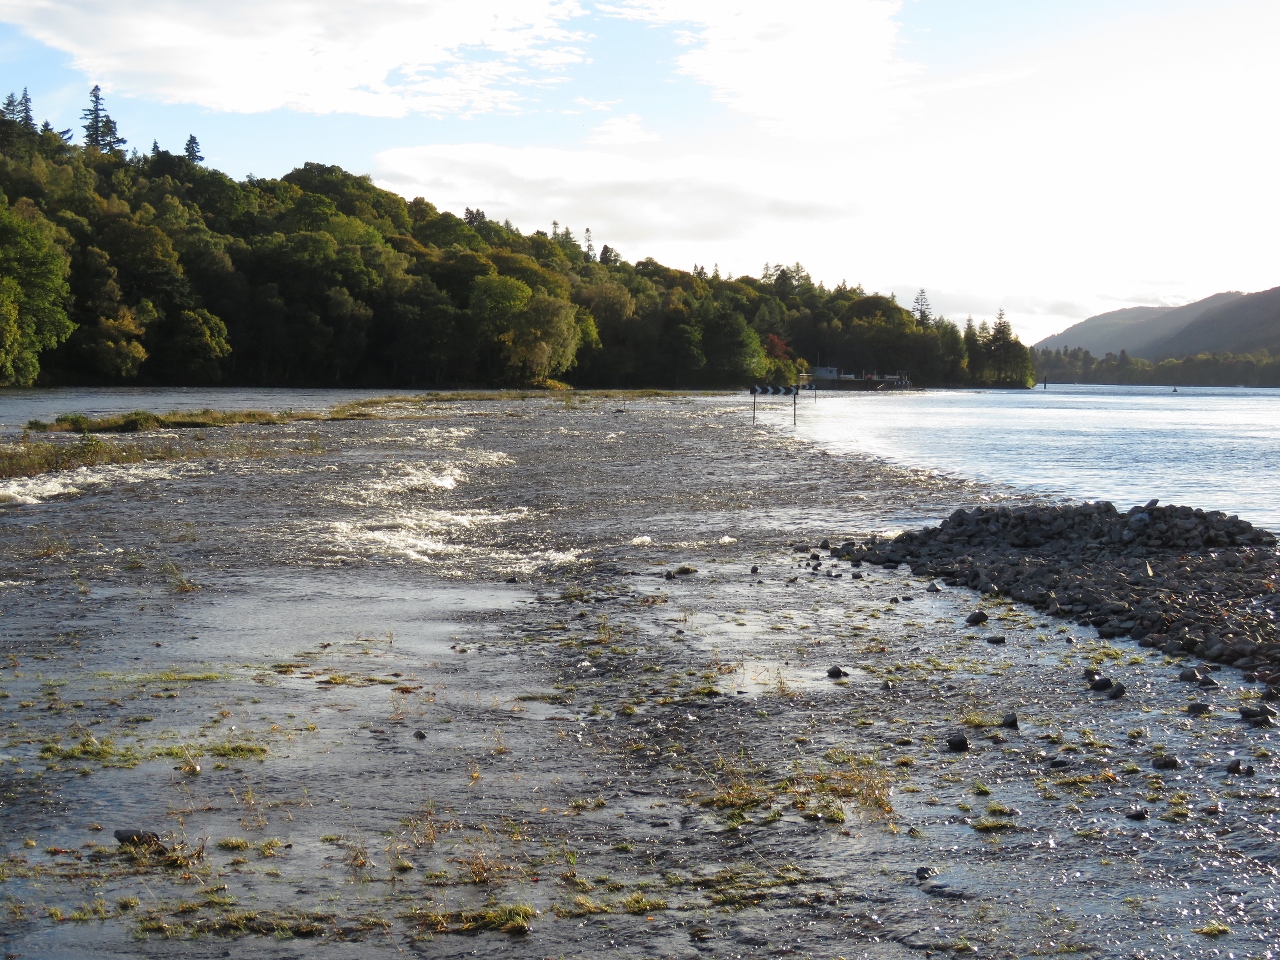 |
Wiers
Position: -4 18.48, 57 25.72
Weirs where the canal joins the River Ness. The canal level is quite high right now, and water is flowing down into the River Ness.
|
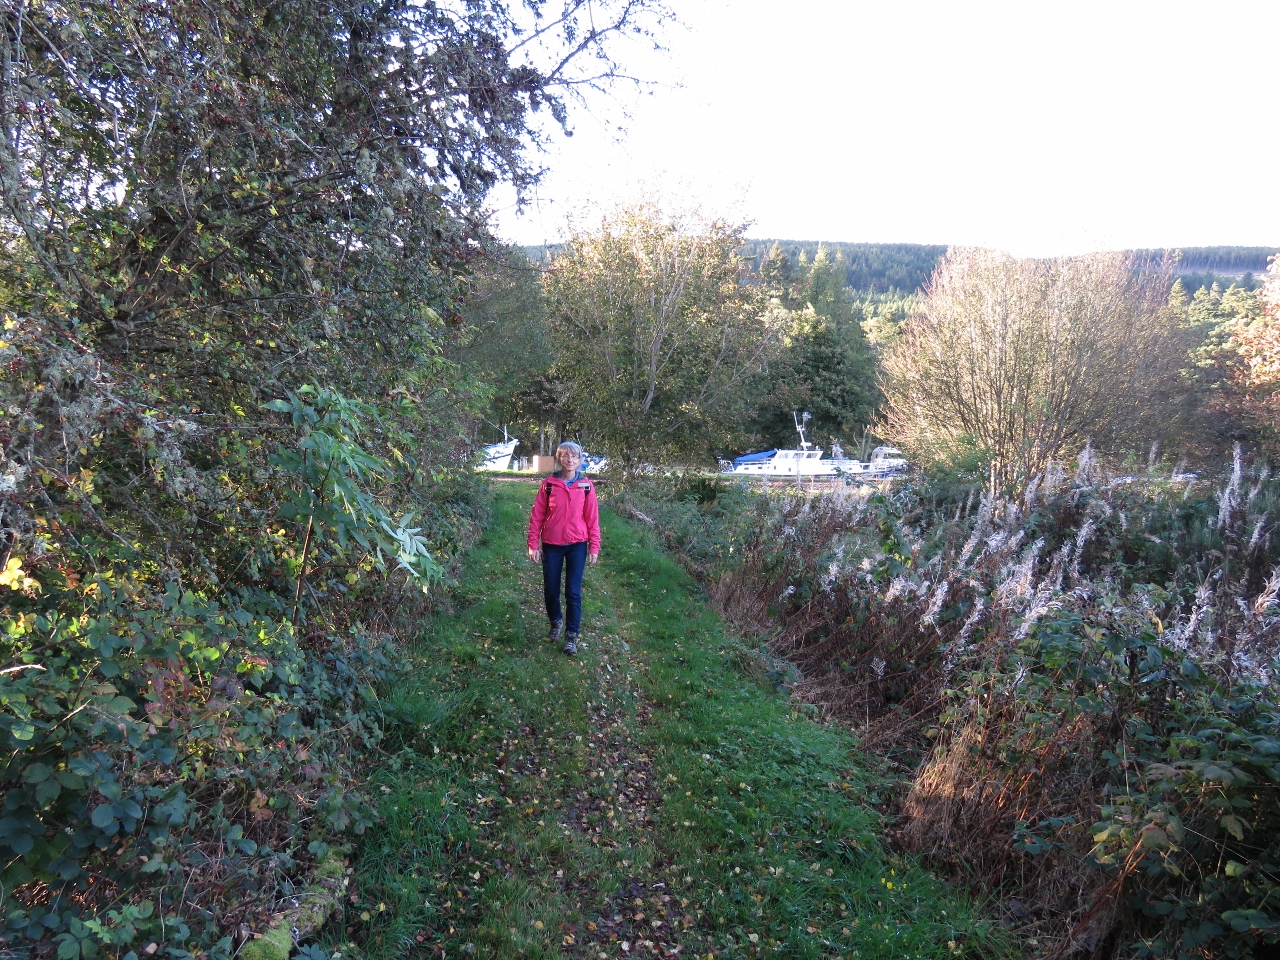 |
Walk
Position: -4 18.38, 57 25.79
Walking along a short path toward the River Ness.
|
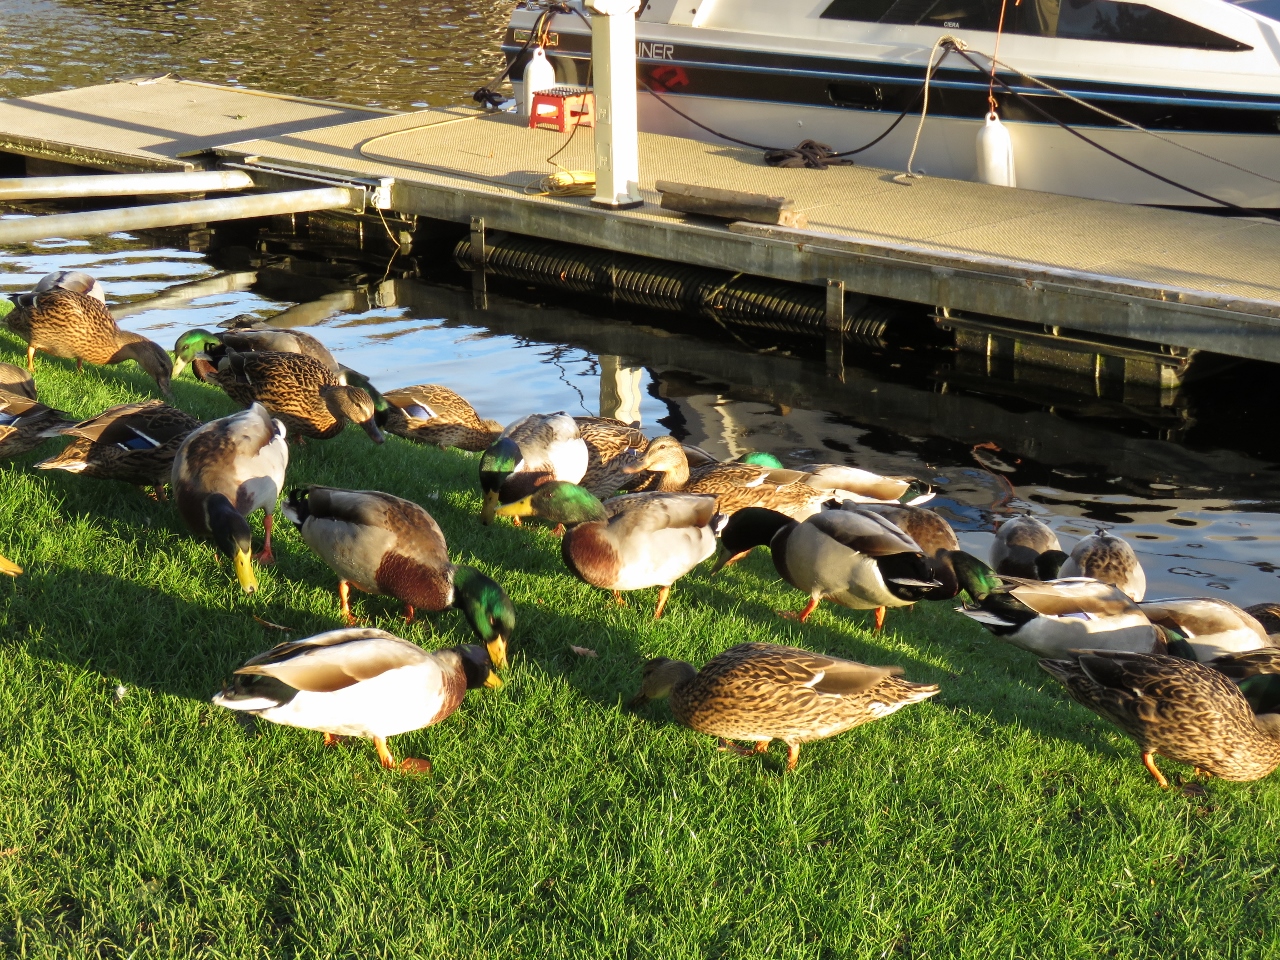 |
Ducks
Position: -4 18.21, 57 25.97
The owner of a canal-front home spread some birdseed on the grass by the lock and the ducks were chowing down. This probably is a daily routine.
|
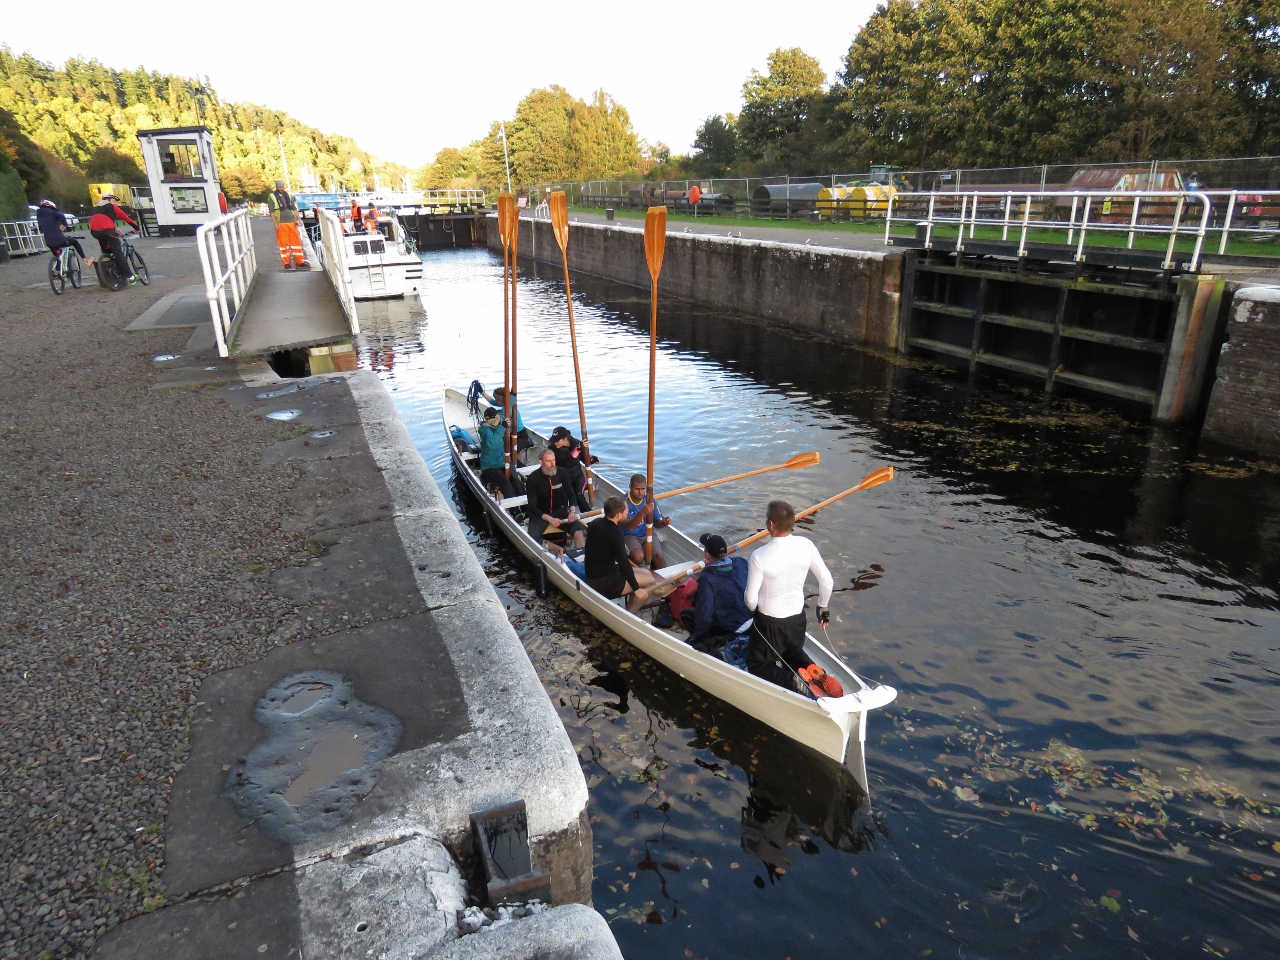 |
Row Boat
Position: -4 18.17, 57 25.98
One of several row boats that passed through the Dochgarroch Lock while we were there.
|
 |
Happy Hour
Position: -4 18.04, 57 26.03
With a little help from our patio heater, the evening was warm enough at 52°F (11°C) for drinks in the cockpit.
|

|
Click the travel log icon on the left to see these locations on a map, with the complete log of our cruise.
On the map page, clicking on a camera or text icon will display a picture and/or log entry for that location, and clicking on the smaller icons along the route will display latitude, longitude and other navigation data for that location. And a live map of our current route and most recent log entries always is available at http://mvdirona.com/maps. |
Hi, could you tell me which way up and down the Dochgarroch and Muirtown locks flow please. As if you are leaving Loch Ness and going to Inverness. With Inverness supposedly being higher above sea level than Loch Ness I’m puzzled. Thanks.
Julie,
The Dochgarroch and Muirtown locks flow downwards heading from south to north. Loch Ness, at 16 metres (52 feet) above sea level, is higher than Inverness at 13 m (43 ft) above sea level.
A map showing the lock directions is in the Caledonian Canal Skipper’s Guide at https://www.scottishcanals.co.uk/wp-content/uploads/2022/05/73214-BW-Scottish-Canals_Caledonian-Skippers-Guide_WEB.pdf
Jennifer