Boats are full of compromises, and advances in one dimension can bring problems in another. Nailing the full equation of longevity, strength, and serviceability often is truly challenging.
A perfect example of this challenge is the Nordhavn 47 and 52 rudder upper bearings. The early members of the Nordhavn 47/52 line used fixed race ball bearings. These bearings are durable, very strong, and should never require replacement. But these are steel bearings and if they not always 100% greased, they will rust. If the emergency hand rudder deck plate O-ring fails, water will leak down onto the bearing and it will quickly fail. Even draining the air out of the rear thruster, if not done with some care, could spray this bearing. If this bearing rusts and the rust isn’t noticed, it can fail in dangerous ways.
This bearing is example of an excellent engineering component selection that should support the application well. Yet due to the less-than-perfect conditions often found in the real world, the bearing can fail. Because the failure modes for this bearing can be dangerous, Nordhavn went to a Delrin bushing on the later boats in the 47/52 series. See the white bushing in the picture below.

The Delrin bushing approach to the rudder upper bearing again works very well but, again, has drawbacks. A Delrin bushing is stable, inexpensive, takes loads very well, and unlike the ball bearing approach, the Delrin bearing can operate even when wet with sea water and still show excellent longevity. It’s self-lubricating as well so virtually service-free. Where the Delrin bearing is less than ideal is that it wears fairly quickly. When Dirona got to around 1,500 hours, the bearing was starting to show significant side play and you really don’t want side play on the rudder.
A perfectly reasonable approach to this problem is to exploit the fact the Delrin bearing is inexpensive and easy to change, and just install a new one. On this approach, I recommend having a spare.
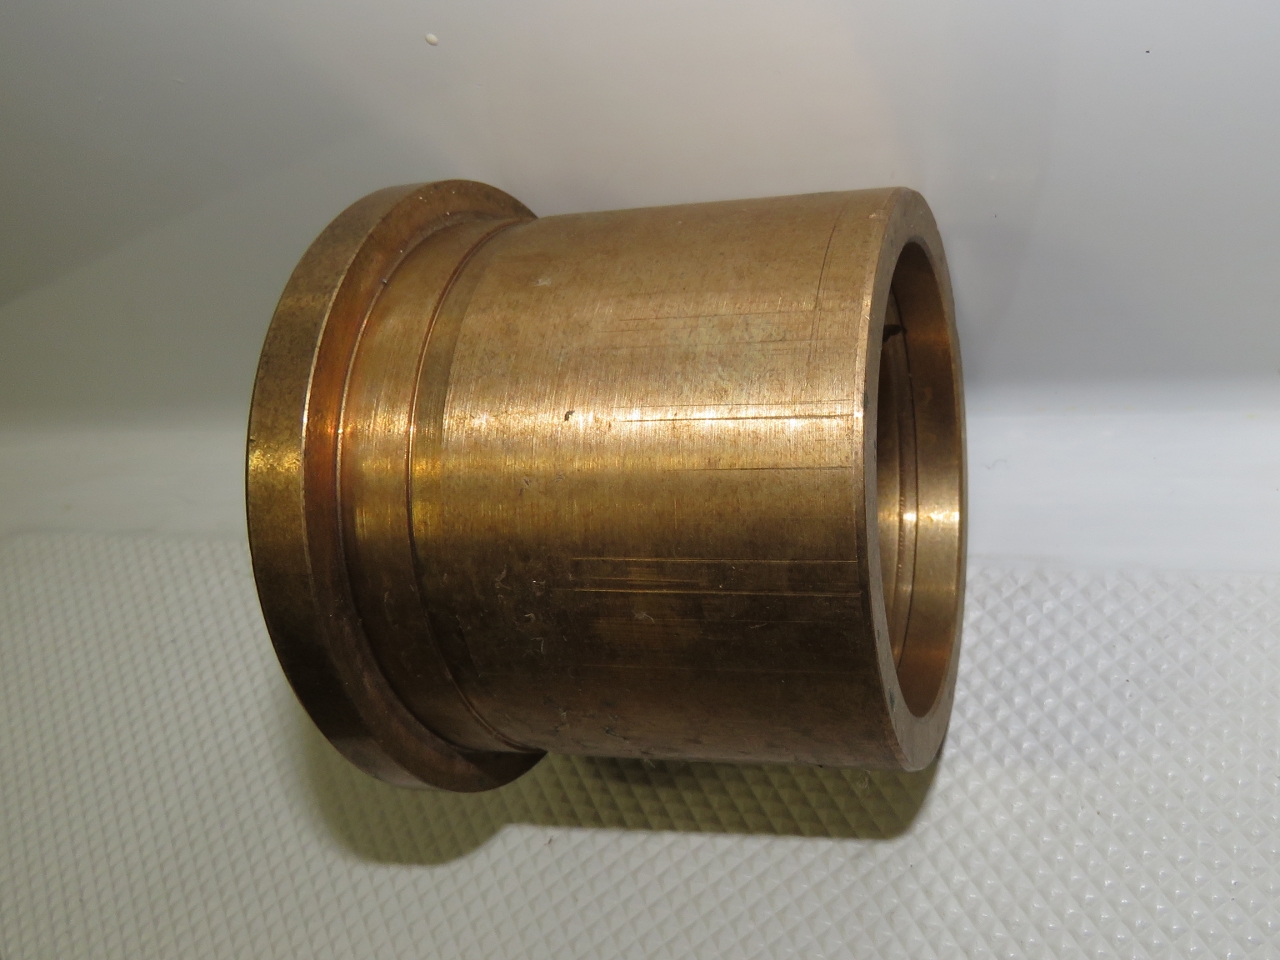
On Dirona, we wind up the hours fairly quickly and have just crossed 8,000 hours in 6 years. The approach we took was to replace the Delrin upper rudder bearing bushing with an Oilite bushing of the same dimensions.

Oilite is the trade name for oil impregnated sintered bronze. There are generic sources of the product but this is the brand name supplier: https://www.oilite.com/bearings.asp.
|
|
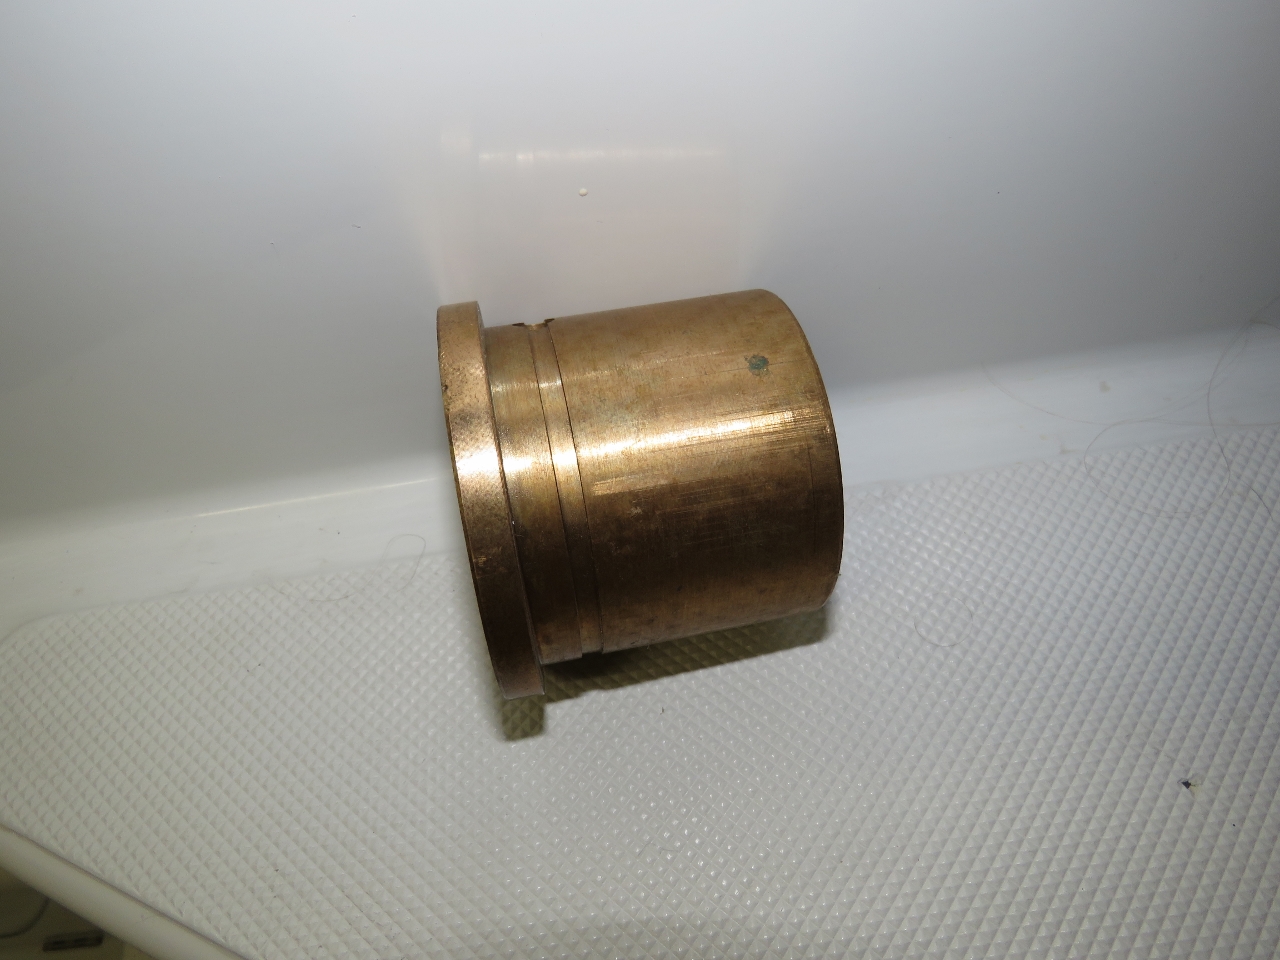
Above can see some nice touches from the machine shop where grease passages are cut all the way around the outside of the bushing.
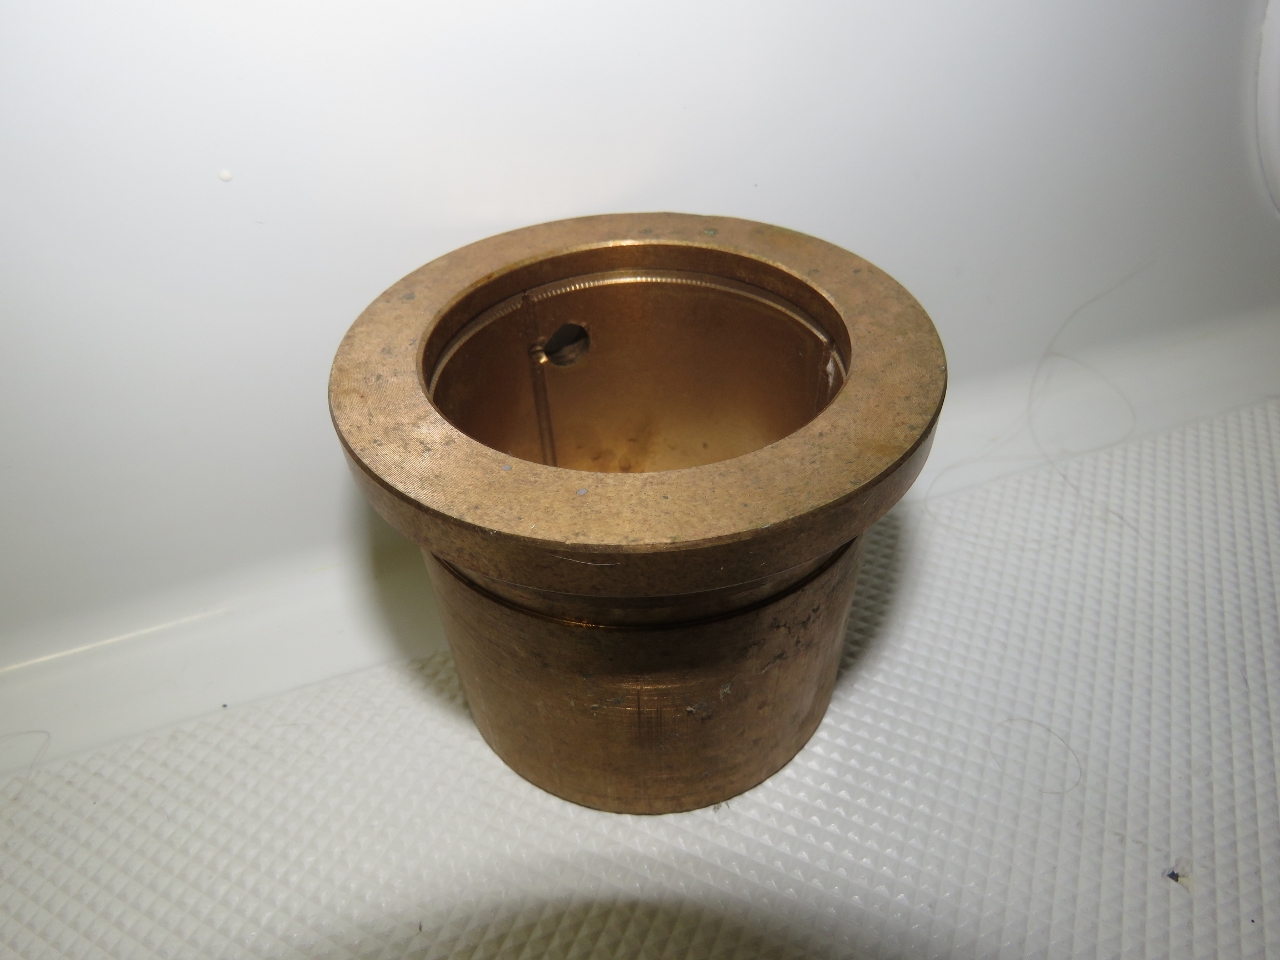
In the picture below you can see the grease fitting installed in the outer housing. This fitting forces grease into the outside of the bushing and from that single fitting grease is brought all the way around the bush as well as through two holes into the inside of the bush where another grove conducts the grease all the way around.

|
|
The machine work was done by Wilson Machine Works in Seattle. I had Wilson produce a spare since I fully expected I would wear them out every 4,000 to 5,000 hours. But, the current bearing has been in there for 6,500 hours and thus far shows absolutely no signs of age. I’m starting to suspect it’s going to never need replacement or service at this point. I still don’t mind having a spare on board.
Regardless of whether you chose to stay with the Delrin bearing or move to Oilite as we have on Dirona, there are a few important installation tips that are worth bearing in mind. When re-installing the rudder arm it is imperative that the two 90 degree pockets that clamp onto the rudder post be 100% square with the rudder post. If you can see any gaps between the rudder shaft and the rudder arm, it’s not installed correctly. This is super important as the loads on this interface are very high and it will work free if not seated correctly. Ensure that the 4 large nuts and bolts that clamp on the rudder arm are properly torqued after first coating in Loctite Blue. Then ensure the lock nuts are properly installed.
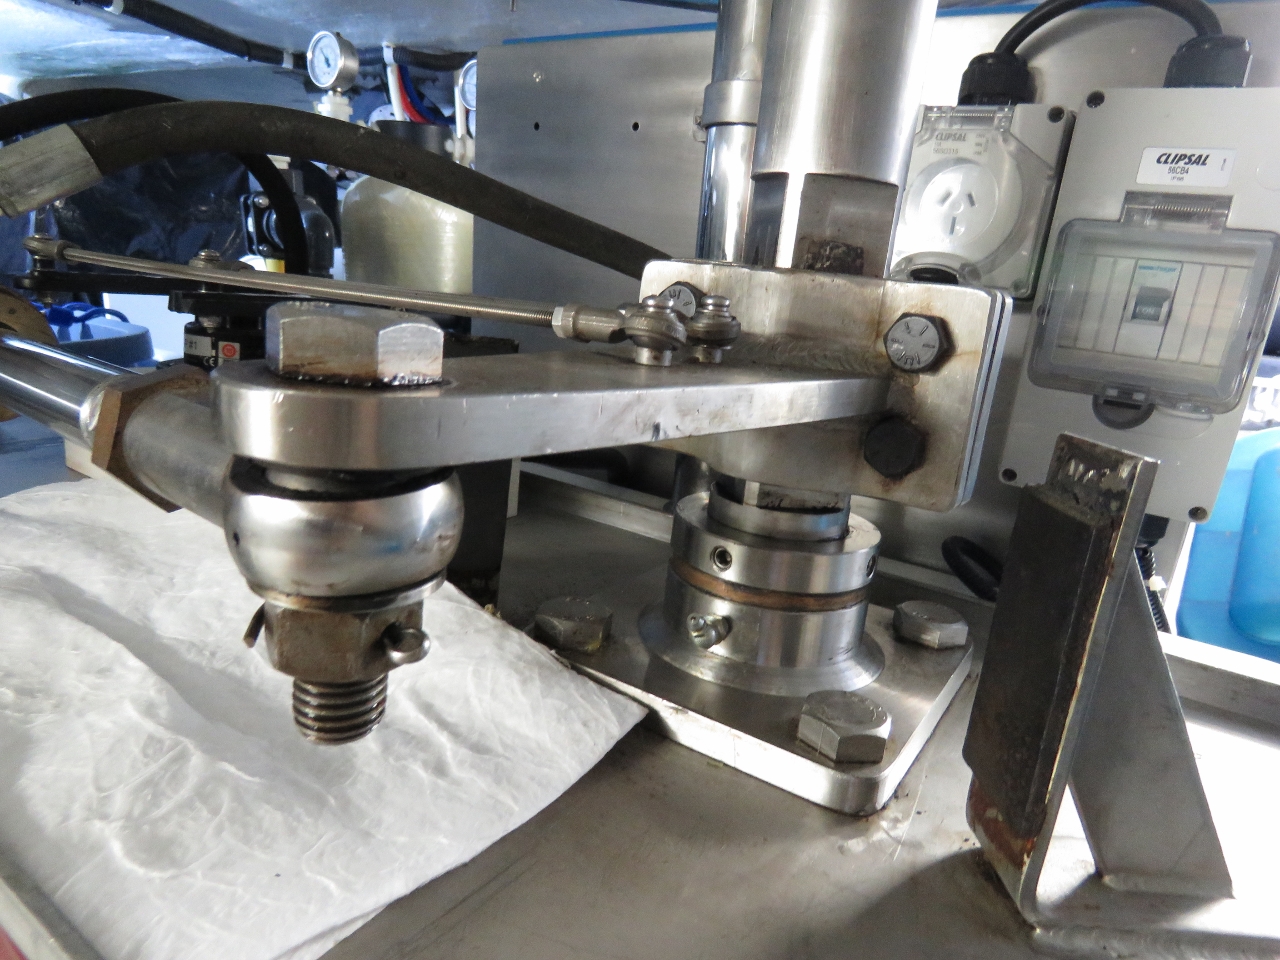
In addition its super-important that the steering hydraulic ram be operating exactly 90 degrees to the rudder shaft. Ensure that the rudder arm vertical install height places the hydraulic arm exactly horizontal (assuming the boat is properly trimmed).

|

|
Finally ensure that the large bolt that goes through the rod end on the end of the hydraulic ram and attaches it to the rudder ARM be both tight and cotter pinned in place. Forces are high and some of these forces are rotational so you really do need a cotter pin. There have been incidents where this has fallen off and it will yield a boat without steering which, needless to say, can be highly dangerous.
The bolt that connects the rod end to the rudder arm was once installed upside-down for a few hundred hours on Dirona. In this configuration, with a cotter pin in, it’s just slightly loose, with the result that some minor motion was allowed between the bolt and the rudder arm. This has two nasty side effects: 1) it will open up the hole in the rudder arm so proper tightening will no longer stop all motion, and 2) any metal from wear will fall down into the spherical bearing in the rod end and cause it to failure earlier than it should. On Dirona, there is a slight movement between the bold and the rudder arm so I will have to get a machine shop to bush the rudder arm or weld it up and redrill the hole. I will probably request a slight press fit to ensure this issue doesn’t repeat.
Getting all these installation conditions correct is easy, but important to ensure thousands of hours of trouble free operation. None of us want rudder issues.
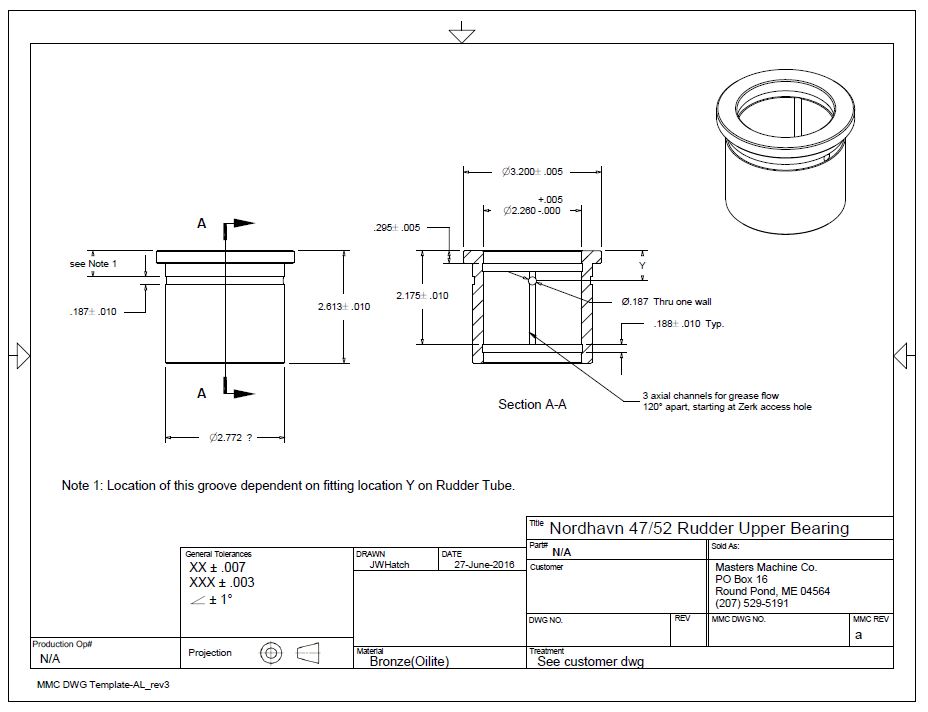
2016/07/11 update: Bruce Harris of N5260 Stella Maris has really dug into the details of this project and contributed greatly to the owners community by working with the Masters Machine to draft out a repeatable design that can be easily fabricated for other owners interested in making this change. This is a really nice refinement of what we did:
James I am a system engineer with an interest and hobby in machining – I actually found your blog while researching AWS infrastructure information. Oilite, or 841 bronze, is a perfect solution for this. I can also appreciate the groove for distributing grease via the zerk fittings. Sounds like you’ve found a clever machine shop! What grease do you use? I believe 841 bronze is usually impregnated with 30wt oil. I recently machined a similar bearing for the shift linkage on my older BMW as the factory part was also delrin. Interesting blog looking forward to more!
Your solution sounds very similar to what I did. For lubrication, I probably should likely be using a thinner grease but I use the same waterproof marine grease everywhere just because the hassle of keeping different greases around for different applications is too much hassle.
I just re read the article and had missed that the current bushing has over 6000 hours. Once every six months seems to be enough.
The Petromatic looks pretty interesting. Nice find Steven. You are a constant source of fun, innovative solutions.
By the way, I did buy that small condensate pump you recommended. At this point I have no drainage issues but, the moment any of them cause me trouble, they are getting a pressurized drain solution. Thanks!
If you ever need it, I think you’ll be happy with that condensate pump.
They are rather expensive but, they’ve solved more than one problem for me where clearance was an issue.
Interesting approach James,
My experience with sintered bronze bushings is related to H.V.A.C. equipment although they don’t appear to be as much in use now, as in the past. Great for dirty environments.
The only real difference I see in what I’m use to and your application, is method of lubrication. I’m use to using 10 or 20 weight non-detergent oil rather than grease.
I’m sure the Laz on Dirona gets hot enough to “soften up” most grease and provide a good saturation however I got to wondering what holds the grease in contact with the bushing?
What I’m use to seeing is felt or some other porous material which is saturated with oil and able to work it’s way through the bushing. I can’t tell from your pictures if you have something similar and if not, do you have any concerns about the grease simply turning to liquid and flowing out without providing more than a hit or miss lubrication?
I suppose you could hit the Zerk with a shot or two of grease at some frequent interval but I doubt that would match your simplicity or ease of maintenance plans. Or you could install grease cups and time how long it takes to run them out for a maintenance plan.
I’m sure you’ve already addressed this issue and I’m just to dense to grasp it at this point.
Steven, thanks for your contributing your experience. The grease is driven in through the Zerk fitting into a grove that conducts it all the way around the outside and through two holes that take the grease into the inside. Once those channels fill, the grease is forced long the flats of the bushing. Once every 6 months, I just force enough in see some forced out the top and bottom. In HVAC applications, you are likely looking at several hundred to low number of thousands RPM whereas the rudder is effectively under 1 RPM. The grease path was more of an insurance design addition to insure adaquate lubrication. I suspect the bearing would do fine without external lube source at these turn rates but, since I need to grease the bow rollers every every 6 months, I just do the rudder at the same time.
I’ve seen adequately maintained 35 year old equipment still running on the original bearings of this type so as far as longevity, I have no doubt you’ve designed a winner with this. It wouldn’t surprise me if you never needed your spare.
I’d argue that lubrication is still needed however the point is moot since you’ve decided to go that route.
If you are looking for a little insurance that once every six months is enough until you’ve seen it in operation, you might consider installing something similar to this:
http://trilube.com.au/wp-content/uploads/2013/08/petromatic-opt.pdf
There are many out there, that’s just the one that turned up when I was searching for “Oilite”
It wouldn’t surprise me if you never needed your spare.